
Learn Linux — Write-up
TryHackMe Walkthrough Link: https://tryhackme.com/room/zthlinux
Learn Linux is a great introductory room from Paradox. As the name suggests, it gives a nice foundation for Linux skills. This is a walkthrough room, so I’m not going to go into a huge amount of detail about the concepts themselves — I’ll leave that in Pars’ capable hands. Instead I’m going to be focusing on the questions, and how to answer them. By this token, I will be bypassing the tasks which don’t actually have any questions to answer: however, I would strongly advise you to read and understand the information that they’re trying to teach, especially if you’re new to Linux.
Let’s get started!
Logging in:
The room covers deploying and logging into the machine in great detail, however I’m just going to quickly screenshot this myself, as I believe that many people have been struggling with this.
I will be using the terminal in both Linux and Windows for this; however, the syntax is identical in both operating systems.
In Linux, open a terminal and use the following syntax:
ssh shiba1@<machine-ip>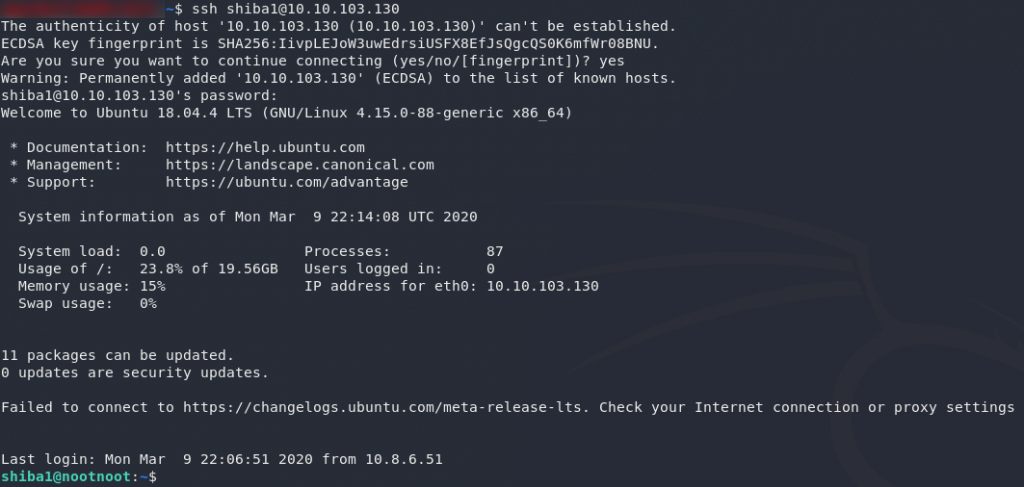
Type “yes,” when prompted, then hit Enter.
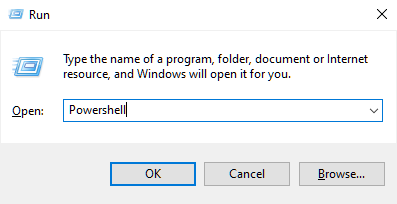
In Windows, press Ctrl + R then type in Powershell and hit Enter:
The syntax here is identical:
ssh shiba1@<machine-ip>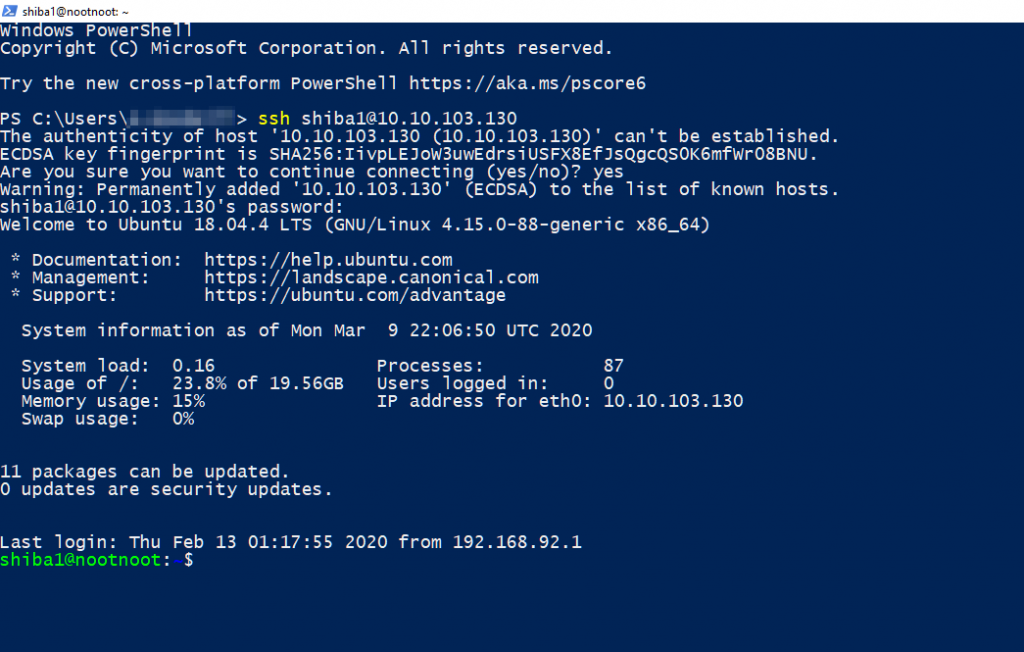
Remember that the password will be shiba1 when we’re logging in.
For the remainder of this write-up I will be using Linux for simplicity, however, the syntax will be the same from here on out.
Task 6 — Manual Pages and Flags:
The first five tasks are purely tutorial, so we’re going to skip over them here. Again, I would urge you to read that information for yourself.
There is one question for Task 6:
How would you output hello without a newline
We were told in task 5 that the echo command is used to output text to the console. Looking at the man page for echo (accessed using man echo), we can see that the switch for removing the newline is -n:
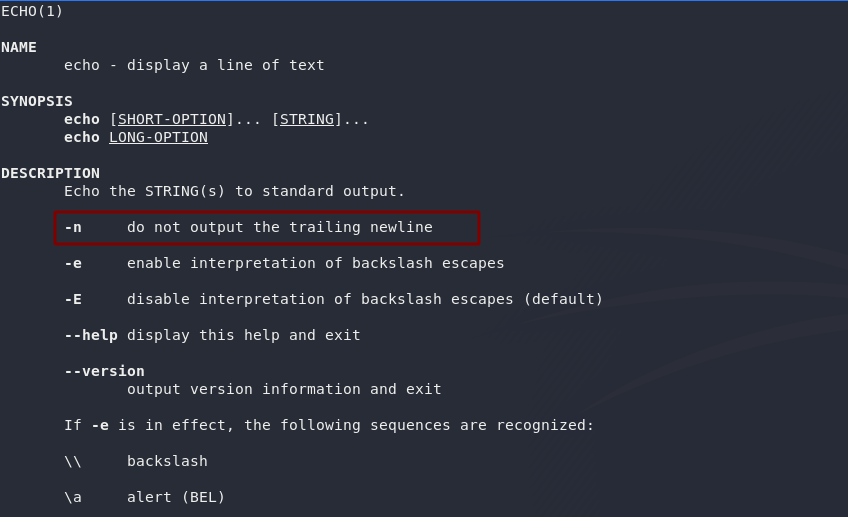
man echoPress q to exit the man page.
Let’s put that together. We want to output “hello.” Usually that would be echo hello, but here we also want to get rid of the new-line after the command, so we’ll add in that -n switch:
echo -n hello
echoWhich gives us our answer for the question.
Task 7 — ls:
There are two questions for task seven. Both can be answered by looking in the man page for ls — we access this once again using man ls.
We can see that the switch for outputting all entries is -a:

man lsYou’ll need to scroll down a bit for the second question, but further down we can see that the switch to output in a long list format is -l:

man lsAs a side note, these two switches are often combined into a single command, which would look like this: ls -al.
Task 8 — cat:
Just one question for task 8. Once again this can be answered with the man page of cat (you guessed it: man cat).
Take a look:
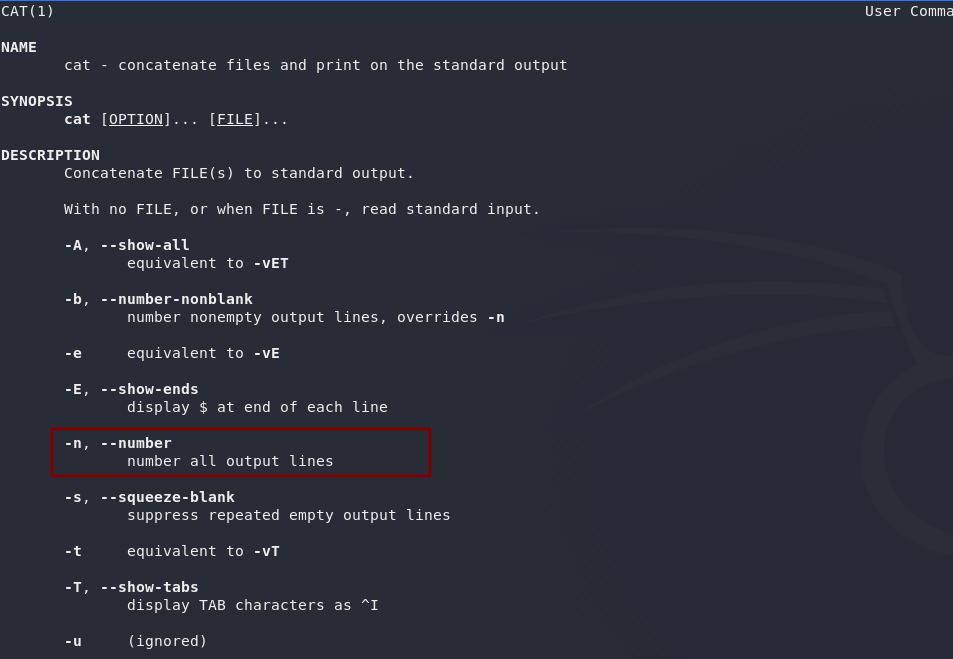
man catFrom this we can see that the switch to number all the lines of the output is -n.
Task 10 — Running A Binary:
Task 9 has no questions, so we’ll be moving on to Task 10, which has three questions.
The first asks us to run a binary called “hello” that’s in the current directory. We do this by referencing the current directory using ., like so:

(Note that I created the hello binary to serve as an example. This will not work if you try it on the deployed machine)
The second question asks us to run a binary called “hello” that’s inside our home directory, which we reference with a tilde character (~), like so:

Finally, we’re asked to run a binary called “hello” that’s inside the directory above our current directory. We reference this with two dots (..), like so:

Task 11 — shiba1:
Task 11 is our first test. Once we solve it, we’ll be given the password for the second user (shiba2).
We’re asked to create a file called noot.txt in our home (~) directory, then run the shiba1 binary. To create files we use the touch command (as explained in Task 9). We’ve just covered how to run binaries in Task 10.
Let’s do the challenge:

I’ve blurred the password so that you have to do this for yourself, but if you follow that process you will be given the password to use in the next task.
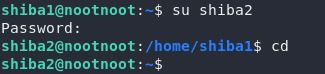
Task 12 — su:
In Task 12 we will be using the password that we found earlier to change our account. As the task explains, we use the su (switch user) command to change which account we’re logged in as.
Normally we would just use this in the format su <user> — which will work fine for changing our account to shiba2, but we’re also asked which switch we would use to specify a specific shell. Back to the man pages (man su):

man suNotice that the switch to specify a shell is -s.
Don’t worry too much about what shells are just now. Essentially, different shells, give you different levels of functionality. The shell that we’ve been using (which gives us a prompt like this: shiba1@nootnoot) is called bash, but there are lots of other shells, including custom shells that can be downloaded from the internet.
Use su to upgrade your account now:
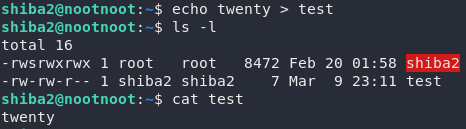
Task 14 — “>“:
In Task 14 we have a single question:
How would you output twenty to a file called test
Think way back to the start — how would you output twenty to the console?
With echo of course!
echo twentyWe can use the redirect operator to print this to a file, rather than using the console. The question has asked us to output it to a file called test, so let’s do that:
echo twenty > testHere’s a demonstration that this has worked successfully:
Task 18 — “$“:
Environment variables are very useful things. They can be accessed anywhere in the operating system, which makes them ideal for storing information about the system.
We’ll need these for a later task, so learning how they work is very important.
In terms of the two questions, the first asks:
How would you set nootnoot equal to 1111
Well, we know that we save environment variables like this:export <variable>=<value>
We just need to substitute in the values we’ve been asked for:
export nootnoot=1111To access an environment variable we can use echo, like this:echo $<variable>.
Once again, we can just substitute the value in:
echo $HOME
echo $HOMEOnce again, I’ve blurred the actual answer so that you have to do this for yourself, but that command will give you the answer.
Task 21 — shiba2:
This is the second challenge. If we complete this then we get the password for the next user (shiba3)
The question is asking us to create an environment variable called test1234 and set it equal to the $USER environment variable. This gives us two things that we need to do.
First up, we know how to set an environment variable: export <variable>
So that’s the first one out of the way
We also know that we can access the contents of an environment variable by using the dollar sign. Previously we used this with echo (echo $<varname>) to output the contents of the variable, but this time we just need to use the contents.
Let’s put this together:
export test1234=$USERHere we’re creating an environment variable called test1234 and setting it equal to the value in the $USER variable — exactly as the question asks.
Run the binary, and grab that password!

At this point you should also use su to switch into the shiba3 user before continuing.
Task 24 — chmod:
The task explains file permissions in Linux very well; however, if you still don’t understand them, I have a full blog post on the subject — it’s a lot longer, but goes into more depth. This post will also cover the topic of Task 25 (chown).
In terms for the two questions for task 24, let’s start with the first one:
What permissions mean the user can read the file, the group can read and write to the file, and no one else can read, write or execute the file?
Let’s break this down a bit:
- User can read the file, so
r-- - Group can read and write, so
rw- - No one else can read, write or execute, so
---
Let’s convert each of these to octal:
- User:
r--=4--=4 - Group:
rw-=42-=4 + 2=6 - World:
---=0
Putting these together properly, we get 460, which answers the first question.
See this in practice:

Notice that after I used the chmod command the permissions matched up exactly: r--rw----.
Let’s do the same thing for the second question:
What permissions mean the user can read, write, and execute the file, the group can read, write, and execute the file, and everyone else can read, write, and execute the file.
We’ll separate these out again first:
- User can read, write and execute the file, so
rwx - Group can read, write and execute the file, so
rwx - World can read, write and execute the file, so
rwx
This means that all three sets of permissions will be the same:rwx = 421 = 4 + 2 + 1 = 7
Putting that together for all three permission sets, we get 777, which is the answer to the second question.
See this in practice:

Task 25 — chown:
We have three questions in task 25. The first asks us how we would use the chown command to change the owner of a file called file to be “paradox”.
We know that to specify the owner of a file we can use chown <owner> <file>, so let’s try substituting the values that we have into this:
chown paradox fileNext we want to set both the owner and the group of file to be “paradox”.
To set the owner and group we use chown <owner>:<group> <file>.
Once again, let’s sub our values in:
chown paradox:paradox fileFor the last question, let’s head back to our trusty man pages (man chown):
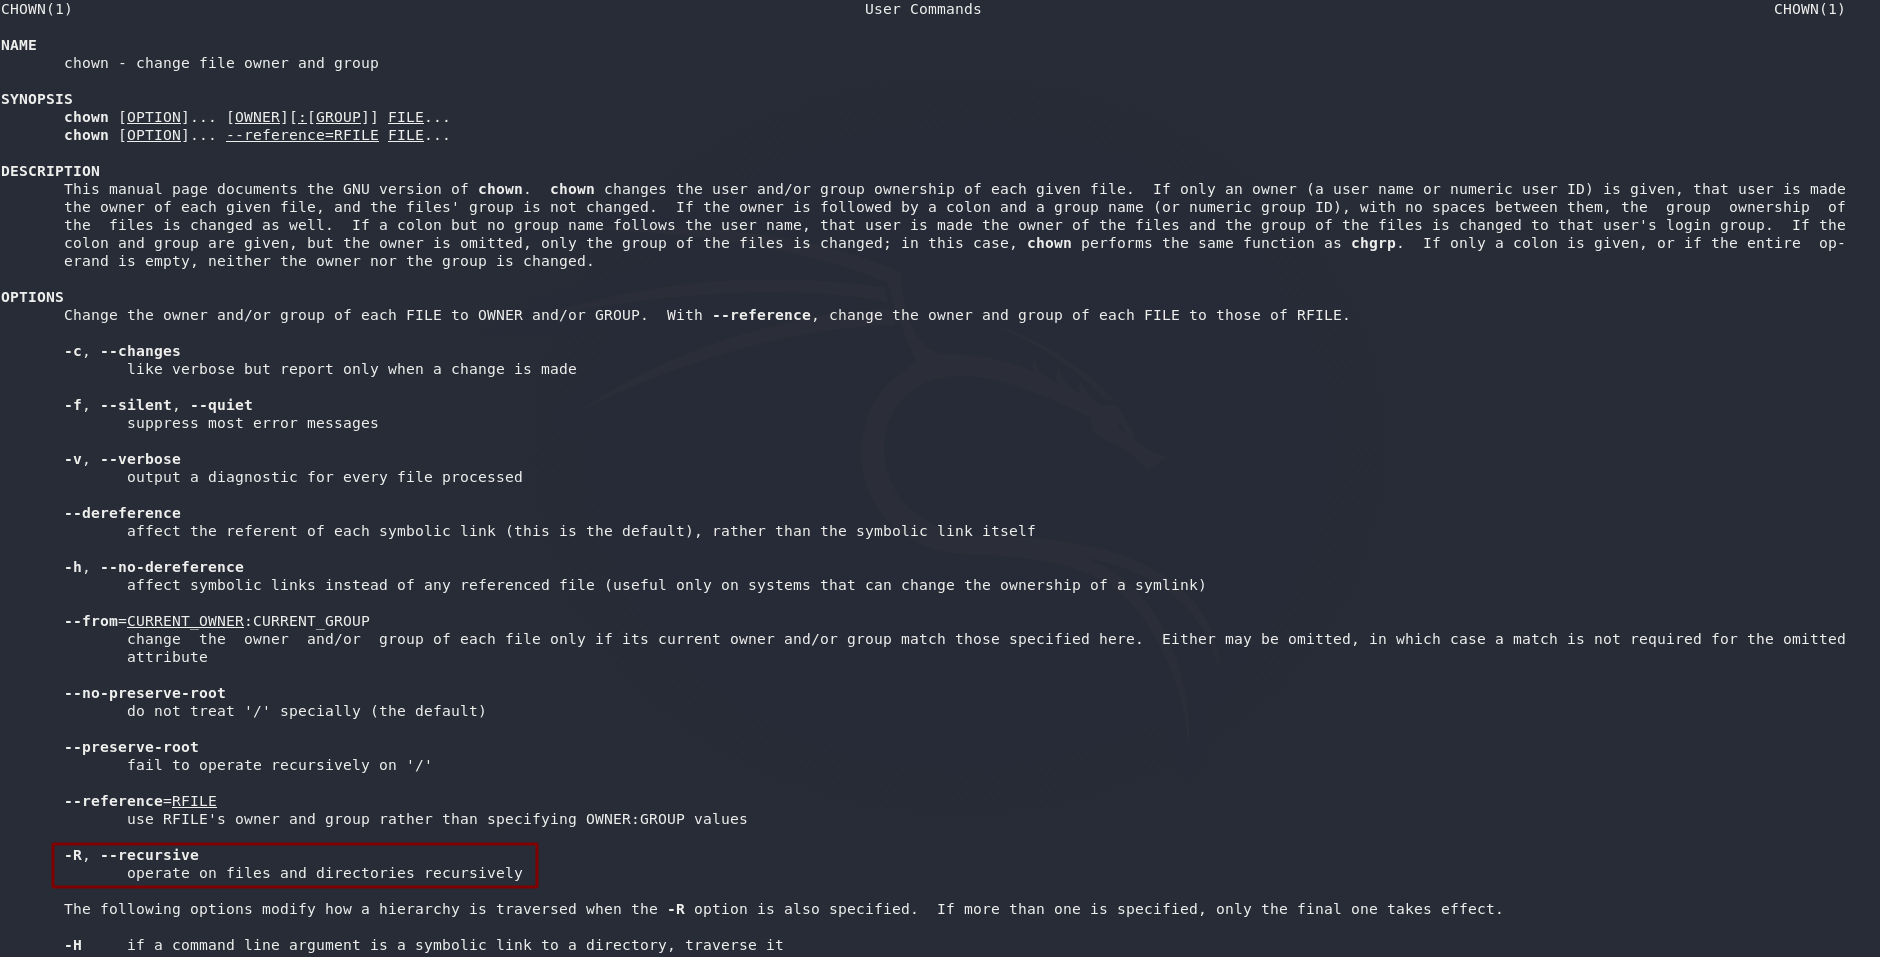
man chownThis question is quite sneaky, but the switch we’re looking for is -R, which operates recursively on every file inside a directory as well as all sub-directories.
Task 26 — rm:
Ah, the remove command…
rm can cause nightmares if used carelessly. Unlike in Windows, there is no “recycling bin” in Linux. Once you’ve used rm on something, it ain’t coming back (not without forensic tools at any rate).
Both questions in this task can be answered with the man page for rm (man rm):
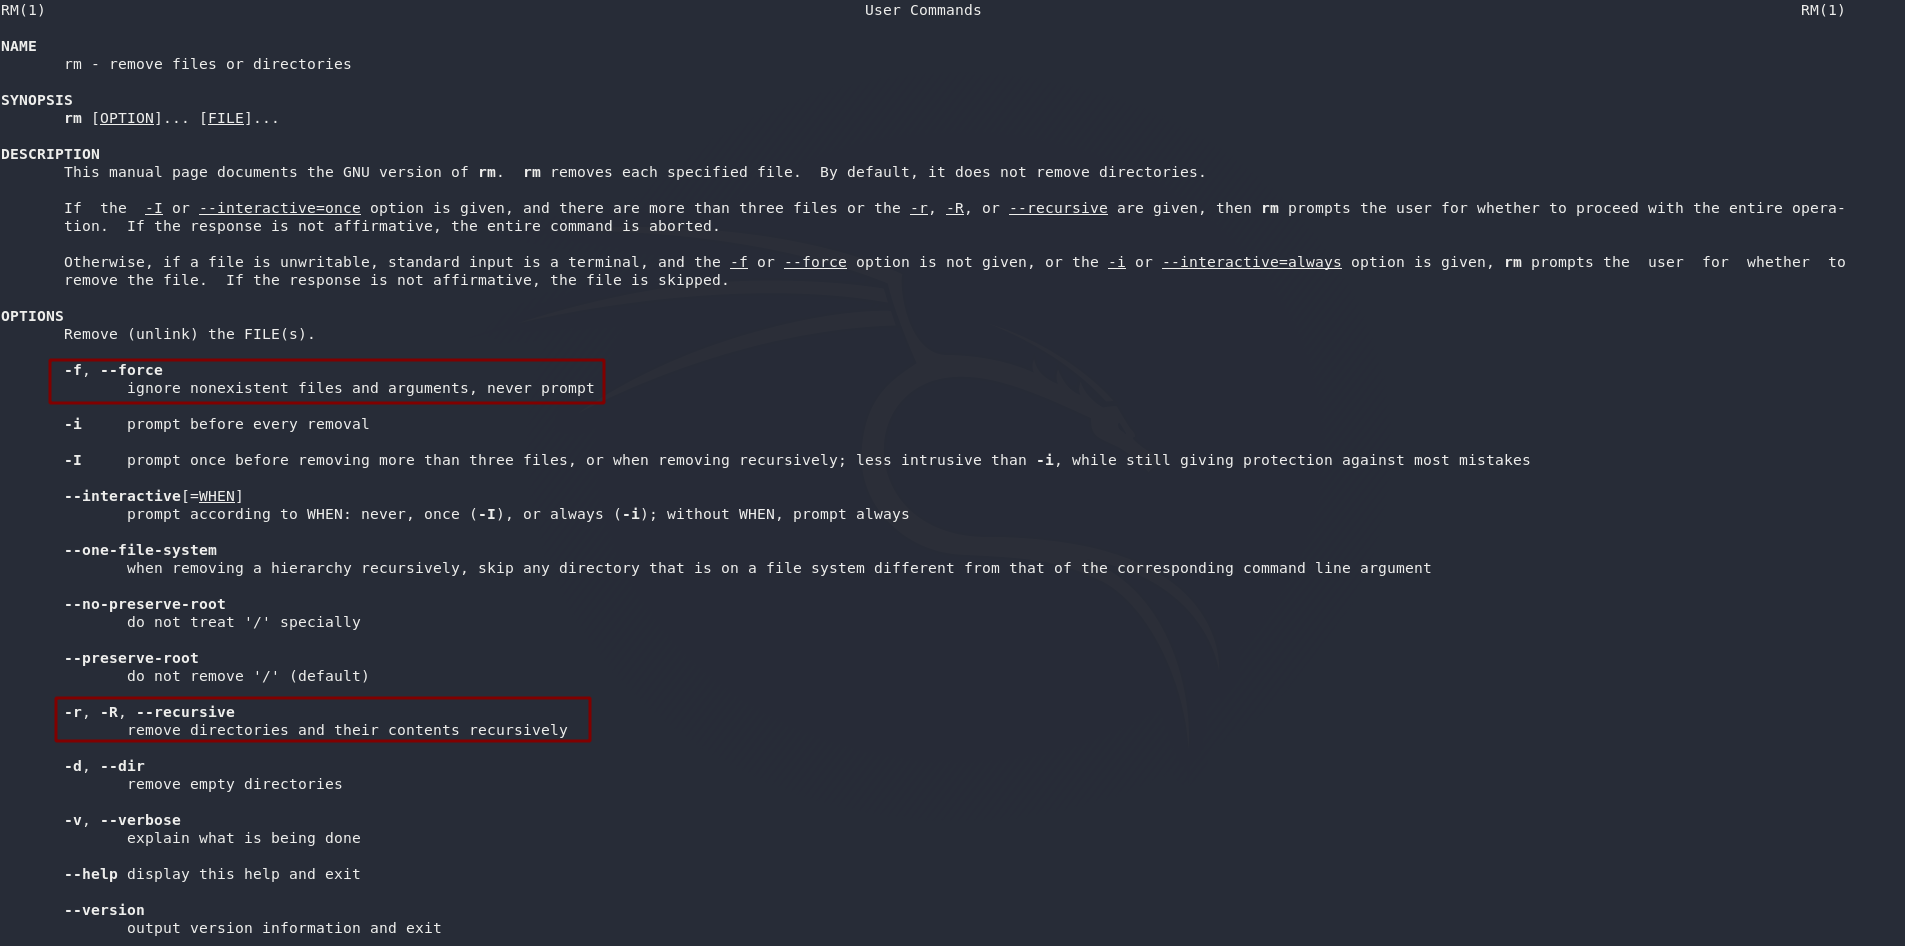
man rmFrom the man page we can see that the switch for deleting every file in a directory will be -r, which will delete everything inside the directory, as well as all subdirectories.
The flag to suppress all warning prompts (as we can see in the man page) is -f, which forces the action.
Task 27 — mv:
There’s just one question for Task 27. We’re asked how we would move a file called file into the /tmp directory.
Well, we can see from the task (and the man page!) that the syntax for mv is: mv <current-location> <new-location>
Assuming that file is in the same directory that we are then we can just fill in the values:
mv file /tmpWhich would move file from our current location, into the /tmp directory.
As a bonus question. How would you move a file called file2 from /home to /tmp? Click on the answer to reveal it: mv /home/file2 /tmp
Task 28 — cd && mkdir:
Remember way back to Task 10? We learnt that we could reference our home directory with a tilde (~). Well, this is what we gotta do here.
We know from the task that the syntax of cd is cd <location>, so let’s do that now:
cd ~This will take us to our home directory using a relative path.
For the second question we’re using the mkdir command to make a directory. The syntax for this, we’re told, is mkdir <location>. The question specifically asks us to make a directory called test inside the /tmp directory, so let’s do that now:
mkdir /tmp/test
mkdirTask 30 — ln:
We have one question for Task 30:
How would I link /home/test/testfile to /tmp/test
Notice that this is not asking for a symbolic link, which means we don’t need the -s switch.
The syntax for linking is ln <target-file> <destination-file>, so let’s sub our values in.
We’re linking /home/test/testfile to /tmp/test, so it looks like this:
ln /home/test/testfile /tmp/testTask 31 — find:
The find command is incredibly useful. There’s a whole room about it on TryHackMe, which I would recommend completing.
For the first question here we’re looking for a switch that lets us search for files with specific permissions. Our old friend the man page (man find) can help us with that!

man find -> -perm switchAdmittedly it’s slightly convoluted, but it’s in there. We can use -perm to specify permissions.
The next question is slightly easier. We know from Paradox’ explanation that the basic syntax for the find command is find /<location>, which would find all files in that location.
In this case our location is /home, so we want to use find /home.
For the final question in this task, we need to find all files belonging to the user “paradox”. To find every file on the system we can use / as find is recursive. We’re also told in the instructions that searching by user can be done with the -user switch.
Let’s try that now:
find / -user paradoxThis will find every file on the system belonging to the user “paradox”
Task 32 — grep:
For question one… you guessed it! Let’s have a look at the man page for grep (man grep). We’re looking for a switch that lists line numbers for every string found:

man grepThat looks good. -n will list line numbers for every string found.
For the second question, we’re told in the task that the basic syntax for grep is grep <string-to-find> <file-to-find-it-in>.
Let’s sub the information we’ve been given into this format.
We’re looking for string “boop” in file /tmp/aaaa:
grep boop /tmp/aaaaTask 33 — shiba3:
The third challenge. This one has a little more in it than the first two.
The first thing we need to do is find the binary. We’ve been told its name though (shiba4) so let’s use the find command to locate it:

There’s a file called shiba4 in the directory /opt/secret — looks good!
Notice in the find command I used there that I used / to search the entire filesystem, -name to specify the name of the file, -type f to specify that I wanted a file, not a directory, and 2>>/dev/null to discard all errors.
Now, what does the task need us to do next?
We first need to create a directory called test in our home directory. Looks like a job for mkdir:

mkdir testAn error. Looks like the directory already exists. Ah, well — we can move on then. We next need to make a file called test1234 inside the test directory. Let’s do this with touch:
touch ~/test/test1234We can now execute the binary that we found earlier: /opt/secret/shiba4 to receive the password:

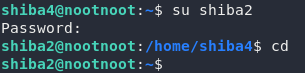
/opt/secret/shiba4Use the password with su to become the shiba4 user, then let’s continue!
Task 35 — sudo:
Sudo is a really good command to learn — you’re going to be using it a lot.
For the first question here, lets *dun dun dun* take a look at the man pages! (man sudo):

man sudoThe -u switch will allow us to specify another user to run a command as.
Following on from that, let’s put what we just learnt into practice.
How would we run whoami as a user called jen? Well, with that -u switch!
sudo -u jen whoamiFor the last question we are once again back to perusing the manual to look for a switch that gives us our sudo permissions:

man sudoUsing the -l switch to list our permissions seems like it should work!
Task 36 — Adding users and groups:
Just one question for this task: how would we add the user test into the group test?
Well, this command needs to be run as the root user, so we’ll be using sudo here.
We know from the task that the basic syntax for modifying users is:usermod -a -G <groups> <user>
So lets sub in our values:
sudo usermod -a -G test testTask 43 — The True Ending:
And here we have it. The one we’ve all been waiting for. The question that’s been driving people insane. What’s the flag at /root/root.txt?
Well, this is not exactly a conventional privesc. Paradox wasn’t lying when he said that all the tools to find it were taught in the room. There’s nothing fancy here.
First thing to do is use sudo -l on each of the four users we have access to. You’ll find that none of them can use sudo, so that’s definitely not an option.
Let’s search for files belonging to each of the shiba users.
find / -user <insert-username-here> -type f 2>>/dev/nullShiba2 owns an interesting file:

/var/log/test1234 fileWe haven’t used that yet in this room, have we?
Let’s have a look at the file permissions using ls -l:

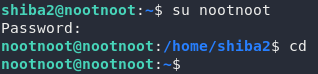
/var/log/test1234Right, so look at those file permissions. The file is owned by shiba2 and it’s readable only by its owner and group. That means we’ll need to use su to become shiba2 before we can open the file:
shiba2We should now be able to open our mysterious file:
cat /var/log/test1234
/var/log/test1234Aha! Those look like credentials for the nootnoot user. Let’s switch to that user now:
nootnootCan this user use sudo as root?

sudo -lYep! Full root privileges!
From here it’s a simple matter to read the flag using sudo to pretend to be the root user:

And we’re done!
Certainly not a conventional privilege escalation, but all the more fun as a result of it!
I hope that you’ve learnt something in the course of this room, and now feel ready to go and tackle some challenges!
50 thoughts on “Learn Linux — Write-up”
Hi,
i’m just having a problem trying to find out which is the i have to connect to.
machine_ip*
Hi Alex,
There should be a big green “Deploy” button in Task 1.
If you click on that it will give you an IP to connect to 🙂
Hi,
thanks for the dedication to teach us,
so i am stuck trying to get the password for shiba3
when trying to run the binary i first got no such file or directory then when i did ~/shiba2 instead it returns cat: etc/shiba/shiba3 permission denied.
even when i tried to start over again the binary ./shiba1 doesnt even work again…
as for my connection i am using the kali machine to ssh into the room machine.
Hi,
In all honesty I can’t picture what you’re doing here. I would suggest checking your bash prompt to see your current directory (if it’s a tilde
~you know you’re in the home directory for your current user). The prompt should look something likeshiba1@nootnoot:~$. You can uselsto check the contents of your current directory. If the binary you’re trying to isn’t in there then you won’t be able to do it with./.Sounds like this is to do with locations though — pay attention to the screenshots in the write-up if you’re struggling; they’ll show you which directory you need to be in.
Been at it for a while now. “~/”, “./” and ensured that I followed all the previous steps and I still get the ” cat : /etc/shiba/shiba3: Permission denied”. Any suggestions?
Did you ever complete this? i am completely new to linux and have been finding most things make lots of logical sense. however … i am stuck on this task 21 and cant seem to get the password for shiba3 and am not sure where i am going wrong. i have even followed step by step tutorials and STILL no luck.
heyyy
i am stuckkkk, permission denied after setting variable and running binary, even accessed the etc/shiba directory and found the shiba3 but cant run a cat on it or even chmod to change the permission the permission can only be changed by shiba3 itself i guess, lol shiba4 password was gotten instead,
please help
Thank you,
it worked but i am actually shocked why it didnt work yesterrday..and i was on the right directory of shiba2@nootnoot:~$.
Thank you so much for the write-up man!
Great job, btw loved your ‘Research Room’, great work, and you are just 18!! Well done.
I would love to follow you on Twitter!
Awesome room, learned some few stuff despite working on Linux every day for the last year, and a great writeup for when I came unglued a couple of times. Particularly on the last challenge.
Hello!
im stuck into the 10th task.. I just cant acess any file by the ./ ../ or ~/
and when i create the noot.txt by touch, nothing happens, i cant acess shiba1.
I dont know what im doing wrong…
sorry that im so noob and thanks
Thanks for a great write , the room was awesome. Learned a lot. I am new to this but catching up
please thank you for this posts, its very useful
Hey in task 24 chmod in the beginning you have mentioned that the the syntax of this command is typically chmod .
Isn’t the syntax chmod ?
*chmod
… is what you said not identical to what you quoted?
Hi, Everyone here in the community……
i was stucked in the error of ssh…
ssh: connection refused to host error
i did deployed the machine & trying to connect to it..but it never connects
even when i updated openssh-server ,client & ssh itself….nobody in the other communities cant help me….
Thankyou,i was searching for this …for a month now!!😊
did you set up openvpn and run the openvpn command like tryhackme tells you to in the access page?
i still dont fully understand task 43
thanks for this was seriously over thinking task 43.
knew that nootnoot was the only sudo user and i might have to access the user but was over the how to get there.
thanks again.
Task 33 — shiba3: I do not understand how by us creating a file using touch magically spits out the password. Can someone please explain what im missing here??
The binaries are compiled programs that check to see that you’ve met the conditions of the task.
So, in that instance, the logic would be:
No magic involved.
ok now that makes sense. thank you. and you know this because ./ is what you use to run a program from terminal correct?
Hello, thank you very much for your contribution
I was wondering what exactly optimization level = 2 does in the find command in task 43
because I tried “find / -user shiba2 -type f >> test.txt” and got a totally different output, and when you use 2 you have to put the operator “>>” without space next to the number “2 >>” already otherwise it doesn’t work.
I would really appreciate an answer, anyway the room was incredible for the new users like me.
Lovely,i was stuck on q21, thanks for opening my eyes :))
at what point in hacking does the methodology become clear in how to approach a box? I worked on task 43 for 2 hours before coming here. Never once did the idea of “searching for files” from the 4 users… I tried to get a binary to execute like before, i tried, to find the /root/root.txt file n only got permission denied.
So yeah, at what point in learning does the methodology in how to approach a test become clear??
thanks very much to me learn linux !
I’AM FINISH! I WILL FOLLO THIS WEB,IF YOU ARE PUT NEWS! THANKS again!
Used you for the final test. Nicely done.
Checked all permissions and just missed the file!!
Will review the null piece which I have not used for what seems an age!
Thanks again.
Thank you for the write up. However, I have an issue with Task 33. When I run ./shiba2 > noot.txt as user shiba2 I receive the following: Segmentation fault (core dumped). is there a problem with the file that is not working correctly? I can complete all other tasks successfully, but cannot run the shiba2 binary.
Correction. I was able to exit the vm and re-enter and was able to complete the task. My apologies for any unnecessary confusion or troubleshooting.
for the last task 43:
I followed everything, found out nootnoot had root priviledges, and then pretended to be root by typing:
sudo cat root/root.txt
cat: root/root.txt: No such file or directory
i did as exactly as you said, do you know why I can’t access the root directory from nootnoot?
nevermind……hahah….forgot the / in front of /root/root.txt!
All set.
Love your forum!
In task 21, I accidentally ran ‘echo test1234 > $USER’ and I think change the shiba2 file. When I run ‘./shiba2’ I get: ‘./shiba2: line 1: test1234 : command not found’. How do I fix this?
Sorry problem can be solved by resetting VM
hey, I finished this room thanks to the help of this but I don’t understand task 43 like what made you use shiba2 and not Shiba 3 was it trial and error. I am confused on that I understand everything after that it’s just how you found it was shiba2 also what does this stuff mean
*** -type f 2>>/dev/null***
can someone explain please would be greatly appreciated
In terms of the first question, yes, that was just trial and error — or rather, I checked all of them, but only included the correct one in the write-up.
I have just explained what that part of the find command does in another response, quoted:-
“
-type ftells it to look specifically for files.2>>/dev/nullsends all errors to /dev/null — basically discarding them.Thank you very much, your post has been really useful!
In particular the explanation regarding the command find.
Thanks!
I got stuck on task 43 and after looking at your walk-through I didnt quite understand the use of -type f 2>>/dev/null can you please explain?
I would recommend taking a look at the TryHackMe room on The Find Command
That said,
-type ftells it to look specifically for files.2>>/dev/nullsends all errors to /dev/null — basically discarding them.Thanks for the explanation of the /dev/null. Appreciate the help God bless and have a great one!
This was amazing, especially for someone new to all of this. Not going to lie i just used Hydra to attack nootnoot through SSH because i was getting so mad at the last challenge!
Amazing job man.
Task 11 (creating a noot.txt file):
I tried creating noot.txt file using the command :
touch noot.txt
It gave an error saying permission denied.
Then I tried using :
sudo touch noot.txt
After entering the password it gave and error that we are not sudoers.
What should I do?
i can’t understand how to solve Task 43 — The True Ending:
can you explain how to solve
Thank you very much for this write up. It helped me out a lot. I admit I didn’t think of using find 🙂 I was really stuck at the True Ending and your write-up helped out a lot especially trying to understand the flow. Thank you.
ssh is not working on cygwin terminal… Can you elaborate me why??
Always showing connection timed out.
I use cmder when I’m on Windows, so I can’t really tell you why cygwin isn’t working for you. I would suspect it either doesn’t have access to the TAP OpenVPN adaptor, or you don’t have your VPN connection set up.
Thanks for the guide. I just think that the wording for many of the challenges is not clear enough, for instance task 21 never states that the environment variable needs to be set. Just says that the binary is already checking for that, and of course when you run the bin it appears to be corrupted or something. I’d have worded it as: “Create a binary that…” Anyway, thanks.
That’s something to take up with the room creator (Paradox).